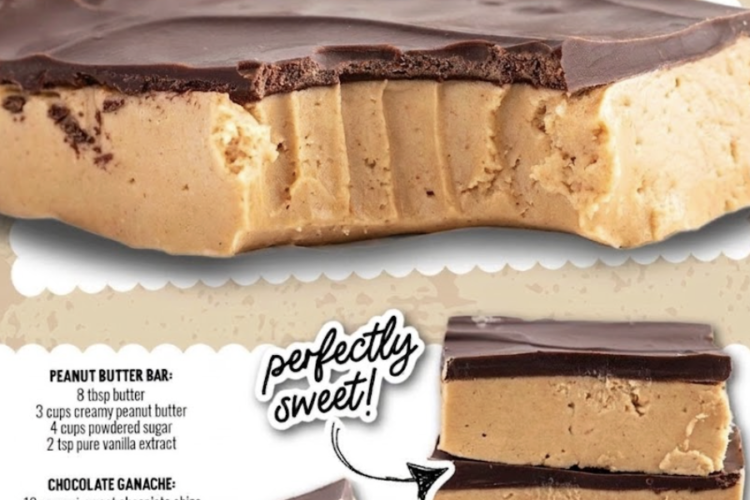
Why This Recipe Works (And How to Prevent Common Pitfalls)
Making peanut butter bars seems simple on the surface, but a few subtle mistakes can completely throw off the texture.
First, let’s talk about the peanut butter itself. Commercial peanut butters like Jif or Skippy are fully homogenized with hydrogenated oils. That built-in stability is essential here because it keeps the fats from separating out when mixed with melted butter. Natural peanut butter—the kind where the oil floats on top—will leave you with a pool of grease on top of the bars and a dry, crumbly center underneath.
Second, there is the sugar-to-fat balance. Powdered sugar (10X confectioners’ sugar) isn’t just there for sweetness—it contains a small amount of cornstarch that absorbs free moisture and binds liquid fats. Sifting the sugar ensures those microscopic starch particles dissolve evenly into the butter-peanut base rather than forming chalky pockets.
Finally, adding a touch of neutral oil to the melted chocolate drops the melting point of the cocoa butter just enough. Instead of setting into a rigid, glass-like sheet that shatters when sliced, the top coat sets into a smooth, fudgy snap that cuts cleanly right alongside the peanut butter center.
What You’ll Need
For the Peanut Butter Base:
- 1 stick (½ cup / 113g) unsalted butter, melted and cooled until warm (around 100°F)
- 3 cups (768g) creamy peanut butter (stick strictly to standard commercial brands)
- 2 teaspoons pure vanilla extract
- 4 cups (480g) powdered sugar, sifted to eliminate all lumps
- ½ teaspoon fine sea salt (optional, but great for balancing sweetness)
For the Chocolate Top Coat:
- 12 ounces (340g) semi-sweet chocolate chips or chopped dark chocolate
- 2 tablespoons neutral vegetable oil, canola oil, or refined coconut oil
Step-by-Step Instructions
1. Construct a Four-Sided Parchment Sling
Prepare a 9×13-inch metal baking pan by creating an overlapping paper sling. Cut two strips of parchment paper—one 9 inches wide and one 13 inches wide.
Lightly grease the inside of the pan with cooking spray, then lay the 13-inch strip lengthwise down the center and up the long sides. Lay the 9-inch strip perpendicular across it. Ensure you have at least 2 inches of excess paper hanging over all four edges. This creates four sturdy handles that allow you to lift the entire set slab out of the pan in one piece without tearing the edges.
2. Emulsify the Peanut Butter & Sugar
In a large mixing bowl, combine the 1 stick of melted butter and 3 cups of creamy peanut butter. Whisk vigorously for about 60 seconds until the fats fully unify into a smooth, warm paste. Stir in the 2 teaspoons of vanilla extract and salt.
Position a fine-mesh sieve over the bowl and sift in the 4 cups of powdered sugar in two separate additions. Using a heavy wooden spoon or rigid silicone spatula, fold the sugar into the peanut butter base.
At first, the mixture will look dry and shaggy. Keep working it from the bottom up—within two minutes, the sugar will fully absorb the peanut oils, transforming into a smooth, pliable dough that pulls away cleanly from the sides of the bowl.
3. Level and Compact the Dough
Transfer the warm peanut butter dough to the center of your prepared pan. Use your hands to push it outward into all four corners.
To achieve an immaculate, flat surface, place a piece of parchment paper over the dough and press firmly using a flat-bottomed measuring cup, small offset spatula, or flat wooden press. Compacting the dough pushes out hidden air pockets and ensures every square inch of the bottom layer has a uniform thickness. Slide the pan into the refrigerator for 15 to 20 minutes to let the fats firm up slightly.
4. Melt and Smooth the Chocolate
Combine the 12 ounces of chocolate chips and 2 tablespoons of vegetable oil in a bone-dry, microwave-safe bowl. (Even a single drop of water will cause the melting chocolate to seize into a grainy paste).
Microwave at 50% power in 30-second bursts, stirring thoroughly with a dry spatula after each round. When the chocolate is about 80% melted with a few small lumps remaining, remove it from the microwave and keep stirring manually off the heat. The gentle residual heat of the bowl will finish melting the remaining chocolate without scorching the cocoa solids.
5. Pour, Tap, and Chill
Retrieve the chilled base from the fridge. Pour the warm liquid chocolate directly into the center and spread it out to the edges in smooth, fluid strokes using an offset spatula.
Pick the pan up two inches off the kitchen counter and drop it flat onto the surface two or three times. This forces trapped air bubbles inside the liquid chocolate to rise to the top and pop, giving you a sleek, mirror-like finish.
Return the pan uncovered to the refrigerator for at least 1.5 to 2 hours until both layers are cold and firm to the touch.
The Professional Slicing Technique
To cut clean, geometric squares without chocolate smudging onto the peanut butter layer:
- The Lift: Grasp the overlapping parchment paper handles on the sides of the pan and lift the entire solid block straight up out of the dish onto a large cutting board. Peel back the paper walls.
- Blade Heat: Fill a tall pitcher with hot water and grab a clean towel. Submerge a large 8- or 10-inch chef’s knife in the hot water for 10 seconds, then wipe every drop of water off the blade using the towel.
- The Score Cut: Set the warm, dry blade on top of the chocolate and press straight down in one firm, continuous motion. Do not saw back and forth! The thermal energy of the heated metal scores the chocolate layer instantly, gliding through the base without cracking the top.
- Wipe and Repeat: Lift the knife straight up. Wipe the blade completely clean and re-dip in hot water before every single cut. Cleaning the blade between slices prevents peanut butter crumbs from smearing across the dark chocolate top.
Storage and Freezing
- Refrigeration: Store sliced bars in an airtight container lined with parchment paper in the fridge for up to 2 weeks.
- Freezer: Wrap individual squares in plastic wrap, store in a zip-top bag, and freeze for up to 3 months. They can be eaten cold straight from the freezer for an ice-cream-like texture, or brought to room temperature in 10 minutes.