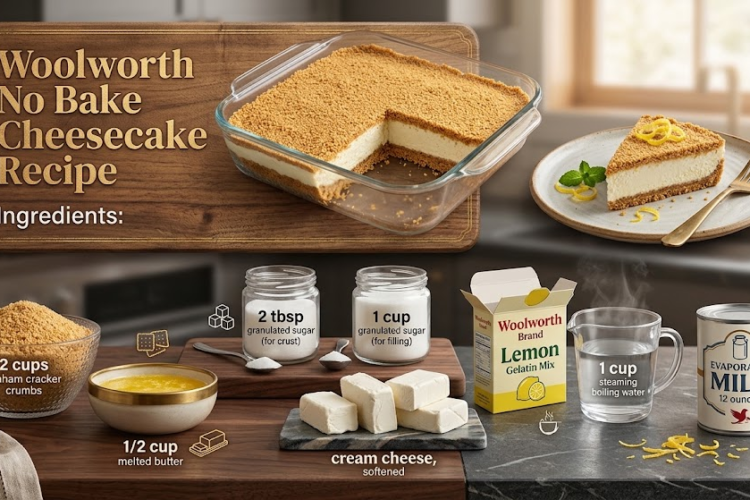
🍰 Woolworth No-Bake Cheesecake
Light, creamy, tangy, and wonderfully nostalgic, Woolworth No-Bake Cheesecake is a classic refrigerator dessert with a buttery graham cracker crust and an airy lemon-kissed cheesecake filling. Unlike dense baked cheesecake, this old-fashioned favorite has a soft, mousse-like texture that makes it especially refreshing served cold.
⏱ Recipe Information
Prep Time: 25 minutes
Chill Time: 6 hours
Total Time: About 6½ hours
Yield: 12 servings
Difficulty: Easy
Method: No-Bake
🛒 Ingredients
🍪 For the Crust
- 2 cups (200 g) graham cracker crumbs
- ½ cup (113 g) unsalted butter, melted
- 2 tablespoons (25 g) granulated sugar
🍋 For the Filling
- 1 (8 oz / 226 g) package cream cheese, softened
- 1 cup (200 g) granulated sugar
- 1 teaspoon vanilla extract
- 1 (12 oz / 355 ml) can evaporated milk, thoroughly chilled
- 1 (3 oz / 85 g) package lemon-flavored gelatin
- 1 cup (240 ml) boiling water
- 2 tablespoons fresh lemon juice
- 1 teaspoon finely grated lemon zest, optional
Instructions
🍪 1. Make the Graham Cracker Crust
Add the graham cracker crumbs and sugar to a bowl.
Pour in the melted butter and stir until the mixture resembles moist sand.
Reserve about 2–3 tablespoons of the crumbs for decorating, if desired.
🥧 2. Press the Crust Into the Pan
Line the bottom of a 9 × 13-inch baking dish with parchment paper if desired.
Transfer the crumb mixture to the dish.
Press firmly and evenly across the bottom using the back of a measuring cup or glass.
Refrigerate the crust while preparing the filling.
Press firmly enough that the crust holds together when sliced, but don’t pack it so tightly that it becomes hard.
🍋 3. Prepare the Lemon Gelatin
Place the lemon gelatin powder in a medium bowl.
Pour in 1 cup boiling water.
Whisk for approximately 2 minutes, until the gelatin is completely dissolved.
Stir in the fresh lemon juice.
Set aside to cool to room temperature.
Don’t allow the gelatin mixture to fully set. It should remain liquid but no longer be hot.
🧀 4. Beat the Cream Cheese
Place the softened cream cheese in a large mixing bowl.
Beat with an electric mixer until smooth and creamy.
Add the sugar and vanilla.
Beat for another 2–3 minutes, scraping down the sides of the bowl as needed.
The mixture should be completely smooth.
🥛 5. Whip the Evaporated Milk
Pour the well-chilled evaporated milk into a separate large bowl.
Using clean beaters, whip on high speed until it becomes thick, fluffy, and approximately doubled in volume.
This may take several minutes.
The evaporated milk must be very cold for this step to work properly.
🍋 6. Combine the Gelatin & Cream Cheese
Slowly pour the cooled lemon gelatin mixture into the cream cheese mixture.
Beat on low speed until smoothly incorporated.
Add the lemon zest if using.
☁️ 7. Fold in the Whipped Milk
Add approximately one-third of the whipped evaporated milk to the cream cheese mixture.
Gently fold it in with a spatula.
Continue adding the remaining whipped milk in two additions, folding gently until the filling is light and evenly combined.
Don’t aggressively stir—the air you’ve incorporated gives the cheesecake its signature fluffy texture.
🥧 8. Fill the Crust
Remove the chilled crust from the refrigerator.
Pour the cheesecake filling over the crust.
Spread the top evenly with an offset spatula.
Sprinkle the reserved graham cracker crumbs over the surface if desired.
❄️ 9. Chill Until Firm
Cover the dish and refrigerate for at least 6 hours.
For the cleanest slices and best texture, refrigerate overnight.
The filling should feel firm and set when gently touched.
🔪 10. Slice & Serve
Use a sharp knife to cut the cheesecake into squares or rectangles.
For cleaner cuts, dip the knife in hot water, wipe it dry, and slice.
Repeat between cuts.
Serve chilled.
⭐ Chef’s Tips
Chill the Evaporated Milk
This is essential for getting it fluffy and airy.
Don’t Add Hot Gelatin
If the gelatin is hot when added to the cream cheese, it can soften the mixture and interfere with the final texture.
Use Full-Fat Cream Cheese
It gives the cheesecake a richer flavor and more stable filling.
Give It Plenty of Chill Time
This dessert needs time to fully set. Overnight chilling is ideal.
Don’t Skip the Lemon
The lemon balances the sweetness and gives this cheesecake its distinctive refreshing flavor.
🍓 Delicious Variations
Strawberry Woolworth Cheesecake
Top the finished cheesecake with sliced fresh strawberries or strawberry pie filling.
Blueberry Lemon
Add a layer of blueberry pie filling over the chilled cheesecake.
Raspberry
Swirl a few tablespoons of raspberry sauce into the filling before chilling.
Orange Creamsicle
Replace the lemon gelatin with orange gelatin and use orange zest instead of lemon.
Cherry
Top each serving with cherry pie filling for a classic diner-style dessert.
🍽️ Serving Suggestions
Serve cold with:
- Fresh strawberries
- Blueberries
- Raspberry sauce
- Cherry pie filling
- Whipped cream
- Lemon zest
- Extra graham cracker crumbs
A small amount of fresh fruit provides a lovely contrast to the creamy filling.
🧊 Storage
Keep the cheesecake covered and refrigerated.
Refrigerator: Up to 4 days.
Because this is a no-bake dairy dessert, keep it chilled until ready to serve.
❄️ Freezing
Freeze the cheesecake without fresh fruit toppings.
Wrap tightly and place in a freezer-safe container.
Freeze: Up to 1 month.
Thaw overnight in the refrigerator before serving.
🍋🍰 Recipe Summary
Woolworth No-Bake Cheesecake is a wonderfully nostalgic dessert with a buttery graham cracker crust and an airy lemon cheesecake filling made with cream cheese, whipped evaporated milk, and lemon gelatin.
It’s creamy, fluffy, refreshing, and completely oven-free.
A classic refrigerator cheesecake that’s especially delicious straight from the fridge on a warm day. 🍋❄️🍰