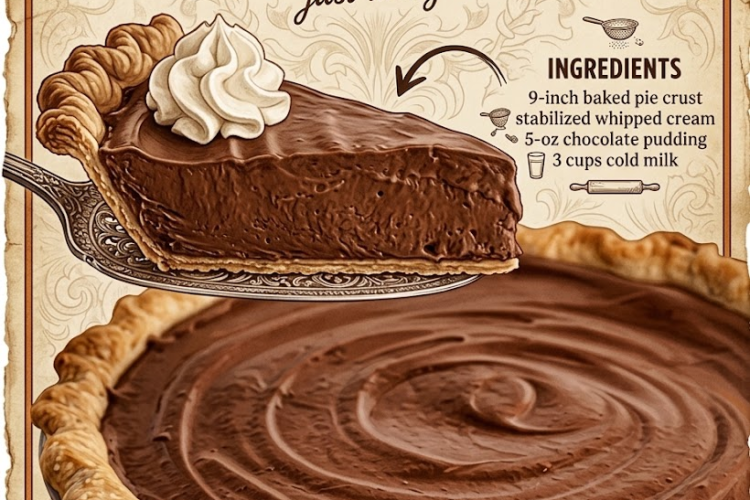
🍫 Classic Creamy Chocolate Pie
Rich, silky, deeply chocolatey, and wonderfully creamy, this Chocolate Pie is an easy old-fashioned dessert with a smooth pudding filling and a generous layer of stabilized whipped cream. It’s perfect for holidays, Sunday dinners, birthdays, or anytime a serious chocolate craving strikes.
⏱ Recipe Information
Prep Time: 15 minutes
Cook Time: 8–10 minutes
Chill Time: 4 hours
Total Time: About 4½ hours
Yield: 8 slices
Difficulty: Easy
🛒 Ingredients
🍫 For the Chocolate Filling
- 5 oz (142 g) chocolate pudding mix, cook-and-serve or instant
- 3 cups (720 ml) cold milk
- 1 prepared 9-inch pie crust, baked and completely cooled
☁️ For the Stabilized Whipped Cream
- 2 cups (480 ml) heavy whipping cream, cold
- ½ cup (60 g) powdered sugar
- 1 teaspoon vanilla extract
- 1 teaspoon unflavored gelatin
- 1 tablespoon cold water
- 2 tablespoons hot water
🍫 Optional Garnishes
- Chocolate shavings
- Cocoa powder
- Mini chocolate chips
- Chocolate curls
- Fresh berries
- Extra whipped cream
Instructions
🥧 1. Prepare the Pie Crust
If using a homemade or refrigerated unbaked pie crust, bake it according to the crust recipe or package directions.
Allow it to cool completely before adding the chocolate filling.
A completely cooled crust helps keep the pudding filling smooth and prevents the crust from becoming soggy.
🍫 2. Prepare the Chocolate Pudding
If using cook-and-serve pudding, combine the pudding mix and 3 cups cold milk in a medium saucepan.
Whisk thoroughly until smooth.
Place over medium heat, stirring constantly.
Cook according to the pudding package directions, generally until the mixture comes to a gentle boil and thickens.
Remove from the heat.
If Using Instant Pudding
Whisk the pudding mix with the cold milk according to the package directions.
Allow it to thicken for several minutes.
🥧 3. Fill the Pie Crust
Pour the warm or freshly prepared chocolate pudding into the cooled pie crust.
Smooth the surface with a spatula.
Press a piece of plastic wrap directly against the surface of the pudding to prevent a skin from forming.
Refrigerate for at least 2–3 hours, or until completely chilled and set.
☁️ 4. Make the Stabilized Whipped Cream
Place the gelatin in a small bowl.
Add 1 tablespoon cold water and let it stand for about 5 minutes to bloom.
Add the hot water and stir until the gelatin has completely dissolved.
Allow it to cool slightly—it should be liquid but not hot.
🥛 5. Whip the Cream
Pour the cold heavy cream into a chilled mixing bowl.
Beat on medium speed until it begins to thicken.
Gradually add the powdered sugar and vanilla.
Continue whipping until soft peaks form.
Slowly drizzle in the cooled gelatin mixture while continuing to beat.
Increase the speed slightly and whip until firm peaks form.
Don’t overbeat. Stop as soon as the cream is thick enough to hold its shape.
🍰 6. Top the Chocolate Pie
Remove the chilled pie from the refrigerator.
Spread the stabilized whipped cream generously over the chocolate pudding.
Alternatively, pipe the whipped cream around the edge or create decorative swirls across the top.
✨ 7. Garnish
Finish with your favorite chocolate decoration.
Try:
- Chocolate curls
- Chocolate shavings
- A light dusting of cocoa powder
- Mini chocolate chips
- Chocolate drizzle
For an elegant presentation, add a few chocolate curls to the center.
❄️ 8. Chill Before Serving
Return the completed pie to the refrigerator for at least 1 hour.
This allows the whipped cream to firm up and makes slicing easier.
For the best texture, serve thoroughly chilled.
🔪 9. Slice & Serve
Use a sharp knife to cut the pie into 8 slices.
For cleaner cuts, dip the knife in hot water, wipe it dry, and slice.
Wipe the knife between cuts.
Serve cold.
⭐ Chef’s Tips
Cook-and-Serve vs. Instant
Both work beautifully.
Cook-and-serve: Produces a particularly rich, silky filling.
Instant: Makes the recipe faster and requires no stovetop cooking.
Chill the Pie Thoroughly
The pudding needs sufficient time to set before the whipped cream is added.
Keep the Cream Cold
Cold heavy cream whips faster and produces a more stable topping.
Don’t Pour Hot Pudding Into the Crust
Allow the pudding to cool slightly before filling the crust if it is extremely hot.
Make It Extra Chocolatey
Add 2 oz (55 g) melted semisweet chocolate to the prepared pudding while it’s still warm, stirring until completely smooth.
🍫 Delicious Variations
Double Chocolate Pie
Use a chocolate cookie crust and add chocolate shavings on top.
Mocha Chocolate Pie
Add 1–2 teaspoons instant espresso powder to the pudding mixture.
Chocolate Peanut Butter Pie
Spread ½ cup creamy peanut butter over the cooled crust before adding the chocolate pudding.
Mint Chocolate Pie
Add ¼ teaspoon peppermint extract to the whipped cream and garnish with chocolate curls.
Chocolate Raspberry Pie
Top with fresh raspberries and chocolate shavings.
🧊 Storage
Cover the pie loosely and refrigerate.
Refrigerator: Up to 3–4 days.
Keep chilled until serving.
❄️ Freezing
For best quality, freeze the pudding-filled pie without the whipped cream topping.
Wrap tightly and freeze for up to 1 month.
Thaw overnight in the refrigerator, then prepare and add the whipped cream before serving.
🍫🥧 Recipe Summary
This Classic Chocolate Pie combines a silky chocolate pudding filling, buttery pie crust, and cloud-like stabilized whipped cream for a dessert that’s simple but incredibly indulgent.
Every slice delivers creamy chocolate richness balanced by light, fluffy whipped cream.
Rich, creamy, chocolatey, and pure comfort in pie form. 🍫🥧✨