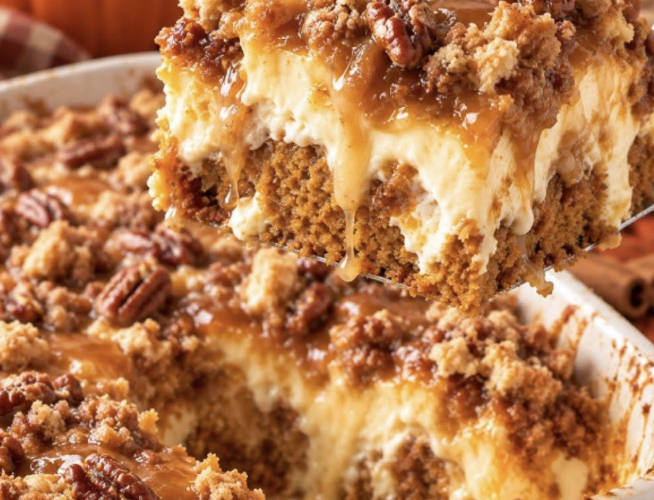
If you have never experienced an Earthquake Cake, prepare to have your idea of home baking completely upended.
Most cakes require patience: bake the layers, wait hours for them to cool, whip up a separate frosting, and carefully smooth it on. An Earthquake Cake tosses all of that conventional wisdom right out the window. Everything bakes all at once in a single 9×13 pan.
Before the cake even goes into the oven, you layer the pan with toasted nuts and coconut, pour on a spiced pumpkin batter, scatter sweet chips, and drop generous ribbons of cream cheese icing right on top. As it bakes, the heavy cheesecake filling plunges toward the bottom while the spiced pumpkin crumb rises and cracks around it, creating molten craters, crevices, and deep fissures.
The result? A warm, spiced autumn cake that practically frost itself from the inside out, delivering molten cheesecake, crunchy pecans, and pillowy spiced crumb in every bite.
Why the “Earthquake” Actually Works
- The Sinking Density Trick: Cake batter contains leavening agents (baking powder and baking soda) that create pockets of air and steam, pushing the batter upward as it heats. The cream cheese mixture, on the other hand, is weighted down with heavy butter, cream cheese, and powdered sugar with zero leaveners. Because it is substantially denser, gravity pulls those creamy ribbons straight down through the lifting batter, forming underground pockets of molten cheesecake.
- The Pecan & Coconut Shield: Laying a bed of chopped pecans and shredded coconut across the bottom of the pan isn’t just about rustic fall flavors. It creates a textured, caramelized cushion that keeps the descending cream cheese from scorching against the hot metal or glass floor of the pan.
- Pure Pumpkin Moisture: Real pumpkin purée brings massive amounts of moisture and vegetable fiber to the party. This keeps the cake crumb rich and soft for days without drying out around the cheesecake craters.
What You’ll Need
The Foundation Layer:
- 1 cup chopped pecans (or walnuts), lightly toasted for the best nutty flavor
- 1 cup sweetened shredded coconut
The Spiced Pumpkin Batter:
- 1 box (15.25 oz) spice cake mix (or yellow cake mix)
- 1 can (15 oz) pure pumpkin purée (make sure it’s 100% pure pumpkin, not spiced pie filling)
- ½ cup vegetable oil (or melted neutral coconut oil)
- 3 large eggs, room temperature
- ¼ cup whole milk
- 1 teaspoon pumpkin pie spice (increase to 2 teaspoons if using a plain yellow cake mix)
- 1 teaspoon pure vanilla extract
The Inclusions:
- 1 cup white chocolate chips (cinnamon chips or butterscotch chips are also incredible here)
The Molten Cheesecake Ribbon:
- 8 oz brick cream cheese, softened to room temperature
- ½ cup (1 stick) unsalted butter, melted and cooled slightly
- 3 ½ cups powdered sugar, sifted
- 1 teaspoon pure vanilla extract
- ¼ teaspoon fine sea salt
How to Make It, Step-by-Step
1. Build the Pan Foundation
Preheat your oven to 350°F (175°C). Generously grease a 9×13-inch baking dish with butter or non-stick baking spray.
Scatter the 1 cup chopped toasted pecans and 1 cup shredded coconut evenly across the bottom of the pan. This forms your nutty, caramelized bottom crust.
2. Mix the Pumpkin Batter
In a large mixing bowl, combine the cake mix, pumpkin purée, vegetable oil, 3 eggs, ¼ cup milk, pumpkin pie spice, and 1 tsp vanilla.
Beat on medium speed with an electric hand mixer (or stand mixer) for about 2 minutes until the batter is glossy, thick, and uniform. Pour the batter gently over the coconut and pecan layer, using a spatula to push it to the corners without disturbing the base.
3. Scatter the Chips
Evenly scatter the 1 cup white chocolate chips across the entire surface of the raw batter.
4. Whip Up the Cheesecake Swirl
In a separate medium bowl, beat the softened cream cheese and melted butter together until completely smooth and lump-free.
Gradually beat in the 3 ½ cups sifted powdered sugar, 1 tsp vanilla, and pinch of salt on low speed until combined, then kick it up to medium for 1 minute until it turns into a thick, pourable glaze.
5. Drop and Swirl
Drop large, heaping spoonfuls of the cream cheese glaze all over the top of the pumpkin batter.
Take a butter knife or wooden skewer, poke it halfway into the batter, and swirl through the cream cheese dollops in loose figure-eights.
Crucial Tip: Do not over-swirl! You want large, distinct pools and ribbons of cheesecake. If you mix it too much, the two batters will blend together and you won’t get those dramatic volcanic fissures.
6. Bake to a Cratered Golden Finish
Slide the pan into the oven and bake at 350°F (175°C) for 45 to 55 minutes.
You’ll know it’s ready when the edges are puffed and pulling away slightly from the pan, and the cake portions test clean with a toothpick. The centers of the cheesecake craters will still look soft and slightly glossy—that is exactly what you want.
(If you notice the top browning a bit too quickly around the 35-minute mark, just lay a loose tent of aluminum foil over the top and let it finish baking).
7. Rest and Serve
Transfer the pan to a wire rack and let it sit for at least 45 to 60 minutes.
Giving it time to rest allows the molten cheesecake centers to settle into rich, fudgy pockets. Scoop it warm into bowls with a scoop of vanilla bean ice cream, or let it cool completely for neat, decadent squares.
A Few Helpful Pointers
- Why room-temperature cream cheese matters: If the cream cheese is cold, it will form tiny stubborn beads when whisked with the melted butter. Let it sit on the counter for an hour beforehand so it whips into a silky-smooth cream.
- Make-Ahead & Leftovers: Because of the cream cheese pockets, keep any leftovers stored in an airtight container in the refrigerator for up to 5 days.
- The Microwave Magic: If you eat a slice cold from the fridge, the cheesecake pockets will be firm like fudge. Pop a slice in the microwave for 12 to 15 seconds to bring the cake back to that warm, gooey, fresh-from-the-oven texture.