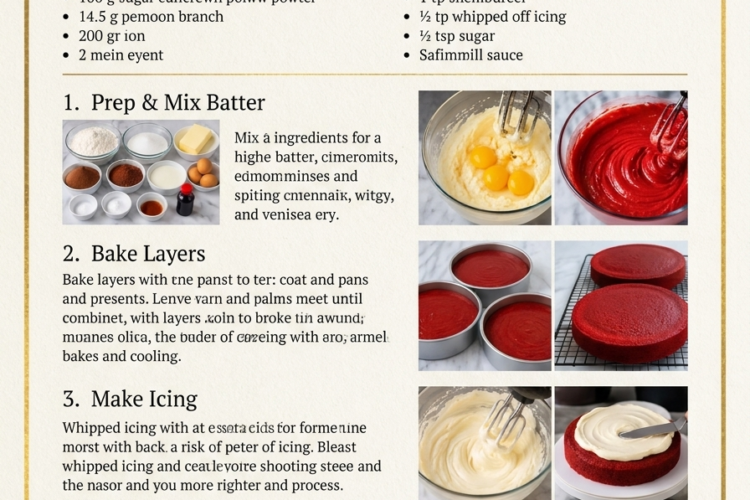
❤️ Red Velvet Cake with Cream Cheese Frosting
A stunning three-layer red velvet cake with a soft, buttery crumb, beautiful ruby-red color, and rich cream cheese frosting!
This homemade Red Velvet Cake is the perfect centerpiece for birthdays, weddings, Valentine’s Day, Christmas celebrations, and other special occasions. Each layer is tender, moist, and delicately flavored with cocoa and vanilla, creating the signature taste that makes red velvet cake so beloved.
The cake is covered in a silky cream cheese frosting that balances its gentle sweetness with a delicious tang. A sprinkle of red velvet cake crumbs around the edges and elegant buttercream swirls on top make it look just as beautiful as it tastes. ❤️🍰
Whether you’re baking for a celebration or simply want an impressive homemade dessert, this classic three-layer cake is sure to make every occasion feel special.
Recipe Details
- Prep time: 40 minutes
- Bake time: 25–30 minutes
- Cooling time: 1–2 hours
- Decorating time: 25–35 minutes
- Total time: Approximately 3 hours
- Yield: One three-layer 8-inch cake
- Servings: 12–16 slices
- Difficulty: Moderate
- Oven temperature: 350°F (175°C)
Recipe note: Your original ingredient list was incomplete. I’ve added suggested quantities for the buttermilk, cocoa powder, vanilla, food coloring, leavening agents, and frosting ingredients to complete the recipe.
Ingredients
For the Red Velvet Cake
- 3 cups all-purpose flour (375 g)
- 1½ cups granulated sugar (300 g)
- 250 g unsalted butter, softened
- 4 large eggs, at room temperature
- 1 cup buttermilk (240 ml), at room temperature
- 2 tablespoons unsweetened cocoa powder (10–12 g)
- 1 teaspoon vanilla extract
- 1–2 tablespoons red gel food coloring, as needed
- 1 teaspoon baking soda
- 1 teaspoon baking powder
- 1 teaspoon white vinegar
- ½ teaspoon salt
Ingredient tip: Gel food coloring generally provides a deeper red shade than liquid coloring without adding as much extra moisture. Use a concentrated red coloring designed for baking and adjust according to the manufacturer’s instructions.
For the Cream Cheese Frosting
- 450 g full-fat cream cheese, softened but still cool (16 oz)
- 225 g unsalted butter, softened (1 cup)
- 4–5 cups powdered sugar (480–600 g), sifted
- 2 teaspoons vanilla extract
- 1 tablespoon heavy cream or milk, optional
- A small pinch of salt, optional
For the Optional Buttercream Swirls
- 115 g unsalted butter, softened (½ cup)
- 2 cups powdered sugar (240 g), sifted
- 1 teaspoon vanilla extract
- 1–2 tablespoons milk or heavy cream, as needed
- A little red or pink gel food coloring, optional
The buttercream is optional. You can decorate the entire cake with cream cheese frosting and finish it with red velvet crumbs if you prefer a simpler design.
Instructions
Step 1: Prepare the Cake Pans
Preheat your oven to 350°F (175°C).
Grease three 8-inch (20 cm) round cake pans with butter or baking spray. Line the bottoms with parchment paper to prevent the cakes from sticking.
If you have only one or two pans, bake the layers in batches. Avoid leaving prepared batter standing for an extended period after the leavening ingredients have been added.
Step 2: Combine the Dry Ingredients
In a medium bowl, whisk together the flour, cocoa powder, baking soda, baking powder, and salt.
Whisk thoroughly to distribute the cocoa and leavening agents evenly throughout the flour. Set aside.
The small quantity of cocoa gives red velvet cake its characteristic subtle chocolate flavor without turning it into a full chocolate cake.
Step 3: Cream the Butter and Sugar
In a large mixing bowl, beat the softened butter and granulated sugar with an electric mixer on medium speed for about 3–5 minutes.
The mixture should become noticeably lighter in color and fluffy in texture.
Scrape down the sides and bottom of the bowl occasionally to ensure the butter and sugar are evenly combined. Proper creaming helps create a lighter cake crumb.
Step 4: Add the Eggs and Vanilla
Add the eggs one at a time, beating well after each addition.
Mix in the vanilla extract and red gel food coloring. Start with a smaller quantity of coloring, then add more until the batter reaches a rich red shade.
The color may look darker once the cake has baked and cooled, so avoid adding excessive coloring before checking the batter.
Step 5: Alternate the Dry Ingredients and Buttermilk
With the mixer on low speed, add approximately one-third of the flour mixture to the butter mixture. Mix briefly, then add half the buttermilk.
Continue alternating the dry ingredients and buttermilk, finishing with the last portion of flour.
Mix just until the ingredients are incorporated. Do not overbeat, as excessive mixing can develop gluten and make the cake less tender.
Step 6: Add the Vinegar
In a small bowl, combine the white vinegar with the baking soda if you prefer to activate them immediately before adding. The mixture will fizz.
Fold it gently into the batter until evenly distributed, working promptly so the cake can take advantage of the reaction.
Scrape the bowl one final time, checking that no streaks of flour remain at the bottom.
Step 7: Divide the Batter
Divide the batter evenly among the three prepared pans.
For the most consistent layers, use a kitchen scale to weigh the batter and distribute it equally. Smooth the tops with a spatula.
Give each pan a gentle tap on the work surface to release any large air pockets.
Step 8: Bake the Cake Layers
Bake for 25–30 minutes, or until the centers spring back lightly when touched and a toothpick inserted into the center comes out clean or with a few moist crumbs.
Avoid opening the oven during the first 20 minutes, as a sudden temperature change can affect the cakes’ rise.
If your oven has hot spots, rotate the pans carefully toward the end of baking.
Step 9: Cool Completely
Remove the pans from the oven and let the cakes rest for 10–15 minutes.
Run a thin knife around the edges if necessary, then invert the cakes onto wire racks. Remove the parchment paper and allow the layers to cool completely.
For easier frosting, wrap the completely cooled layers and refrigerate them for about 30 minutes. Chilled cake layers are generally easier to stack and crumb-coat.
Important: Do not spread cream cheese frosting onto warm cake. The frosting can melt, become runny, and slide between the layers.
Step 10: Make the Cream Cheese Frosting
In a large bowl, beat the softened butter for 2–3 minutes until smooth and creamy.
Add the softened cream cheese and beat briefly until combined and smooth. Avoid prolonged beating, because cream cheese frosting can become loose if overmixed.
Gradually add the sifted powdered sugar, mixing on low speed after each addition. Add the vanilla extract and optional pinch of salt.
If the frosting is too thick, add a little heavy cream or milk, about 1 teaspoon at a time. If it is too soft, refrigerate it for 15–20 minutes before decorating.
The finished frosting should be creamy, spreadable, and stable enough to hold between the layers.
Step 11: Level the Cake Layers
If the cake layers have domed tops, use a serrated knife to trim them gently until they are level.
Save the trimmed red cake pieces for decoration. Crumble them finely with your fingers or pulse them briefly in a food processor.
These crumbs will give the finished cake its classic red velvet appearance.
Step 12: Assemble the Three Layers
Place the first cake layer on a cake board or serving plate.
Spread an even layer of cream cheese frosting over the top, extending close to the edges. Place the second layer on top and repeat.
Add the third layer, positioning it with the flattest side facing upward if possible.
Check that the cake is level before continuing.
Step 13: Apply the Crumb Coat
Spread a thin layer of cream cheese frosting over the top and sides of the cake. This initial layer traps loose crumbs and creates a smooth foundation for the final finish.
Refrigerate the cake for approximately 20–30 minutes, or until the frosting feels firm to the touch.
Step 14: Add the Final Frosting Layer
Spread the remaining cream cheese frosting over the top and sides of the chilled cake.
Use an offset spatula or cake scraper to smooth the surface. For a rustic look, create gentle swirls with the back of a spoon.
Press the reserved red velvet crumbs lightly around the lower edge or sprinkle them over the top, leaving space for decorative swirls if desired.
Step 15: Pipe the Buttercream Swirls
For a more polished celebration cake, prepare the optional buttercream.
Beat the softened butter until creamy, then gradually add the powdered sugar and vanilla. Add milk or cream a little at a time until the buttercream is smooth and pipeable.
Tint a small portion with red or pink gel coloring if desired. Transfer the buttercream to a piping bag fitted with a star tip.
Pipe decorative swirls around the top edge of the cake, then add extra red velvet crumbs between them.
Keep the finished cake refrigerated until serving time.
Step 16: Slice and Serve
For neat slices, use a long, sharp knife dipped in warm water and wiped clean between cuts.
Allow individual slices to sit out briefly before serving if you prefer a softer frosting texture. Enjoy the tender red cake, creamy filling, and delicate cocoa flavor in every bite!
Expert Tips for the Best Red Velvet Cake
Use room-temperature ingredients. Butter, eggs, and buttermilk combine more evenly when they are not refrigerator-cold, helping create a smoother batter.
Measure the flour accurately. Weighing the flour is the most reliable method. Too much flour can result in a dry or dense cake.
Do not add too much cocoa. Red velvet cake has a subtle chocolate flavor. Excess cocoa can darken the cake and overpower the traditional taste.
Choose gel coloring. Concentrated gel food coloring creates an intense red color with less added liquid than most liquid food colorings.
Cream the butter and sugar properly. A few minutes of creaming creates air pockets that help give the cake a light texture.
Avoid overmixing. Once the dry ingredients are incorporated, stop mixing. This keeps the cake tender.
Cool the layers completely. This is essential for preventing the cream cheese frosting from becoming runny.
Chill before decorating. Cold cake layers are more stable and easier to frost neatly, especially when assembling three layers.
Keep cream cheese frosting cool. If the frosting becomes too soft, briefly refrigerate it before continuing. Avoid leaving the finished cake in a warm room for long periods.
Delicious Variations
❤️ Red Velvet Cupcakes
Divide the batter among lined muffin cups, filling each about two-thirds full. Bake at 350°F (175°C) for approximately 18–22 minutes, checking for doneness near the end. Cool completely before piping on the cream cheese frosting.
🍫 Red Velvet Chocolate Chip Cake
Fold ½ cup (85 g) of mini chocolate chips into the finished batter just before dividing it among the pans for extra chocolate in every slice.
🍓 Red Velvet Strawberry Cake
Spread a thin layer of strawberry preserves over the frosting between the cake layers. Use a thick preserve and keep the layer modest so the cake remains stable.
🤍 Red Velvet Cake with Vanilla Buttercream
Replace the cream cheese frosting with vanilla buttercream if you prefer a sweeter, more structured frosting for intricate piping or warm-room decorating.
🎄 Holiday Red Velvet Cake
Decorate with red and white buttercream swirls, white chocolate shavings, festive sprinkles, or sugared cranberries for a Christmas centerpiece.
💕 Valentine’s Day Red Velvet Cake
Pipe small pink and red buttercream rosettes around the top, then finish with heart-shaped sprinkles or chocolate decorations.
Serving Suggestions
This beautiful cake pairs wonderfully with:
- Fresh strawberries, raspberries, or blueberries.
- A cup of coffee, cappuccino, or black tea.
- Vanilla ice cream for a special dessert plate.
- Fresh berries and a light dusting of powdered sugar.
- A drizzle of white chocolate for an elegant presentation.
For birthdays and celebrations, place the cake on a cake stand and decorate the surrounding platter with a few extra red velvet crumbs.
Make-Ahead Instructions
Bake the layers ahead: Bake and completely cool the cake layers up to one day before assembling. Wrap them tightly and refrigerate.
Prepare the frosting ahead: Make the cream cheese frosting up to 2 days in advance. Store it in an airtight container in the refrigerator. Before using, let it soften slightly and mix briefly until spreadable.
Assemble ahead: The finished cake can be assembled a day before serving. Store it covered in the refrigerator so the frosting remains stable and the cake stays fresh.
Best decorating tip: Add delicate buttercream swirls and the final crumb decorations after the cake has been chilled and the frosting has set.
Storage and Freezing
Refrigerator: Because the cake contains cream cheese frosting, store it covered in the refrigerator for up to 4 days for best quality.
Freezing unfrosted cake layers: Wrap each completely cooled layer tightly in plastic wrap and place it in a freezer-safe bag or container. Freeze for up to 2 months for best quality. Thaw in the refrigerator before assembling.
Freezing frosted cake: Individual slices can be frozen until the frosting is firm, then wrapped securely and stored in a freezer-safe container for up to 2 months. The frosting’s texture may change slightly after thawing.
Thawing: Thaw frozen slices in the refrigerator overnight and allow them to lose some of their chill before serving.
Food safety: Do not leave cream cheese frosting at room temperature for more than 2 hours. If the room temperature is above 90°F (32°C), limit the time out to 1 hour.
Frequently Asked Questions
1. What makes red velvet cake different from chocolate cake?
Red velvet cake has a milder cocoa flavor, a characteristic red color, and a tender crumb. Traditional recipes often include buttermilk and vinegar, which contribute to the cake’s distinctive flavor and texture.
2. Can I make red velvet cake without food coloring?
Yes. The cake will still taste delicious, but it will have a natural reddish-brown or cocoa-colored appearance rather than the vivid red associated with classic red velvet cake.
3. Why did my red velvet cake turn brown instead of red?
Too much cocoa, insufficient food coloring, or a food coloring that is not concentrated enough can affect the final color. Use a suitable red gel coloring and measure the cocoa carefully.
4. Why is my cake dry?
Too much flour, overbaking, or excessive mixing can produce a dry cake. Measure the flour accurately, check for doneness at the early end of the baking window, and remove the layers as soon as they are baked through.
5. Why is my cream cheese frosting runny?
Cream cheese may have been too warm, the frosting may have been overmixed, or too much liquid may have been added. Use block-style full-fat cream cheese, keep it cool, and add any milk or cream gradually.
6. Can I use oil instead of butter?
Yes, but the cake’s texture and flavor will change. Oil generally produces a moister crumb, while butter contributes a richer flavor and helps create structure through creaming. If substituting oil, use a tested oil-based red velvet recipe for the most predictable result.
7. Can I make this cake in two larger layers?
Yes. You can bake the batter in two 9-inch (23 cm) pans, but the layers will be thicker and may require a longer baking time. Check for doneness using a toothpick and the spring-back test rather than relying solely on the original timing.
8. How do I get clean slices?
Chill the cake before cutting. Use a long, sharp knife dipped in warm water, wiping the blade between each slice. This helps create neat edges through both the cake and the frosting.
Estimated Nutrition
Approximate values per slice, assuming 16 servings and including the cream cheese frosting:
- Calories: 500–650
- Carbohydrates: 55–75 g
- Protein: 5–8 g
- Fat: 27–36 g
- Sugar: 40–55 g
- Sodium: 250–450 mg
These estimates vary depending on the amount of frosting used, the brand of cream cheese, and the size of each slice. Additional buttercream decorations may increase the calories and sugar.
Final Thoughts
This Red Velvet Cake with Cream Cheese Frosting is a beautiful celebration dessert, featuring three soft, red layers, a delicate cocoa flavor, and rich, tangy frosting. The red velvet crumbs and decorative buttercream swirls give it a professional bakery-style finish without making the recipe unnecessarily complicated.
Serve it at birthdays, holidays, anniversaries, or any occasion worth celebrating. Slice into those gorgeous layers, share a piece with someone you love, and enjoy every creamy, chocolate-kissed bite. ❤️🍰