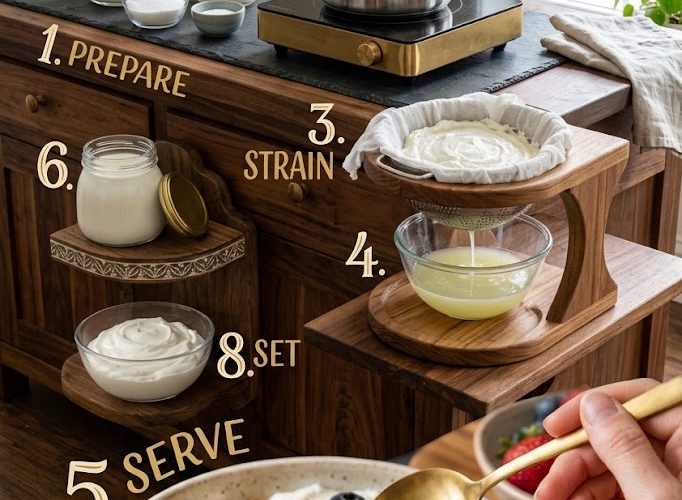
🥛🥣 Homemade Greek Yogurt
Creamy, thick, tangy, and delicious, this Homemade Greek Yogurt is made with just full-fat milk and a little plain yogurt with live cultures.
You don’t need any special yogurt maker to make beautiful homemade Greek yogurt. The process is simple: heat the milk, cool it to the right temperature, add the yogurt starter, keep it warm while it cultures, and then strain it until it reaches that wonderfully thick Greek-yogurt consistency.
Enjoy it plain with honey and fruit, or use it in sauces, smoothies, marinades, breakfast bowls, and desserts.
⏱️ Recipe Information
Prep Time: 10 minutes
Culturing Time: 6–12 hours
Straining Time: 2–6 hours
Total Time: About 10–18 hours
Yield: Approximately 2½–3 cups Greek yogurt
Difficulty: Easy
Method: Stovetop / Incubation
🛒 Ingredients
- 1 liter (4¼ cups) full-fat milk
- 2 tablespoons plain yogurt with live active cultures
Optional Additions for Serving
- Honey or maple syrup
- Fresh berries
- Banana
- Granola
- Chopped nuts
- Cinnamon
- Fresh fruit
- Jam or fruit compote
👩🍳 Instructions
🥛 Heat the Milk
1. Pour the Milk Into a Saucepan
Pour the full-fat milk into a clean, heavy-bottomed saucepan.
Use a pan large enough to prevent the milk from bubbling over.
2. Heat the Milk
Place the saucepan over medium heat.
Warm the milk gradually, stirring occasionally to prevent a skin from forming and to keep the bottom from scorching.
Heat until the milk reaches approximately 180–185°F (82–85°C).
You don’t need a rolling boil, but the milk should be very hot.
3. Hold the Temperature Briefly
Once the milk reaches the target temperature, maintain it for approximately 5 minutes, stirring occasionally.
This helps produce a thicker yogurt later.
🌡️ Cool the Milk
4. Remove From the Heat
Take the saucepan off the stove.
Allow the milk to cool to approximately 110–115°F (43–46°C).
This temperature is warm enough for the yogurt cultures but not so hot that they are damaged.
A kitchen thermometer is highly recommended for this step.
🥣 Add the Yogurt Starter
5. Mix a Small Amount of Milk With the Yogurt
Place the 2 tablespoons of plain yogurt with live cultures in a small bowl.
Add a few tablespoons of the cooled milk.
Whisk until completely smooth.
6. Combine With the Remaining Milk
Pour the yogurt mixture back into the saucepan.
Stir gently until evenly combined.
Don’t whisk vigorously—you only need to distribute the starter throughout the milk.
🌡️ Incubate the Yogurt
7. Keep the Milk Warm
Cover the saucepan with a lid.
The mixture needs to remain warm, around 100–115°F (38–46°C), for the yogurt cultures to multiply.
Choose one of these methods:
Oven method:
Place the covered saucepan in an oven that is turned off but slightly warm. Keep the oven light on if it provides gentle warmth.
Towel method:
Wrap the covered saucepan in a thick towel and place it somewhere warm and draft-free.
Thermos method:
Pour the inoculated milk into a thoroughly cleaned insulated thermos.
8. Let It Culture
Allow the yogurt to culture undisturbed for approximately 6–12 hours.
At around 6 hours, the yogurt may be relatively mild.
A longer incubation produces a tangier, firmer yogurt.
Do not stir during this stage.
❄️ Chill the Yogurt
9. Check the Set
When cultured, the yogurt should look thick and set, with a little clear or pale whey possibly visible around the edges.
Move it carefully to the refrigerator.
Chill for at least 2 hours before straining.
This helps the yogurt firm up.
🥣 Turn It Into Greek Yogurt
10. Prepare the Strainer
Place a fine-mesh sieve or colander over a large bowl.
Line it with clean cheesecloth, a nut-milk bag, or a clean, thin kitchen towel.
11. Add the Yogurt
Gently spoon the chilled yogurt into the lined strainer.
Don’t stir or squeeze it.
Cover loosely and place everything in the refrigerator.
12. Strain
Allow the yogurt to strain for 2–6 hours, depending on how thick you want it.
2 hours: Creamy and moderately thick
4 hours: Thick, classic Greek-yogurt texture
6 hours or longer: Very thick, almost labneh-like
The longer it strains, the more whey separates and the thicker the yogurt becomes.
13. Transfer and Stir
Spoon the thickened yogurt into a clean airtight container.
Stir gently until smooth.
If it’s thicker than you’d like, mix in a small amount of the reserved whey until you reach your preferred consistency.
🍓 Serve
Spoon the homemade Greek yogurt into bowls.
Enjoy it plain or top with honey, fresh berries, banana, granola, nuts, cinnamon, or your favorite fruit.
It’s also delicious as a savory dip or sauce.
⭐ Chef’s Tips
Use whole milk
Full-fat milk produces richer, creamier Greek yogurt. Lower-fat milk can also work, but the final texture will be lighter.
Your starter must contain live cultures
Use plain yogurt specifically labeled as containing live or active cultures.
Avoid flavored or heavily sweetened yogurt as a starter.
Don’t add the starter to very hot milk
The milk must cool to approximately 110–115°F (43–46°C) before the yogurt is added. Too much heat can damage the cultures.
Don’t disturb the yogurt while it cultures
Moving or stirring the mixture can interfere with the setting process.
Strain in the refrigerator
Refrigerated straining gives you better control over the final texture and keeps the yogurt properly chilled.
Save some for your next batch
Once your yogurt is finished, reserve 2 tablespoons to use as the starter for your next batch, provided it remains fresh and contains active cultures.
🥣 Easy Variations
Honey Greek Yogurt
Stir honey directly into the finished yogurt for a naturally sweet breakfast.
Vanilla Greek Yogurt
Add 1 teaspoon vanilla extract and a little honey or maple syrup.
Berry Greek Yogurt
Swirl in fresh berries or homemade berry compote.
Cinnamon Yogurt
Add ½ teaspoon cinnamon and a drizzle of honey.
Chocolate Greek Yogurt
Mix in unsweetened cocoa powder and a little honey for a chocolate-flavored snack.
Savory Greek Yogurt
Add garlic, lemon juice, herbs, salt, and black pepper for a creamy dip or sauce.
🍽️ Ways to Use Homemade Greek Yogurt
Use it for:
- Breakfast bowls
- Smoothies
- Parfaits
- Dips
- Salad dressings
- Tzatziki
- Marinades
- Sandwich sauces
- Baking
- Pancakes
- Overnight oats
- Desserts
It’s especially delicious layered with granola, honey, and fresh fruit.
💧 Don’t Throw Away the Whey
The liquid collected during straining is whey.
You can use it in:
- Smoothies
- Bread dough
- Pancake batter
- Soup
- Sauces
- Oatmeal
It contains useful flavor and nutrients, so there’s no need to waste it.
🧊 Storage
Transfer the finished Greek yogurt to a clean airtight container and refrigerate.
For the best quality, use within approximately 1 week.
Always use a clean spoon when serving.
🥛🥣✨ Final Result
This Homemade Greek Yogurt is beautifully thick, creamy, smooth, and naturally tangy.
With just milk and two tablespoons of live-culture yogurt, you can make a versatile homemade staple that’s perfect for breakfast, snacks, sauces, desserts, and so much more.
Creamy, wholesome, and made right in your own kitchen! 🥛🥣🍓✨