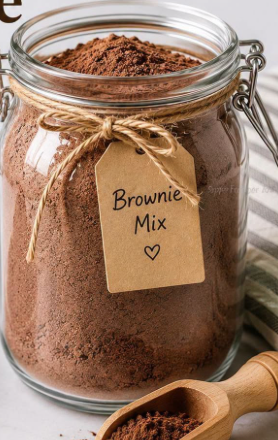
There is a reason commercial boxed brownie mixes have remained a grocery store staple for decades: convenience. Tearing open a single pouch, adding a couple of eggs and oil, and having a pan of warm, fudgy brownies in under half an hour is hard to beat. However, commercial mixes often come loaded with artificial preservatives, hydrogenated palm oils, anti-caking agents, and excess refined fillers.
This Homemade Brownie Mix (Better Than Boxed) bridges the gap between scratch-made artisanal baking and weeknight convenience. By blending simple, high-grade dry pantry staples—pure granulated sugar, unbleached flour, premium unsweetened cocoa powder, a touch of leavening, and fine salt—you create a versatile, shelf-stable mix ready in your pantry whenever chocolate cravings strike.
Baked brownies made from this mix boast crackly, paper-thin shiny tops, deeply fudgy centers, and chewy, caramelized edges, all while costing a fraction of commercial mixes.
Quick Recipe Overview
- Mix Assembly Time: 5 minutes
- Baking Prep Time: 5 minutes
- Bake Time: 20 to 25 minutes
- Cooling Time: 30 minutes (essential for clean slicing)
- Total Time: ~35 minutes from jar to table
- Yield: 1 dry mix batch (bakes one 8×8-inch pan / 16 rich brownie squares)
- Mix Shelf Life: Up to 3 months in a cool, dry pantry
- Skill Level: 100% Beginner-friendly / One-Bowl Method
The Food Chemistry of a Truly Fudgy Brownie
Brownie textures fall on a spectrum between cakey, chewy, and intensely fudgy. This formula is precision-engineered for the ultimate fudgy-chewy balance with a classic glossy, paper-thin crinkle top:
- High Sugar-to-Flour Ratio: With a full 1 cup (200g) of granulated sugar to just ½ cup (65g) of flour, the sugar binds with liquid fats to inhibit gluten structure, creating a dense, melt-in-your-mouth interior rather than a bready, spongy crumb.
- The Physics of the Shiny Crinkle Top: The glossy, wafer-thin meringue crust on top of a great brownie happens when dissolved sugar bonds with egg proteins and migrates to the surface as the batter heats up in the oven. Whisking the eggs and melted butter/oil thoroughly with the mix until the sugar dissolves slightly is the key to activating this reaction.
- Minimal Chemical Leavener: A tiny ¼ teaspoon of baking powder provides just enough micro-lift to prevent the center from becoming a dense brick of unbaked paste, while preserving the rich, chewy bite.
- Cocoa Powder Selection (Natural vs. Dutch-Processed):
- Natural Unsweetened Cocoa: Retains its natural acidity, providing a sharp, fruitier chocolate punch that reacts slightly with the baking powder.
- Dutch-Processed Cocoa: Treated with an alkalizing agent to neutralize acidity, yielding a darker color, smoother flavor, and ultra-fudgy chew. Both work in this recipe.
Detailed Ingredient Breakdown
The Shelf-Stable Dry Mix (In the Jar):
- 1 cup (200g) Granulated White Sugar: The backbone of the recipe that provides sweetness, tenderizes the crumb, and creates the crackly top.
- ½ cup (65g) All-Purpose Flour: Spooned and leveled. Provides just enough structure to suspend chocolate chips and hold clean cuts.
- ⅓ cup (30g) Unsweetened Cocoa Powder: Premium unsweetened baking cocoa (such as Ghirardelli, Guittard, or Hershey’s Special Dark). Sifting eliminates stubborn lumps.
- ¼ tsp Baking Powder: Offers subtle leavening for a soft-fudge center.
- ¼ tsp Fine Sea Salt: Sharpens the cocoa flavor and cuts through the intense sweetness.
The Wet Ingredients (Added on Baking Day):
- ½ cup (1 stick / 113g) Unsalted Butter (melted) OR ½ cup Neutral Vegetable Oil:
- Melted Butter: Delivers rich bakery flavor and chewy, caramelized edges.
- Vegetable Oil: Produces an ultra-glossy crust and stays fudgy even when chilled.
- 2 Large Eggs: Brought to room temperature so they emulsify smoothly with the warm fats.
- 1 tsp Pure Vanilla Extract: Melds the dairy and cocoa notes into a rich aroma.
- (Optional Add-In): ½ cup (90g) Semi-Sweet Chocolate Chips or Chunks: Stirred into the batter or pressed into the top before baking for molten chocolate pockets.
Step-by-Step Instructions
Part 1: Assembling the Dry Mix (Meal Prep)
1. Sift the Powders
Place a fine-mesh sifter over a medium mixing bowl. Add the ½ cup all-purpose flour, ⅓ cup unsweetened cocoa powder, ¼ tsp baking powder, and ¼ tsp fine salt. Sift the ingredients directly into the bowl to break up any packed cocoa clumps.
2. Blend with Sugar
Add the 1 cup of granulated sugar to the sifted dry ingredients. Whisk thoroughly with a dry balloon whisk for 30 to 45 seconds until the mixture is uniform in color with no streaks of white sugar or flour visible.
3. Jar and Store
Funnel the prepared dry mix into a clean, completely dry 1-quart (32 oz) glass mason jar, hermetic clamp jar, or heavy-duty zip-top storage bag. Seal tightly, label with baking instructions, and store in a cool, dark, and dry pantry for up to 3 months.
Part 2: Baking Day (From Mix to Fresh Brownies)
1. Prep Oven and Baking Pan
Preheat your oven to 350°F (175°C) with a rack positioned in the center.
Line an 8×8-inch square metal or glass baking pan with parchment paper, leaving an overhang on two sides to serve as handles for easy lifting later. Lightly grease the parchment with butter or non-stick cooking spray.
2. Whisk the Wet Ingredients
In a medium mixing bowl, whisk together the 2 large room-temperature eggs, ½ cup melted butter (or vegetable oil), and 1 tsp pure vanilla extract for 1 full minute until the mixture is smooth, glossy, and slightly frothy.
3. Combine Wet and Dry
Pour the entire jar of dry brownie mix into the wet mixture.
Using a sturdy wooden spoon or flexible silicone spatula, fold the batter together using broad, firm strokes.
- Batter Texture: The batter will be very thick, rich, and glossy. Mix only until all dry powdery pockets disappear. Avoid vigorous whipping to keep the crumb dense and fudgy.
4. Fold in Chocolate Chips (Optional)
Gently fold in ½ cup of semi-sweet chocolate chips, dark chocolate chunks, or chopped toasted walnuts until evenly distributed.
5. Spread in the Pan
Transfer the thick batter into your prepared 8×8-inch pan. Use an offset spatula or the back of a spoon to spread the batter evenly into all four corners, smoothing the top surface.
6. Bake to Fudgy Perfection
Bake at 350°F (175°C) for 20 to 25 minutes.
- The Doneness Test: Insert a clean wooden toothpick into the center of the pan:
- For Ultra-Fudgy Brownies: The toothpick should come out with a few moist, sticky crumbs attached (around the 21 to 22-minute mark).
- For Cakey Brownies: Bake until the toothpick comes out clean (around 24 to 25 minutes).
- If wet, runny liquid batter clings to the pick, bake for an additional 2 minutes.
7. Cool, Lift, and Slice
Transfer the baking pan to a wire cooling rack. Allow the brownies to cool inside the pan for at least 30 minutes to 1 hour.
(Crucial: Hot brownies are delicate and will tear if sliced immediately. As they cool, the fats and sugars solidify, creating clean edges and a chewy texture).
Use the parchment paper overhang handles to lift the entire brownie slab out of the pan onto a cutting board. Use a large, sharp chef’s knife to slice into 16 neat squares (a 4×4 grid). Wipe the blade clean with a damp warm cloth between each cut for clean edges.
Pro Baker’s Tips for Success
- Use Metal Pans for Crisp Edges: Light-colored aluminum baking pans conduct heat evenly, creating chewy, caramelized edges without burning. Dark coated pans or glass dishes retain heat longer and can take 3 to 5 minutes longer to bake through the center.
- Warm the Eggs: Cold eggs directly from the fridge will cause melted butter to solidify upon contact, leading to a lumpy batter. Place whole, uncracked eggs in a bowl of warm tap water for 5 minutes before cracking.
- Batch Prepping in Bulk: You can easily multiply the dry ingredients by 4 or 6 to fill multiple mason jars in a single prep session. This makes an instant gift for neighbors, teachers, and holiday baskets.
Delicious Flavor Variations
- Salted Caramel Brownies: Drizzle 3 tablespoons of thick dulce de leche or salted caramel over the raw batter in the pan, swirl with a butter knife, and top with flaky sea salt before baking.
- Peanut Butter Swirl: Warm ⅓ cup of creamy peanut butter in the microwave for 15 seconds, dollop across the top of the batter, and swirl with a skewer.
- Espresso Fudge: Whisk 1 teaspoon of instant espresso powder directly into the dry mix to intensify the dark chocolate profile.
- S’mores Brownies: Press mini marshmallows, graham cracker pieces, and extra chocolate chunks onto the top of the batter during the final 5 minutes of baking.
Mason Jar Gift Tag Instructions
If gifting this homemade brownie mix in a decorative jar, write the following instructions on a gift tag:
Fudgy Homemade Brownies
- Preheat oven to 350°F (175°C). Line an 8×8-inch pan with parchment paper.
- In a bowl, whisk 2 large eggs, ½ cup melted butter (or oil), and 1 tsp vanilla extract.
- Add entire contents of this jar and stir until combined. (Fold in ½ cup chocolate chips if desired).
- Spread into pan and bake for 20–25 minutes until top is crackly and center is set.
- Cool for 30 minutes, slice, and enjoy!
Storage, Freezing, and Reheating
- Dry Mix Storage: Store sealed mason jars or bags in a cool, dry pantry for up to 3 months.
- Baked Brownie Countertop Storage: Store sliced brownies in an airtight container at room temperature with a sheet of wax paper between layers for up to 4 to 5 days.
- Refrigeration: Storing baked brownies in the fridge makes them extra chewy and fudge-like. They will keep for up to 1 week.
- Freezer Storage: Wrap individual brownie squares in plastic wrap and aluminum foil, then seal inside a freezer bag. Freeze for up to 3 months. Thaw on the counter for 20 minutes or warm in the microwave for 15 seconds for a warm, molten dessert.