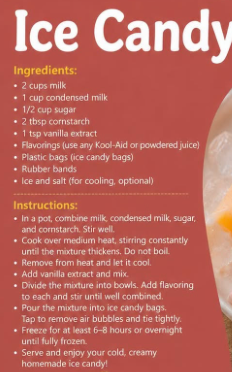
Cold, creamy, and vibrantly colorful, Homemade Ice Candy is a beloved retro street-food treat. Popular across tropical countries and neighborhood summer stands, these slender, handheld frozen pops are packed into clear plastic sleeves and frozen solid until ready to snip and enjoy.
Unlike plain ice pops or freezer pops that freeze into rock-hard, icy blocks of flavored water, this authentic recipe uses a custard-like dairy base enriched with sweetened condensed milk and thickened slightly with cornstarch. This simple secret technique prevents large ice crystals from forming, yielding a smooth, velvety, biteable texture that tastes like frozen gelato in a tube.
Whether made with classic fruit-punch Kool-Aid, zesty orange, creamy mango, chocolate, or tropical berries, these homemade ice candies are a fun, budget-friendly project for hot summer afternoons, parties, and everyday freezer snacking.
Recipe Overview
- Prep Time: 15 minutes
- Cook Time: 8 to 10 minutes
- Cooling Time: 20 minutes (before bagging)
- Freezing Time: 6 to 8 hours (or overnight)
- Total Time: ~7 hours (mostly hands-off freezing)
- Yield: 10 to 14 standard ice candy tubes (depending on sleeve size)
- Estimated Calories: ~95–110 kcal per tube
- Skill Level: 100% Beginner-friendly
The Food Science: Why Cornstarch & Condensed Milk Make It Silky
If you have ever tried freezing standard milk or fruit juice in a plastic sleeve, you know it usually freezes into an icy, crystalline block that separates into flavorless ice crystals and concentrated syrup. This recipe avoids that problem completely:
- Starch Gelatinization (The Anti-Ice Secret): Whisking cornstarch into the milk and gently heating it causes the starch granules to absorb liquid and swell. This forms a light, velvety gel network that physically traps water molecules, preventing them from grouping together into large, crunchy ice crystals during freezing.
- Fat and Sugar Depress the Freezing Point: Sweetened condensed milk delivers concentrated dairy fats and dissolved lactose sugars. Both lower the freezing point of the mixture, ensuring the final ice candy has a soft, creamy “bite” rather than the texture of an ice cube.
- Emulsified Flavor Suspension: Because the base is slightly thickened, powdered drink mixes (like Kool-Aid, Tang, or Milo) remain evenly suspended throughout the entire length of the bag rather than settling into a dark, syrupy layer at the bottom tip.
Equipment Checklist
- Plastic Ice Candy Bags (Sleeves): Long, narrow cylindrical food-grade polyethylene bags (standard size: 1.5 x 10 inches or 2 x 10 inches), available online or at Asian specialty markets. (Standard reusable silicone popsicle tubes or zip-top ice pop pouches also work).
- Small Funnel: Essential for mess-free pouring into narrow plastic sleeves.
- Medium Saucepan (2 to 3-quart capacity): For cooking the creamy base.
- Stainless Steel Whisk & Silicone Spatula: For stirring continuously to prevent scorching.
- Small Mixing Bowls: For dividing the base and mixing multiple colors and flavors.
- Small Rubber Bands or Twist Ties: Optional, if you prefer not to tie manual knots in the plastic bags.
- Liquid Measuring Pitcher: Helps with easy, spill-free funneling.
Detailed Ingredient Breakdown
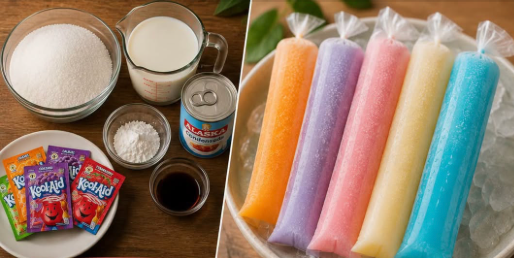
The Creamy Base:
- 2 cups (480ml) Whole Milk (or Fresh Cow’s Milk): Full-fat dairy provides the rich, creamy liquid foundation. (Evaporated milk or coconut milk can also be substituted for part of the milk for extra richness).
- 1 cup (240ml / approx. 300g) Sweetened Condensed Milk: Adds concentrated sweetness, dense dairy solids, and that nostalgic caramelized milk flavor.
- ½ cup (100g) Granulated White Sugar: Balances the flavor. (Note: Frozen treats taste significantly less sweet once frozen solid, so the base should taste quite sweet while warm).
- 2 tbsp Cornstarch: The essential thickening agent that creates the signature smooth, biteable chew.
- 1 tsp Pure Vanilla Extract: Rounds out the base with warm bakery aroma and melds the fruit flavorings together.
The Flavorings & Color:
- Powdered Drink Mixes / Flavorings (such as Kool-Aid, Tang, or Fruit Powders): 1 to 2 teaspoons per flavor batch (e.g., Cherry, Tropical Punch, Blue Raspberry, Orange, Grape, or Lemonade).
- (Optional Fresh Add-ins): Pureed fresh mango, mashed strawberries, shredded young coconut (buko), or chocolate drink powder (such as Milo or Nesquik).
Step-by-Step Instructions
1. Make the Cornstarch Slurry and Base
In a medium saucepan (off the heat), pour in the 2 cups of whole milk. Add the 2 tablespoons of cornstarch and whisk vigorously until the powder is completely dissolved with zero lumps.
Pour in the 1 cup of sweetened condensed milk and ½ cup of granulated sugar. Whisk thoroughly until the sugar granules begin to dissolve into the dairy.
2. Gently Thicken over Medium Heat
Place the saucepan over medium heat. Cook the mixture, stirring constantly with a whisk or silicone spatula, making sure to scrape the bottom and corners of the pan to prevent the cornstarch from sticking and scorching.
Cook for 6 to 8 minutes until the mixture begins to steam and visibly thickens into a consistency resembling warm, thin melted ice cream or light custard. Do not bring to a rolling, vigorous boil—keep it at a gentle simmer to preserve the delicate dairy fats.
3. Cool and Add Vanilla
Remove the saucepan from the heat source immediately. Stir in the 1 tsp pure vanilla extract.
Set the pan aside on the counter (or place the bottom of the pan into an ice-water bath) and allow the mixture to cool down to room temperature (approx. 15 to 20 minutes), stirring occasionally to prevent a skin from forming on top.
4. Divide and Mix Flavors
Once the base has cooled, divide the liquid evenly among 3 to 4 small mixing bowls or measuring pitchers, depending on how many distinct colors and flavors you want to create.
Stir ½ to 1 teaspoon of your chosen Kool-Aid or flavored powder into each bowl. Whisk thoroughly until the powder is completely dissolved and the color is bright, vibrant, and streak-free.
5. Fill the Ice Candy Bags
Fit a small, narrow funnel into the opening of an ice candy plastic sleeve.
Carefully pour the flavored milk mixture through the funnel, filling the bag until it is approximately three-quarters (75%) full (leaving about 2 to 3 inches of empty plastic space at the top for tying).
Gently tap the bag against the counter to dislodge any large air bubbles that may be trapped in the liquid.
6. Seal and Tie the Sleeves
- The Traditional Knot Method: Hold the top of the filled bag firmly right above the liquid line. Twist the empty plastic top tightly 3 or 4 times, wrap the twisted tail around your index finger to form a loop, and pull the end through the loop to form a tight, watertight knot.
- The Rubber Band Method: If manual knotting feels tricky, twist the top neck tightly and wrap a small elastic rubber band or mini zip-tie securely around the twisted plastic.
Repeat the filling and tying process until all the flavored milk bases are packed into neat tubes. Rinse the outside of the filled bags under a quick stream of cold water and pat dry with a kitchen towel to remove any sticky drips.
7. Freeze Until Solid
Arrange the filled ice candy sleeves in a flat, single layer on a baking tray or inside a shallow container.
Transfer to the freezer and chill for at least 6 to 8 hours, or ideally overnight, until frozen solid from end to end.
8. Serve and Enjoy
To eat, simply use clean kitchen scissors to snip off the top sealed corner or knot of the plastic sleeve, gently push the frozen candy up from the bottom with your fingers, and enjoy!
Master Tips for Perfect Ice Candy
- Never Boil the Dairy: Boiling sweetened condensed milk and fresh milk aggressively can cause milk proteins to curdle or create a burnt layer at the bottom of the pot. Cook over medium-low heat and stir constantly.
- The “Sweetness Rule” for Frozen Treats: Cold numbs the tastebuds on your tongue. If the warm liquid base tastes “just sweet enough,” it will taste bland and muted once frozen. Make sure the liquid base tastes slightly sweeter than normal before bagging.
- Leave Adequate Headspace: Liquids expand by about 9% when freezing. If you fill the plastic sleeves to the very brim, the expanding ice will split the plastic seams or pop the knots inside your freezer.
- Keep Sleeves Flat During Initial Freeze: Freezing the tubes flat on a tray ensures they freeze into uniform, straight cylinders that are easy to stack and store later.
Popular Flavor Variations
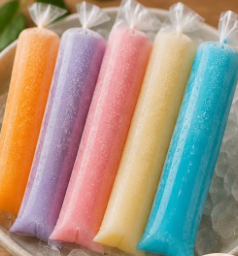
- Creamy Mango (Mango Float Ice Candy): Whisk ½ cup of smooth canned mango puree or blended ripe mango into the cooled base.
- Classic Chocolate Malt (Milo / Nesquik): Stir 3 tablespoons of Milo malt chocolate powder or Nesquik powder into a portion of the warm base until dissolved.
- Tropical Fruit Punch: Use Cherry or Strawberry Kool-Aid powder combined with a tiny splash of pineapple extract.
- Melon Cantaloupe: Use sweet melon drink powder and stir in a spoonful of very finely shredded fresh cantaloupe shreds before bagging.
- Buko Pandan (Coconut Pandan): Substitute 1 cup of whole milk with 1 cup of coconut milk, add ½ teaspoon of green pandan extract, and drop in tiny strips of young coconut meat.
Storage and Shelf Life
- Freezer Storage: Keep frozen ice candies sealed inside a large zip-top freezer bag or plastic tub in your freezer. This prevents them from absorbing stray freezer odors and protects the plastic from tearing.
- Shelf Life: Properly stored, homemade ice candies will keep their fresh, creamy texture for up to 2 to 3 months.