There is a distinct, undeniable difference between an ordinary chocolate cupcake and a true, bakery-style Double Chocolate Muffin. A proper chocolate muffin should not be an overly airy, frosted party cake masquerading as breakfast; it should boast a rich, tender crumb, a tall, domed, crackly top, and a deep cocoa intensity packed with gooey, melted chocolate chips in every bite.
Whether paired with a hot morning espresso, packed as an afternoon snack, or served warm as a late-night treat, these homemade chocolate muffins deliver pure cocoa comfort. Using everyday pantry staples, a single pair of mixing bowls, and zero electric mixers, this recipe produces twelve bakery-worthy muffins that stay moist and tender for days.
Recipe Overview
- Prep Time: 15 minutes
- Bake Time: 18 to 22 minutes
- Cooling Time: 15 minutes
- Total Time: ~45 minutes
- Yield: 12 standard-sized muffins (or 6 jumbo bakery muffins)
- Estimated Calories: ~285 kcal per muffin
- Skill Level: 100% Beginner-friendly
The Science of the Perfect Bakery Muffin
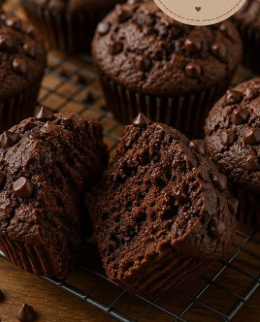
Understanding the simple baking chemistry behind this recipe ensures your muffins rise tall, develop a classic domed crown, and retain a soft crumb without turning dense or dry:
- The Two-Bowl “Muffin Method”: By whisking the dry and wet ingredients in separate bowls before combining them, you limit the total agitation of the flour. Overworking a muffin batter develops strong gluten networks, which creates rubbery textures and large, unpleasant air tunnels inside. A quick, gentle fold produces a delicate, tender crumb.
- Oil vs. Melted Butter:
- Vegetable Oil: Produces muffins with an exceptionally soft, long-lasting moisture level. Because oil remains 100% liquid at room temperature, muffins made with oil stay soft and tender even 3 to 4 days after baking.
- Melted Butter: Imparts that classic, rich dairy flavor and creates slightly crispier, golden-brown muffin crowns.
- The Baker’s Compromise: For the ultimate balance of flavor and moisture, you can use an equal split: ¼ cup melted unsalted butter paired with ¼ cup neutral vegetable oil.
- Balanced Chemical Leaveners: Using both baking powder and baking soda ensures maximum lift. Baking soda reacts immediately with the natural acids found in unsweetened cocoa powder and milk, creating early carbon dioxide expansion. Baking powder (which is double-acting) reacts first upon mixing and again when hit with oven heat, pushing the muffin batter upward to form a high, rounded muffin top.
- Double Chocolate Inclusions: Mixing chocolate chips directly into the batter provides pockets of melted chocolate throughout, while scattering a handful over the batter right before baking guarantees an artisan, bakery-window presentation.
Equipment Checklist
- Standard 12-cup muffin tin (or standard cupcake pan)
- 12 paper or silicone muffin liners (or non-stick baking spray)
- Large mixing bowl (for dry ingredients)
- Medium mixing bowl or 4-cup liquid measuring pitcher (for wet ingredients)
- Fine-mesh sifter
- Stainless steel balloon whisk
- Flexible silicone spatula
- Standard 3-tablespoon (¼ cup) cookie/ice cream scoop
- Wire cooling rack
Detailed Ingredient Breakdown
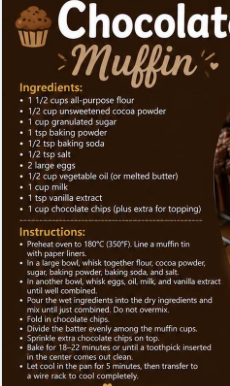
The Dry Essentials:
- 1 ½ cups (190g) All-Purpose Flour: Spooned and leveled. All-purpose flour provides the structural framework necessary to hold heavy chocolate chips suspended in the batter without them sinking to the bottom.
- ½ cup (50g) Unsweetened Cocoa Powder: Standard natural unsweetened cocoa powder (such as Hershey’s) or Dutch-processed cocoa powder. Natural cocoa provides a sharp, fruitier chocolate bite, while Dutch-processed yields a darker color and smoother, earthy chocolate flavor. Sifting is essential to remove stubborn lumps.
- 1 cup (200g) Granulated White Sugar: Sweetens the batter and acts as an essential tenderizer, locking in moisture as the starches bake.
- 1 tsp Baking Powder: Provides steady, thermal-activated leavening power.
- ½ tsp Baking Soda: Neutralizes the cocoa acidity and creates a tender crumb.
- ½ tsp Fine Sea Salt: A crucial pinch that cuts through the sweetness and elevates the rich cocoa flavors.
The Wet Emulsion:
- 2 Large Eggs: Brought to room temperature. Eggs provide moisture, structure, and emulsification, binding the fat and liquids together.
- ½ cup (120ml) Vegetable Oil (or Unsalted Butter, melted and cooled): Neutral oils like canola, sunflower, or vegetable oil yield the softest crumb.
- 1 cup (240ml) Whole Milk: Whole milk provides dairy fats and natural sugars that keep the crumb rich. (Buttermilk or room-temperature 2% milk can also be used).
- 1 tsp Pure Vanilla Extract: Enhances the depth of the cocoa base.
The Chocolate Pocket Add-Ins:
- 1 cup (175g) Semi-Sweet Chocolate Chips: Standard semi-sweet chips, dark chocolate chunks, or mini chips folded into the batter.
- 2 to 3 tbsp Extra Chocolate Chips: Reserved exclusively for pressing into the tops of the batter before baking for a picture-perfect finish.
Step-by-Step Instructions
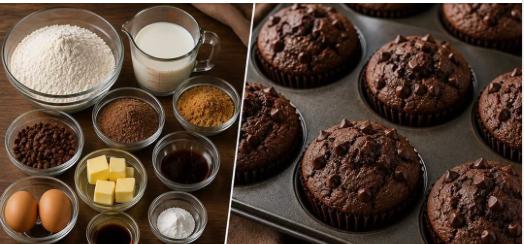
1. Set Up Your Oven and Pan
Preheat your oven to 350°F (180°C) with the baking rack positioned in the center.
Line a standard 12-cup muffin pan with paper liners. Alternatively, spray the muffin cups generously with non-stick baking spray with flour if baking directly in the pan.
2. Sift and Whisk the Dry Ingredients
Set a large fine-mesh sifter over your main mixing bowl. Add the 1 ½ cups of all-purpose flour, ½ cup unsweetened cocoa powder, 1 cup granulated sugar, 1 tsp baking powder, ½ tsp baking soda, and ½ tsp fine salt.
Sift everything directly into the bowl to break up cocoa clusters. Whisk thoroughly with a balloon whisk for 30 seconds to ensure the leavening agents and salt are evenly distributed throughout the flour.
3. Whisk the Wet Ingredients
In a separate medium mixing bowl, crack the 2 room-temperature eggs. Pour in the ½ cup vegetable oil (or melted, cooled butter), 1 cup whole milk, and 1 tsp pure vanilla extract.
Whisk vigorously for 1 full minute until the eggs are completely broken down and the mixture is smooth, pale, and emulsified.
4. Combine Wet and Dry (The Golden Rule)
Make a small well in the center of your dry ingredient bowl. Pour the wet egg-and-milk mixture all at once into the dry ingredients.
Using a flexible silicone spatula or wooden spoon, gently fold the batter together using broad, sweeping strokes from the bottom of the bowl up toward the center.
Mix only until the dry flour pockets just disappear (about 15 to 20 gentle strokes).
(Baker’s Note: The batter should look thick, slightly lumpy, and textured. Do not use an electric mixer or whisk here, and resist the temptation to stir until smooth—overmixing results in tough, peaked muffins).
5. Fold in the Chocolate Chips
Add the 1 cup of chocolate chips to the bowl. Gently fold them into the batter with 3 or 4 light turns of the spatula, distributing the chips evenly throughout the thick batter without overworking the gluten.
6. Portion the Batter
Using a large ice cream scoop or measuring cup, divide the batter evenly among the 12 muffin cups. Fill each cup approximately ¾ to ⅞ full (about ¼ cup of batter per cavity).
7. Crown with Extra Chocolate
Take the reserved 2 to 3 tablespoons of extra chocolate chips and scatter them generously over the surface of each unbaked muffin. Gently press a few chips into the top of the batter so they adhere as the muffins rise.
8. Bake to Perfection
Transfer the muffin tin to the center rack of your preheated oven. Bake at 350°F (180°C) for 18 to 22 minutes.
- Doneness Test: Insert a clean wooden toothpick or skewer into the center of a muffin (aiming for the cake portion, not a melted chocolate chip). The toothpick should emerge clean or with a few moist crumbs attached. If wet, liquid batter clings to the wood, bake for another 2 to 3 minutes.
9. Cool and Settle
Remove the muffin tin from the oven and set it on a heatproof wire cooling rack. Allow the muffins to rest and cool inside the pan for 5 minutes.
(Leaving them in the pan briefly allows the delicate hot crumb to firm up slightly without steaming the paper liners soggy).
Gently lift the muffins out of the pan and transfer them directly onto the wire cooling rack to cool completely, or serve them warm while the chocolate chips are still molten.
Baker’s Pro Secrets for Bakery-Style Tops
- Room-Temperature Dairy & Eggs: Cold milk and eggs will cause melted butter or oil to congeal and seize, creating uneven pockets in the batter. Take your dairy and eggs out of the fridge 30 minutes before baking.
- The High-Heat Rise Trick (Optional): For sky-high bakery domes, preheat your oven to 400°F (200°C). Bake the muffins at 400°F for the first 5 minutes to create a blast of initial steam that forces the batter upward rapidly, then lower the oven temperature to 350°F (180°C) for the remaining 13 to 15 minutes to finish baking the centers.
- Coffee Flavor Enhancer: Stirring ½ teaspoon of instant espresso powder into the dry ingredients will not impart coffee flavor; instead, it deepens and sharpens the chocolate profile.
Delicious Flavor Variations
- Triple Chocolate Crunch: Use a combination of ½ cup semi-sweet chips, ¼ cup white chocolate chips, and ¼ cup milk chocolate chips for contrasting chocolate pockets.
- Chocolate Peanut Butter: Fold ½ cup peanut butter chips and ½ cup semi-sweet chocolate chips into the batter, or drop a teaspoon of creamy peanut butter into the center of each muffin cup before baking.
- Nutty Cocoa Muffins: Fold ½ cup of chopped, toasted walnuts, pecans, or slivered almonds alongside the chocolate chips for an earthy crunch.
- Raspberry Chocolate: Gently fold ½ cup of fresh or frozen whole raspberries into the batter with the chocolate chips for a tart berry contrast.
Storage, Freezing, and Reheating
- Room Temperature Storage: Store completely cooled muffins in an airtight container lined with a single sheet of paper towel (the paper towel absorbs excess humidity and prevents sticky tops) for up to 4 days.
- Refrigeration: Avoid storing in the refrigerator, as the cold air can dry out the crumb faster.
- Freezer Storage: Wrap individual muffins tightly in plastic wrap, then place them into a heavy-duty freezer bag. Freeze for up to 3 months.
- Reheating: Thaw frozen muffins at room temperature for 1 hour, or warm a single muffin in the microwave on medium power for 15 to 20 seconds to restore that bakery-fresh, molten chocolate chip texture.