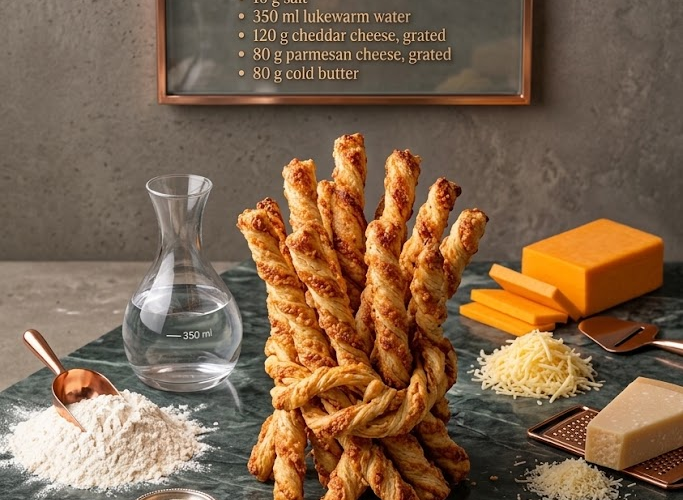
🧀🥨 Flaky Buttery Cheese Straws
Crisp, flaky, buttery, and packed with rich cheesy flavor, these homemade Cheese Straws are an irresistible savory snack that everyone will reach for.
Made with a simple yeast dough enriched with cold butter and a generous combination of sharp cheddar and Parmesan cheese, these golden cheese straws bake into beautifully layered twists with crisp edges and a tender, flavorful interior.
They’re perfect for party platters, afternoon snacks, holiday entertaining, soup sides, lunchboxes, or serving with your favorite dips.
⏱️ Recipe Information
- Prep Time: 25 minutes
- Resting Time: 1 hour
- Bake Time: 18–22 minutes
- Total Time: About 1 hour 45 minutes
- Yield: Approximately 20–24 cheese straws
- Difficulty: Easy–Intermediate
- Method: Oven-Baked
🛒 Ingredients
- 500 g plain flour
- 7 g instant yeast
- 10 g salt
- 350 ml lukewarm water
- 120 g cheddar cheese, grated
- 80 g Parmesan cheese, finely grated
- 80 g cold unsalted butter, cubed
Optional Toppings
- Extra grated Parmesan
- Sesame seeds
- Black sesame seeds
- Poppy seeds
- Dried oregano
- Chili flakes
- Freshly cracked black pepper
👩🍳 Instructions
🥣 Make the Dough
1. Combine the Dry Ingredients
Add the flour, instant yeast, and salt to a large mixing bowl.
Whisk or stir everything together until evenly combined.
Important:
Try to keep the yeast and salt from sitting directly on top of each other before mixing, as concentrated salt can affect yeast activity.
2. Add the Lukewarm Water
Gradually pour the lukewarm water into the dry ingredients.
Mix with a wooden spoon or dough hook until a rough dough forms.
The water should feel comfortably warm rather than hot.
Water that is too hot can damage the yeast.
3. Knead the Dough
Transfer the dough to a lightly floured work surface.
Knead for approximately 8–10 minutes, until smooth and elastic.
Alternatively, use a stand mixer fitted with a dough hook and knead on medium-low speed for approximately 5–7 minutes.
The dough should feel soft and slightly tacky but manageable.
🧈 Add the Butter and Cheese
4. Roll Out the Dough
Lightly flour your work surface.
Roll the dough into a large rectangle approximately ½ inch (1 cm) thick.
Try to keep the edges reasonably straight.
5. Add the Cold Butter
Scatter the cubes of cold butter evenly over the dough.
The butter should remain cold.
Cold butter helps create small flaky layers as the dough bakes.
6. Add the Cheese
Sprinkle the grated cheddar and Parmesan evenly over the butter.
Reserve a small handful of Parmesan if you’d like to sprinkle it over the finished cheese straws.
🥐 Create Flaky Layers
7. Fold the Dough
Fold the dough into thirds, similar to folding a business letter.
Bring one side toward the center.
Fold the opposite side over it.
This creates layers of dough, butter, and cheese.
8. Roll and Fold Again
Turn the folded dough 90 degrees.
Gently roll it into another rectangle.
Fold it into thirds again.
Repeat this rolling and folding process one more time.
Important:
Avoid rolling too aggressively. You want the butter to remain relatively cool and distributed in layers.
If the dough becomes very soft or sticky, place it in the refrigerator for 10–15 minutes before continuing.
⏲️ Let the Dough Rise
9. Rest the Dough
Place the dough in a lightly greased bowl.
Cover with plastic wrap or a clean kitchen towel.
Allow it to rest in a warm place for approximately 45–60 minutes, or until slightly puffy.
The dough does not necessarily need to double dramatically in size.
A gentle rise helps create a lighter texture.
🥨 Shape the Cheese Straws
10. Preheat the Oven
Preheat your oven to 400°F (200°C).
Line two baking sheets with parchment paper.
11. Roll Out the Dough
Transfer the rested dough to a lightly floured surface.
Roll it into a rectangle approximately ¼ inch (6 mm) thick.
Try to maintain an even thickness for consistent baking.
12. Cut Into Strips
Using a sharp knife or pizza cutter, cut the dough into strips approximately:
- ½–¾ inch (1.5–2 cm) wide
- 6–8 inches (15–20 cm) long
You can make them thinner for extra-crispy cheese straws or slightly wider for a softer center.
13. Twist the Strips
Pick up one strip.
Gently twist both ends in opposite directions to create a spiral shape.
Place it on the prepared baking sheet.
Repeat with the remaining strips.
Leave a little space between each straw because they may expand slightly during baking.
🧀 Add Optional Toppings
14. Garnish
If desired, lightly brush the tops with a little water.
Sprinkle with:
- Extra Parmesan
- Sesame seeds
- Black sesame seeds
- Oregano
- Chili flakes
- Freshly cracked black pepper
The toppings add extra flavor and a beautiful bakery-style finish.
🔥 Bake
15. Bake Until Golden
Bake at 400°F (200°C) for approximately 18–22 minutes.
The cheese straws are ready when:
- The edges are golden brown.
- The cheese is deeply golden.
- The surface is crisp.
- The bottoms are lightly browned.
Rotate the baking sheets halfway through baking if your oven has uneven heat.
❄️ Cool
16. Allow Them to Cool
Remove the cheese straws from the oven.
Allow them to cool on the baking sheet for approximately 5 minutes.
Transfer them to a wire rack.
They will become even crispier as they cool.
🍽️ Serve
17. Enjoy
Serve the cheese straws warm or at room temperature.
They’re delicious on their own or paired with your favorite dips.
🥣 Delicious Serving Ideas
Serve your Flaky Buttery Cheese Straws with:
- Tomato soup
- Creamy vegetable soup
- Marinara sauce
- Garlic dip
- Ranch dressing
- Spicy cheese dip
- Hummus
- Spinach dip
They also make a wonderful addition to:
- Cheese boards
- Party platters
- Holiday snack tables
- Brunch spreads
👩🍳 Chef’s Tips
Keep the Butter Cold
Cold butter is essential for creating flaky layers. If the butter melts into the dough before baking, the final texture will be less flaky.
Grate Your Own Cheese
Freshly grated cheddar generally melts better and provides stronger flavor than pre-shredded cheese.
Don’t Add Too Much Flour
Use only enough flour to prevent sticking. Too much extra flour can make the dough dry and tough.
Don’t Overwork the Dough
Overworking the dough can make the butter blend completely into the dough and reduce the flaky texture.
Chill if Necessary
If your kitchen is warm and the dough feels soft, refrigerate it briefly before shaping.
Watch Them Near the End
Cheese can brown quickly. Start checking the straws a few minutes before the suggested baking time is finished.
🌶️ Delicious Variations
🌶️ Spicy Cheese Straws
Add ½–1 teaspoon chili flakes or cayenne pepper to the dough.
🧄 Garlic Cheese Straws
Mix 1 teaspoon garlic powder into the flour.
Sprinkle with extra Parmesan before baking.
🌿 Herb Cheese Straws
Add 1–2 teaspoons dried Italian herbs, oregano, rosemary, or thyme.
🖤 Black Pepper Parmesan Straws
Add 1 teaspoon freshly cracked black pepper and increase the Parmesan for a bold, savory flavor.
🧀 Extra-Cheesy Straws
Use additional cheddar and Parmesan between the layers and sprinkle extra cheese over the tops before baking.
🥡 Storage
Allow the cheese straws to cool completely.
Store them in an airtight container at room temperature for up to 2 days.
For longer storage, refrigerate for up to 5 days.
Keep in mind that refrigeration may soften their crisp texture.
🔥 How to Re-Crisp
If the cheese straws soften during storage, place them on a baking sheet.
Bake at 350°F (175°C) for approximately 5–7 minutes.
Allow them to cool for a few minutes before serving.
They should become crisp again.
❄️ Freezing
The shaped, unbaked cheese straws can be frozen.
Arrange them on a parchment-lined tray and freeze until firm.
Transfer them to a freezer-safe container or bag.
Freeze for up to 2 months.
Bake directly from frozen, adding approximately 3–5 extra minutes to the baking time.
⭐ Final Result
These Flaky Buttery Cheese Straws combine golden crisp layers, rich cold butter, sharp cheddar, and savory Parmesan into one completely addictive snack.
Each twist is wonderfully flaky on the outside, tender inside, buttery, cheesy, and packed with irresistible savory flavor.
Golden. Flaky. Buttery. Cheesy. The perfect homemade snack! 🧀🥨✨