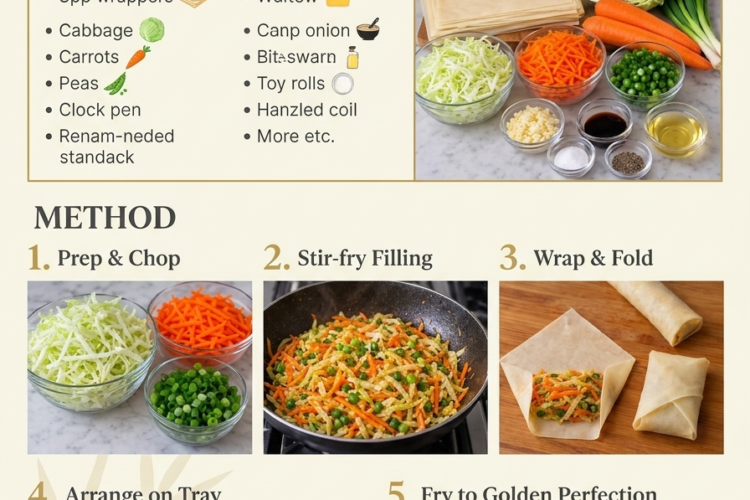
🥢 Crispy Vegetable Spring Rolls – Golden, Crunchy & Packed with Fresh Vegetables
Golden, shatteringly crisp on the outside and filled with deliciously seasoned vegetables on the inside! 🥕🥬
These homemade Crispy Vegetable Spring Rolls are the perfect combination of crunchy pastry and savory vegetable filling. Shredded cabbage, sweet carrots, tender green beans, and fresh spring onions come together with garlic and a flavorful seasoning for a delicious snack that tastes even better when made fresh at home.
Each spring roll is wrapped in a thin pastry sheet and fried until beautifully golden, creating a crispy shell that gives way to a colorful, tender vegetable filling. Serve them with sweet chili sauce, soy dipping sauce, or your favorite homemade dip for an irresistible appetizer.
They’re perfect for family gatherings, parties, lunchboxes, or as a side dish alongside fried rice and noodles. You can also prepare them ahead and freeze them, making it easy to enjoy crispy homemade spring rolls whenever the craving strikes!
Recipe Details
- Prep Time: 25 minutes
- Cook Time: 20 minutes
- Total Time: 45 minutes
- Yield: Approximately 15–20 spring rolls, depending on wrapper size
- Course: Appetizer, Snack, Side Dish
- Cuisine: Asian-inspired
- Difficulty: Easy to Moderate
- Cooking Method: Stovetop, deep-frying
Ingredients
For the Vegetable Filling
- 2 cups shredded cabbage (180 g)
- 1 cup grated or julienned carrots (120 g)
- 1 cup chopped green beans (100 g)
- ½ cup chopped spring onions (50 g)
- 2 cloves garlic, finely minced
- 1 tablespoon neutral cooking oil
- 1 tablespoon soy sauce
- ½ teaspoon ground black pepper
- ½ teaspoon salt, or to taste
- 1 teaspoon sesame oil, optional
- 1 teaspoon grated fresh ginger, optional
For Wrapping
- 15–20 spring roll wrappers, thawed if frozen
- 2 tablespoons all-purpose flour
- 2–3 tablespoons water, for making the sealing paste
For Frying
- Neutral oil, such as sunflower, canola, or vegetable oil, enough for a depth of approximately 2 inches (5 cm)
For Serving
- Sweet chili sauce
- Soy dipping sauce
- Garlic chili sauce
- Sweet-and-sour sauce
- Fresh spring onions or sesame seeds, optional
Ingredient note: Your original ingredient list includes the cabbage, carrots, green beans, and spring onions. The seasonings, wrappers, sealing paste, and frying oil above are suggested additions to complete the recipe.
Instructions
Step 1: Prepare the Vegetables
Wash the cabbage, carrots, green beans, and spring onions thoroughly.
Shred the cabbage into thin strips, grate or julienne the carrots, chop the green beans into small pieces, and finely slice the spring onions.
Mince the garlic and grate the optional ginger.
Try to keep the vegetables relatively uniform in size. Smaller pieces are easier to wrap and distribute more evenly throughout the filling.
Helpful tip: After washing, dry the vegetables well. Excess moisture can make the filling watery and prevent the spring rolls from becoming properly crisp.
Step 2: Cook the Green Beans
Bring a small saucepan of water to a boil.
Add the chopped green beans and cook for approximately 2–3 minutes, just until they become slightly tender but still retain some firmness.
Drain thoroughly and spread them on a clean plate or tray to cool.
You can skip this step if your green beans are cut very finely, but briefly blanching them helps ensure they’re tender inside the finished spring rolls.
Step 3: Sauté the Garlic and Ginger
Heat 1 tablespoon of oil in a large skillet or wok over medium-high heat.
Add the minced garlic and optional ginger. Stir-fry for approximately 20–30 seconds, until fragrant.
Avoid letting the garlic brown too much, as burnt garlic can make the filling taste bitter.
Step 4: Add the Vegetables
Add the cabbage, carrots, and blanched green beans to the skillet.
Stir-fry for approximately 3–5 minutes, tossing frequently until the vegetables soften slightly while retaining some texture.
Add the spring onions during the final minute of cooking.
The filling should be tender but not mushy. Because the spring rolls will cook again during frying, there’s no need to cook the vegetables completely soft at this stage.
Step 5: Season the Filling
Add the soy sauce, black pepper, and salt gradually.
Stir everything together until the vegetables are evenly coated with the seasonings.
If using sesame oil, add it toward the end for extra aroma.
Taste the filling and adjust the seasoning if necessary. Remember that soy sauce is already salty, so add extra salt sparingly.
Remove the skillet from the heat.
Step 6: Cool the Filling Completely
Transfer the cooked vegetables to a shallow plate or tray and spread them into a thin layer.
Allow the filling to cool completely before assembling the spring rolls.
This is an important step. Warm filling can create steam inside the wrapper, making the pastry sticky or difficult to seal. Excess heat can also cause the wrappers to tear.
If the filling appears wet, let it cool uncovered for a few minutes so excess moisture can evaporate.
Step 7: Prepare the Sealing Paste
In a small bowl, combine the flour and water.
Stir until the mixture forms a smooth, thick paste.
This simple paste acts like edible glue and helps keep the spring rolls securely sealed during frying.
Set the paste beside your work surface along with the cooled filling and spring roll wrappers.
Step 8: Fill the Spring Roll Wrappers
Place one spring roll wrapper on a clean, dry surface in a diamond shape, with one corner pointing toward you.
Spoon approximately 1–2 tablespoons of the cooled vegetable filling onto the lower third of the wrapper, forming a compact horizontal strip.
Avoid overfilling, as too much filling makes the rolls difficult to wrap and more likely to burst during frying.
Fold the bottom corner up and over the filling.
Fold the left and right corners toward the center, creating a neat envelope shape.
Roll the wrapper upward tightly but gently, keeping the filling enclosed without tearing the pastry.
Brush the final corner with a small amount of the flour paste, then press firmly to seal.
Repeat with the remaining wrappers and filling.
Step 9: Keep the Prepared Rolls Covered
Arrange the wrapped spring rolls in a single layer on a clean tray.
Cover them loosely with a clean kitchen towel while you finish assembling the batch.
This prevents the wrappers from drying out and cracking before they reach the oil.
If preparing a large quantity, avoid stacking the uncooked spring rolls directly on top of one another because they may stick together.
Step 10: Heat the Oil
Pour the frying oil into a deep, heavy-bottomed pot, filling it no more than halfway.
Heat the oil to 350°F (175°C), using a kitchen thermometer for the most consistent results.
The oil should be hot enough to crisp the wrappers quickly without burning them before the filling is heated through.
If the oil is too cool, the spring rolls may absorb too much oil and become greasy. If it is too hot, the wrappers may brown too quickly.
Safety tip: Never leave hot oil unattended. Keep water away from the frying area and lower the spring rolls carefully to prevent splashing.
Step 11: Fry Until Golden and Crispy
Carefully add 3–4 spring rolls to the hot oil, depending on the size of your pot.
Do not overcrowd the pot, as this lowers the oil temperature and can lead to uneven browning.
Fry for approximately 3–5 minutes, turning occasionally, until the wrappers become golden brown and crisp.
The exact time depends on the wrapper thickness, size of the rolls, and oil temperature.
Adjust the heat as needed to maintain a steady temperature around 350°F (175°C).
Step 12: Drain and Cool Slightly
Using a slotted spoon or kitchen spider, remove the spring rolls from the oil.
Place them on a wire rack set over a tray, or on a plate lined with paper towels, to drain excess oil.
Allow them to cool for a few minutes before serving. The wrappers will continue to crisp as they cool slightly.
Repeat with the remaining spring rolls, allowing the oil to return to temperature between batches.
Step 13: Serve with Your Favorite Dipping Sauce
Arrange the golden spring rolls on a serving platter.
Garnish with finely chopped spring onions or sesame seeds if desired.
Serve immediately with sweet chili sauce, soy dipping sauce, garlic chili sauce, or sweet-and-sour sauce.
Enjoy the satisfying crunch of the wrapper and the savory, colorful vegetables inside! 🥢🥕🥬
Expert Tips for Perfect Crispy Spring Rolls
Remove excess moisture from the filling. Watery vegetables can make the wrappers soggy or cause them to split during frying. Cook the filling briefly and allow it to cool completely.
Don’t overcook the vegetables. A short stir-fry preserves their color and texture, keeping the filling pleasantly tender rather than mushy.
Use cooled filling. This makes wrapping much easier and prevents steam from softening the wrappers prematurely.
Keep the wrappers covered. Spring roll wrappers dry out quickly when exposed to air. Cover any unused wrappers while assembling.
Roll tightly, but don’t stretch the wrapper. A neat, compact roll helps prevent air pockets and reduces the chance of the wrapper bursting.
Seal the edges securely. A little flour paste is usually enough to keep the final corner closed.
Maintain the oil temperature. Frying at around 350°F (175°C) helps produce crisp, golden wrappers without excessive oil absorption.
Fry in small batches. Crowding the pot cools the oil and makes the spring rolls less crisp.
Drain on a wire rack for extra crispness. A rack allows air to circulate around the rolls. Paper towels work too, but avoid letting the rolls sit in pooled oil.
Serve fresh. Spring rolls are at their crispiest immediately after frying.
Delicious Variations
🍄 Vegetable and Mushroom Spring Rolls
Add ½ cup finely chopped mushrooms to the filling. Sauté them until their moisture evaporates before adding the other vegetables.
🥬 Cabbage and Glass Noodle Spring Rolls
Add a small handful of cooked, chopped glass noodles. They absorb the seasonings and give the filling a more substantial texture.
🌶️ Spicy Vegetable Spring Rolls
Add finely chopped green chili or ½ teaspoon chili flakes to the filling. Serve with hot chili sauce for an extra kick.
🥕 Sweet and Savory Vegetable Rolls
Add a small amount of finely shredded bell pepper and a pinch of sugar to balance the savory soy sauce.
🧄 Garlic Sesame Spring Rolls
Increase the garlic slightly and add a teaspoon of sesame seeds to the filling. Finish with sesame seeds over the serving platter.
🍗 Vegetable and Chicken Spring Rolls
Add approximately 1 cup finely shredded cooked chicken. Mix it with the vegetables and seasonings, making sure the chicken was cooked and handled safely before use.
🧀 Cheesy Vegetable Spring Rolls
Add a modest amount of shredded mozzarella or cheddar to the cooled filling. Use less than you might expect to prevent the cheese from escaping during frying.
🌱 Vegan Vegetable Spring Rolls
The basic filling is naturally plant-based. Use vegetable oil and check that your spring roll wrappers and dipping sauces are free from animal-derived ingredients if you’re preparing a vegan version.
🥟 Air-Fryer Spring Rolls
Brush or spray the assembled spring rolls lightly with oil. Place them in a single layer in an air fryer preheated to 375°F (190°C).
Cook for approximately 8–12 minutes, turning halfway through, until golden and crisp. Cooking time varies with the wrapper, filling, and appliance, so check early.
The texture will be somewhat different from deep-fried spring rolls, but this method uses less oil.
What to Serve with Crispy Vegetable Spring Rolls
These spring rolls are versatile enough to serve as a starter, snack, or side dish.
- Sweet chili sauce: Sweet, tangy, and slightly spicy.
- Soy-ginger dipping sauce: A savory accompaniment with a fresh ginger kick.
- Garlic chili sauce: Perfect for anyone who enjoys spicy flavors.
- Sweet-and-sour sauce: A classic pairing for crispy vegetable appetizers.
- Vegetable fried rice: Turns the spring rolls into a more substantial meal.
- Stir-fried noodles: A delicious combination for an Asian-inspired dinner.
- Asian cucumber salad: Refreshing and crunchy, with a tangy dressing.
- Hot and sour soup: A warming starter that complements the crispy pastry.
For an appetizer platter, arrange the spring rolls around small bowls of sweet chili sauce, soy sauce, and garlic chili dip.
Make-Ahead Instructions
Spring rolls are especially convenient for parties because you can prepare the filling and assemble the rolls ahead of time.
Prepare the filling in advance: Cook the vegetables, allow them to cool completely, and refrigerate in a covered container for up to 24 hours.
Assemble before the party: Wrap the spring rolls shortly before cooking. Keep the prepared rolls covered and refrigerated if they will not be fried promptly.
Best option for a large gathering: Freeze the uncooked spring rolls in advance, then fry or air-fry them when needed.
How to Freeze Uncooked Spring Rolls
- Assemble the spring rolls and seal them securely.
- Arrange them in a single layer on a parchment-lined tray.
- Freeze until firm, usually around 1–2 hours.
- Transfer to a freezer-safe container or bag, separating layers with parchment.
- Freeze for up to 2 months for best quality.
For best results, fry directly from frozen in small batches, lowering the rolls carefully into the oil and adjusting the cooking time as needed. Make sure they’re golden and crisp and the filling is heated thoroughly. Avoid overcrowding the pot.
Storage and Reheating
Refrigerator
Allow cooked spring rolls to cool slightly, then refrigerate them in an airtight container within 2 hours.
Store at 40°F (4°C) or below and consume within 3–4 days.
The wrappers will soften during refrigeration, but they can regain some crispness when reheated.
Reheating in the Oven
Preheat the oven to 375°F (190°C).
Place the spring rolls on a baking sheet or wire rack and heat for approximately 8–12 minutes, turning once if needed, until hot and crisp.
Reheating in the Air Fryer
Arrange the rolls in a single layer and heat at 350°F (175°C) for approximately 4–7 minutes, checking frequently.
Avoid overcrowding so air can circulate around each roll.
Reheating in the Microwave
Microwaving is possible, but it makes the wrappers softer rather than crisp. Heat in short intervals until hot throughout, then finish in an oven or air fryer if you want to restore the crunch.
Can You Freeze Cooked Spring Rolls?
Yes, although uncooked frozen spring rolls generally give better results.
If freezing cooked rolls, cool them completely, arrange them in a single layer until firm, then transfer them to a freezer-safe container. Freeze for up to 2 months for best quality and reheat from frozen in an oven or air fryer until hot and crisp.
Frequently Asked Questions
Why are my spring rolls not crispy?
The wrappers may have been too wet, the filling may have released excess moisture, or the oil temperature may have been too low. Dry the vegetables well, cool the filling completely, and maintain the correct frying temperature.
Why did my spring rolls burst while frying?
They may have been overfilled, rolled loosely, or sealed poorly. Use a moderate amount of filling, roll tightly, and seal the final corner with flour paste.
Can I use frozen vegetables?
Yes, but thaw them completely and drain away excess liquid. Pat them dry and stir-fry until the remaining moisture evaporates before assembling the spring rolls.
Can I skip precooking the vegetables?
It’s possible, especially if the vegetables are cut very finely, but precooking is recommended. It removes excess moisture, softens the filling, and helps the ingredients cook evenly.
What can I use instead of spring roll wrappers?
Rice paper can be used for a different style of roll, but it behaves differently and may not produce the same flaky, crispy shell. Follow the instructions for the specific wrapper you use.
Are these spring rolls suitable for vegetarians?
Yes. The suggested vegetable filling is vegetarian. Check the wrapper ingredients and dipping sauces to ensure they meet your dietary requirements.
How do I stop the wrappers from drying out?
Keep the unused wrappers covered with a clean, slightly damp kitchen towel or their original packaging according to the package instructions. Avoid letting them sit uncovered for long periods.
Can I prepare these spring rolls without deep-frying?
Yes. Brush them lightly with oil and bake or air-fry until golden and crisp. The final texture will differ from deep-frying, but the spring rolls will still be delicious.
Can I make the filling ahead?
Yes. Cook and cool the filling, then refrigerate it in an airtight container for up to 24 hours. Make sure it is completely cold before wrapping the spring rolls.
What’s the best dipping sauce?
Sweet chili sauce is an excellent all-purpose option because its sweetness and gentle heat complement the savory vegetables. Soy-ginger sauce is a good alternative if you prefer a more savory dip.
Estimated Nutrition Information
Approximate nutrition per spring roll, assuming 18 rolls and including a modest amount of frying oil absorbed:
- Calories: 90–130
- Protein: 2–3 g
- Carbohydrates: 12–17 g
- Fat: 4–7 g
- Fiber: 1–2 g
- Sodium: 150–300 mg
These are estimates and vary depending on the wrapper brand, the amount of oil absorbed, the filling size, and the dipping sauce served alongside.
Final Thoughts
Crispy Vegetable Spring Rolls are a delicious way to turn everyday vegetables into a crowd-pleasing snack. The colorful cabbage, carrots, green beans, and spring onions create a flavorful filling, while the thin wrapper transforms into a beautiful golden shell when fried.
For the best results, keep the filling dry and cool, wrap each roll tightly, seal the edges securely, and maintain the right oil temperature.
Serve them hot with your favorite dipping sauces for a snack or appetizer everyone will love. Make a batch fresh, freeze some for later, and enjoy the satisfying crunch of homemade spring rolls whenever the craving strikes! 🥢🥕🥬