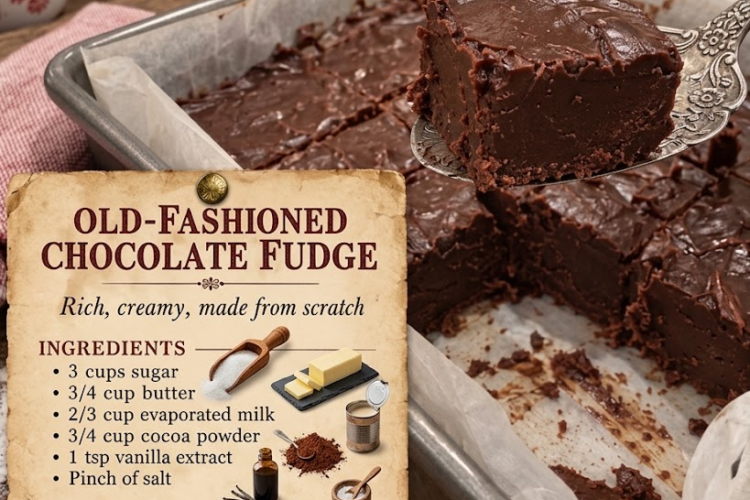
🍫 Old-Fashioned Chocolate Fudge
Rich, chocolatey, buttery, and perfectly firm, this Old-Fashioned Chocolate Fudge is a classic homemade candy made with simple pantry ingredients.
This traditional fudge has the deep chocolate flavor and smooth, slightly crumbly texture that makes old-fashioned fudge so irresistible. The secret is cooking the sugar mixture to the proper temperature and allowing it to cool before beating it to a creamy, thick consistency.
Perfect for holidays, gifting, cookie trays, or simply keeping a batch on hand whenever a chocolate craving strikes.
⏱️ Recipe Information
Prep Time: 10 minutes
Cook Time: 10–15 minutes
Cooling & Setting Time: 2–3 hours
Total Time: About 3 hours 30 minutes
Yield: 24–36 pieces
Difficulty: Easy–Intermediate
Method: Stovetop
🛒 Ingredients
- 3 cups (600 g) granulated sugar
- ¾ cup (170 g) unsalted butter
- ⅔ cup (160 ml) evaporated milk
- ¾ cup (64 g) unsweetened cocoa powder
- 1 teaspoon vanilla extract
- Pinch of salt
Optional Add-Ins
- 1 cup (120 g) chopped walnuts or pecans
- ½ cup (85 g) mini chocolate chips, stirred in after cooling
- Flaky sea salt, for sprinkling
👩🍳 Instructions
1. Prepare the Pan
Line an 8-inch or 9-inch square baking pan with parchment paper, leaving some overhang on two sides for easy removal.
Lightly butter the parchment and set the pan aside.
2. Combine the Dry Ingredients
In a medium heavy-bottomed saucepan, whisk together the sugar, cocoa powder, and salt.
Whisking the cocoa into the sugar first helps distribute it evenly and reduces the chance of cocoa lumps.
3. Add the Butter and Evaporated Milk
Add the butter and evaporated milk to the saucepan.
Place the pan over medium heat.
Stir continuously with a wooden spoon or heat-resistant spatula until the butter has melted and the mixture is smooth.
4. Bring the Mixture to a Boil
Continue heating until the mixture reaches a full, steady boil.
Once it begins boiling, stop stirring constantly.
Attach a candy thermometer to the side of the saucepan if using one.
5. Cook to the Soft-Ball Stage
Continue cooking until the mixture reaches 234–238°F (112–114°C).
This is the classic soft-ball stage needed for fudge.
The mixture will become thicker and noticeably glossy.
Avoid scraping the sides of the pan while the mixture is boiling, as sugar crystals can affect the texture.
Important: Do not rely solely on cooking time. Temperature is the most reliable indicator that the fudge is ready.
6. Remove from the Heat
Immediately remove the saucepan from the heat.
Add the vanilla extract and stir gently just until incorporated.
Do not beat the fudge yet.
7. Let the Fudge Cool
Allow the mixture to cool undisturbed until it reaches approximately 110°F (43°C).
This can take around 20–30 minutes.
Do not stir during this cooling stage.
Cooling before beating helps control the formation of sugar crystals and gives the fudge its characteristic smooth texture.
8. Beat the Fudge
Once cooled, beat the mixture vigorously with a wooden spoon or electric mixer on low-to-medium speed.
Continue beating until the fudge becomes thicker, lighter, and loses some of its glossy appearance.
This usually takes approximately 5–8 minutes by hand, or 2–4 minutes with an electric mixer.
If you’re adding chopped nuts, fold them in at this stage.
9. Transfer to the Pan
Immediately spread the thickened fudge into the prepared pan.
Use a spatula to press it evenly into the corners and smooth the surface.
If desired, sprinkle the top with chopped nuts or a small pinch of flaky sea salt.
10. Let It Set
Allow the fudge to cool completely at room temperature.
Once firm, refrigerate for 1–2 hours for cleaner cuts.
11. Cut and Serve
Lift the fudge from the pan using the parchment-paper overhang.
Place it on a cutting board and use a sharp knife to cut it into 24–36 squares, depending on your preferred size.
For especially clean cuts, warm the knife under hot water, dry it thoroughly, and slice.
Repeat between cuts.
⭐ Chef’s Tips
Use a candy thermometer
Getting the sugar mixture to the correct temperature is the most important step. Under-cooking can leave the fudge too soft, while over-cooking can make it dry or crumbly.
Don’t stir while boiling
Once the mixture reaches a full boil, minimize stirring. This helps prevent unwanted sugar crystallization.
Let it cool before beating
The cooling stage is essential. Beating the mixture while it’s still too hot can produce a grainy or overly soft fudge.
Beat until the shine disappears
The fudge should become noticeably thicker and lose much of its glossy appearance before you transfer it to the pan.
Work quickly
Once the fudge reaches the proper consistency, it sets quickly. Have your lined pan ready before you begin beating.
🍫 Easy Variations
Walnut Chocolate Fudge
Fold 1 cup chopped walnuts into the fudge just before spreading it into the pan.
Pecan Fudge
Use toasted chopped pecans for a rich, buttery variation.
Sea Salt Chocolate Fudge
Sprinkle the finished fudge with flaky sea salt before it sets.
Mocha Fudge
Add 1 teaspoon instant espresso powder along with the cocoa powder.
Chocolate Marshmallow Fudge
Fold in 1 cup mini marshmallows after the fudge has cooled and thickened slightly.
Peanut Butter Swirl Fudge
Warm ¼ cup creamy peanut butter and swirl it over the top of the fudge before it sets.
🎁 Serving Ideas
This fudge is perfect for:
- Holiday dessert trays
- Christmas candy boxes
- Homemade edible gifts
- Potlucks
- Cookie exchanges
- Afternoon coffee
- Chocolate dessert boards
Place individual pieces in mini paper candy cups for an easy homemade gift presentation.
🧊 Storage
Store the fudge in an airtight container at cool room temperature for up to 1 week.
For longer storage, refrigerate for up to 2–3 weeks.
Place parchment or wax paper between layers to prevent the pieces from sticking together.
Allow refrigerated fudge to sit at room temperature for a few minutes before serving for the best texture.
❄️ Freezing
Wrap the fudge tightly in plastic wrap, then place it inside a freezer-safe airtight container or bag.
Freeze for up to 3 months.
Thaw overnight in the refrigerator, then bring to room temperature before serving.
🍫✨ Final Result
This Old-Fashioned Chocolate Fudge delivers everything you want from a classic homemade candy: deep cocoa flavor, rich buttery sweetness, a smooth yet slightly crumbly texture, and beautifully clean-cut squares.
With just a handful of simple ingredients and the right cooking temperature, you can make a timeless chocolate treat that’s perfect for sharing—or keeping all to yourself. ❤️🍫