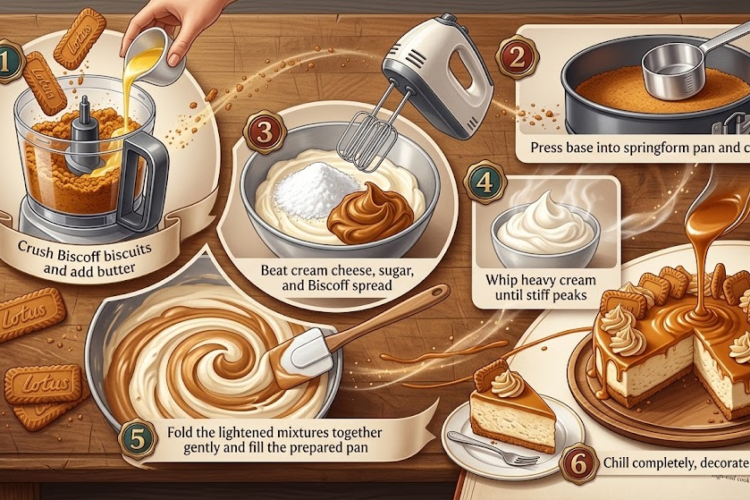
🍰 No-Bake Biscoff Cheesecake
This No-Bake Biscoff Cheesecake is an effortless dessert that’s creamy, luxurious, and packed with the warm caramelized flavor of Biscoff cookies. A crisp buttery Biscoff crust is topped with a smooth cheesecake filling made with cream cheese, powdered sugar, Biscoff spread, and whipped cream.
Finished with a glossy layer of melted Biscoff spread and plenty of crunchy biscuits, this cheesecake makes a beautiful showstopping dessert for birthdays, holidays, dinner parties, and special occasions—without turning on the oven.
Recipe Information
- Prep Time: 25 minutes
- Chilling Time: 6 hours
- Total Time: About 6 hours 25 minutes
- Servings: 10–12 slices
- Difficulty: Easy
- Method: No-bake
- Pan: 8-inch (20 cm) springform pan
Ingredients
For the Biscoff Biscuit Base
- 250 g Biscoff biscuits, finely crushed
- 60 g unsalted butter, melted
For the Cheesecake Filling
- 500 g cream cheese, softened to room temperature
- 1 cup (115–120 g) powdered sugar, sifted
- 2 tablespoons Biscoff spread
- 2 cups (480 ml) cold heavy whipping cream
- 1 teaspoon vanilla extract
- Pinch of salt
For the Topping & Decoration
- ½–¾ cup Biscoff spread, as needed
- 4–6 Biscoff biscuits, for decoration
- Optional: extra crushed Biscoff biscuits for sprinkling
Instructions
1. Prepare the Pan
Line the bottom of an 8-inch (20 cm) springform pan with parchment paper.
For especially neat sides, lightly grease the inside of the pan or add a strip of parchment around the edge.
Set aside.
2. Make the Biscoff Base
Place the Biscoff biscuits in a food processor and pulse until they become very fine crumbs.
Alternatively, place them in a zip-top bag and crush them thoroughly with a rolling pin.
Transfer the crumbs to a bowl and pour in the melted butter.
Mix until all the crumbs are evenly coated and the mixture resembles wet sand.
3. Press the Crust Into the Pan
Pour the biscuit mixture into the prepared springform pan.
Using the bottom of a flat glass, measuring cup, or the back of a spoon, press the crumbs firmly and evenly across the bottom.
Pay particular attention to the edges so the crust doesn’t crumble when sliced.
Refrigerate the crust for at least 20–30 minutes while preparing the filling.
4. Prepare the Cream Cheese Mixture
Place the softened cream cheese in a large mixing bowl.
Beat with an electric mixer on medium speed until smooth and creamy.
Add the sifted powdered sugar, Biscoff spread, vanilla extract, and pinch of salt.
Beat again until completely smooth and evenly combined.
Scrape down the sides of the bowl as needed.
5. Whip the Cream
Pour the cold heavy whipping cream into a separate chilled bowl.
Beat on medium-high speed until medium-stiff peaks form.
The whipped cream should hold its shape but still look smooth and creamy. Avoid overwhipping, as it can make the finished cheesecake grainy.
6. Combine the Filling
Add about one-third of the whipped cream to the cream cheese mixture.
Gently fold it in to loosen the mixture.
Add the remaining whipped cream in two additions, folding carefully with a spatula until no white streaks remain.
Do not vigorously stir, as you want to keep as much air in the whipped cream as possible.
7. Fill the Cheesecake
Remove the chilled biscuit base from the refrigerator.
Spoon the cheesecake filling over the crust.
Spread the top with an offset spatula or the back of a spoon, smoothing it into an even layer.
Gently tap the pan on the counter once or twice to release any large air pockets.
8. Chill Until Firm
Cover the cheesecake loosely and refrigerate for at least 6 hours, preferably overnight.
The cheesecake needs enough time to set properly. For the cleanest slices and firmest texture, overnight chilling is ideal.
9. Prepare the Biscoff Topping
Place the Biscoff spread in a microwave-safe bowl.
Warm it in 10–15 second intervals, stirring between each interval, until it becomes smooth and pourable.
Do not overheat it—the goal is simply to loosen the spread.
10. Decorate the Cheesecake
Remove the fully chilled cheesecake from the refrigerator.
Pour the melted Biscoff spread over the center and gently spread it toward the edges, allowing a few attractive drips to run down the sides if desired.
Return the cheesecake to the refrigerator for 10–15 minutes to allow the topping to firm slightly.
11. Finish With Biscoff Biscuits
Just before serving, decorate the cheesecake with whole Biscoff biscuits.
You can arrange them around the edge, stand them upright in the center, or place smaller pieces on top.
For extra texture, sprinkle crushed Biscoff crumbs over the surface.
12. Slice and Serve
Carefully release the cheesecake from the springform pan.
For clean slices, dip a sharp knife into hot water, wipe it dry, and slice. Clean and rewarm the knife between cuts.
Serve chilled.
Chef’s Tips
- Use full-fat cream cheese: It produces a richer and more stable cheesecake.
- Soften the cream cheese: Room-temperature cream cheese blends much more smoothly.
- Keep the whipping cream cold: Cold cream whips faster and holds its structure better.
- Don’t overwhip the cream: Stop once medium-stiff peaks form.
- Fold gently: This keeps the filling light and airy.
- Chill thoroughly: A minimum of 6 hours is important for a cheesecake that slices cleanly.
- For sharp slices: Chill overnight and use a warm, dry knife.
- Don’t overheat the Biscoff spread: Excessive heat can make the topping oily or runny.
Optional Extra-Biscoff Layer
For an even more indulgent cheesecake, spread ⅓–½ cup Biscoff spread over the chilled biscuit base before adding the cheesecake filling.
This creates a delicious surprise layer of soft Biscoff in the center.
Variations
Mini Biscoff Cheesecakes
Make the recipe in a muffin tin lined with cupcake liners. Press a small amount of crust into each cup and divide the filling among them. Chill until firm.
Chocolate Biscoff Cheesecake
Add 2–3 tablespoons of cocoa powder to the biscuit crumbs or drizzle melted chocolate over the finished cheesecake.
Salted Biscoff Cheesecake
Add a small pinch of flaky sea salt to the filling and sprinkle a little over the Biscoff topping.
Biscoff Caramel Cheesecake
Drizzle the finished cheesecake with salted caramel sauce along with the Biscoff spread.
Make-Ahead Instructions
This cheesecake is ideal for making ahead.
Prepare it 1–2 days before serving, keeping it covered and refrigerated. Add the decorative biscuits shortly before serving so they remain crisp.
Storage
Store leftover cheesecake covered in the refrigerator for up to 4–5 days.
For the best texture, keep it chilled until ready to serve.
Freezing
The cheesecake can be frozen without the decorative biscuits.
Place the fully set cheesecake in the freezer until firm, then wrap tightly in plastic wrap and foil.
Freeze for up to 1 month.
Thaw overnight in the refrigerator before decorating and serving.
Serving Suggestion
Serve each slice with extra Biscoff spread drizzled over the top, a few crushed Biscoff crumbs, or a dollop of lightly whipped cream.
Final Result
A silky, creamy, intensely Biscoff-flavored cheesecake with a crisp buttery biscuit base, a cloud-like filling, and a glossy caramelized cookie spread topping. Best of all, it delivers an impressive bakery-style finish with absolutely no baking required.