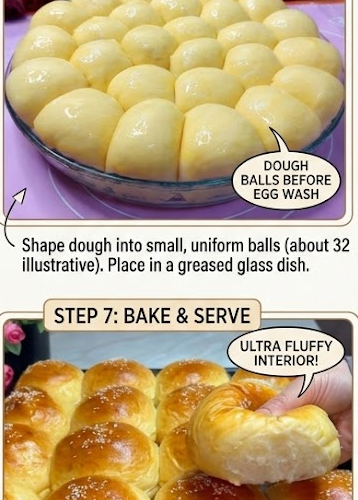
Making enriched bread like milk brioche rolls at home is one of the most rewarding baking projects you can tackle. There is nothing quite like pulling apart warm, impossibly soft rolls that tear away like cotton candy.
When people try making brioche for the first time, though, they usually hit a couple of classic roadblocks: the dough turns out so sticky they keep dumping in extra flour until the rolls end up like heavy, dry biscuits, or the tops turn almost black in the oven before the middle even bakes through.
Getting bakery-level results isn’t about luck or having commercial ovens. It comes down to understanding when to add your fat, how to work the gluten, and giving the dough time to do its thing.
Why the “Delayed Butter” Method Changes Everything
In standard quick breads or sandwich loaves, you can often dump all your ingredients in a bowl and mix. With brioche, order of operations is everything.
Flour contains two main proteins: glutenin and gliadin. When they hydrate with water or milk, they link together to form elastic gluten strands that trap carbon dioxide gas from the yeast, making the bread rise tall.
Butter, however, is pure fat. If you add softened butter at the very beginning with the milk and flour, the fat coats those flour proteins like a raincoat, stopping them from absorbing liquid and forming strong gluten bonds.
By kneading your flour, warm milk, sugar, eggs, and yeast together first, you build an elastic gluten network. Once that foundation is solid, you work in the softened butter a little at a time. The gluten strands stretch to wrap around the pockets of butter without snapping, resulting in that distinct feather-light, shreddable pull.
What You’ll Need
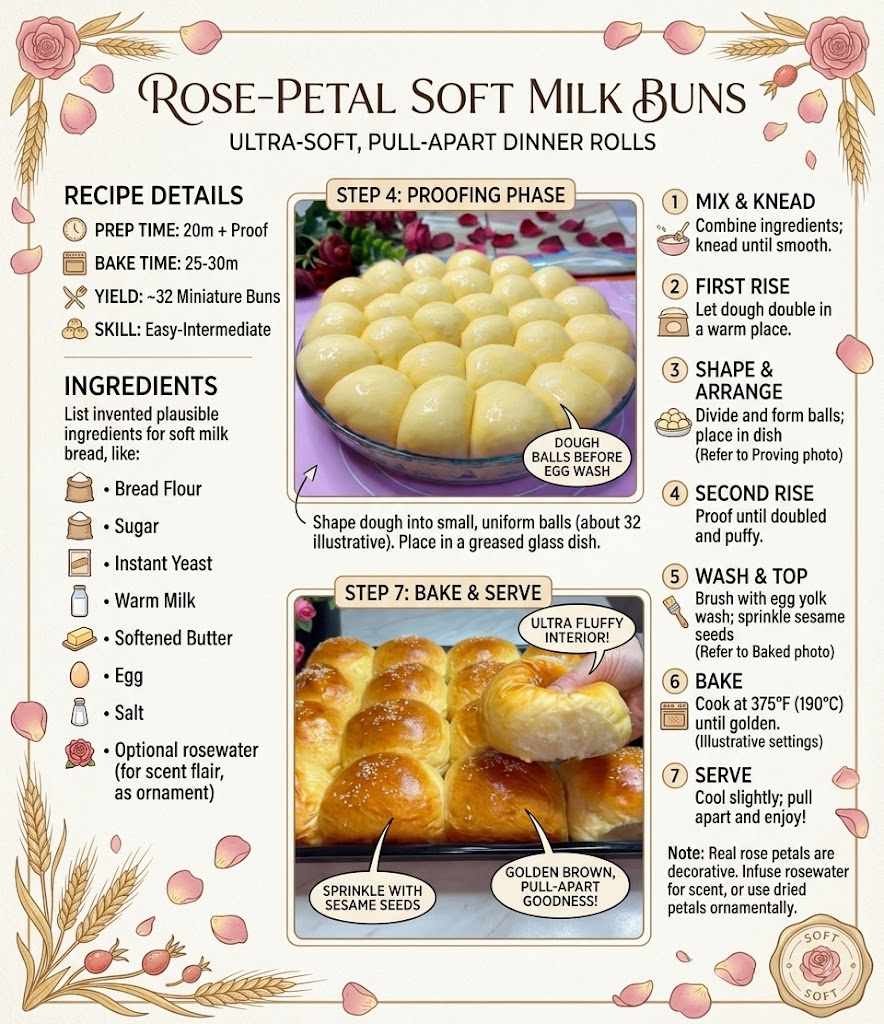
For the Yeast Starter:
- 1 cup (240 ml) whole milk, warmed to around 105°F–110°F (warm like bathwater, not hot!)
- 2 ¼ teaspoons (1 packet / 7 g) active dry yeast (or instant yeast)
- 1 teaspoon granulated sugar (to feed the yeast)
For the Dough:
- 4 cups (500 g) all-purpose flour (or bread flour for extra chew and rise)
- ¼ cup (50 g) granulated sugar
- 1 teaspoon fine sea salt
- 2 large eggs, at room temperature, lightly beaten
- ½ cup (1 stick / 115 g) unsalted butter, fully softened to room temperature (not melted)
For the Finish:
- 1 large egg yolk + 1 tablespoon milk, whisked together for the egg wash
- 1 to 2 tablespoons white sesame seeds (optional)
- 2 tablespoons melted butter, to brush on hot straight out of the oven
Step-by-Step Instructions
1. Wake Up the Yeast
Pour your 1 cup of warm whole milk into a measuring cup or small bowl. Whisk in 1 teaspoon of sugar and the 2 ¼ teaspoons of yeast.
Let it sit on your counter undisturbed for 5 to 8 minutes. You want to see a thick, foamy head form on top with a rich bready aroma. If the milk stays flat with no bubbles, your milk was either too hot (which kills yeast) or the yeast was expired. Start over with fresh yeast so you don’t waste your flour and butter.
2. Mix the Base Dough
In the bowl of a stand mixer fitted with the dough hook (or in a large mixing bowl with a sturdy wooden spoon):
- Add the 4 cups of flour, the remaining ¼ cup of sugar, and the 1 teaspoon of salt. Give it a quick whisk to distribute the salt.
- Pour in your foamy yeast mixture and the 2 beaten room-temperature eggs.
- Mix on low speed for about 3 to 4 minutes. It will start out looking shaggy, but will come together into a rough, cohesive dough ball that pulls away from the sides of the bowl.
3. Knead in the Butter (The Magic Step)
With your mixer running on medium-low speed, start dropping in the ½ cup softened butter one tablespoon at a time. Let each piece mostly disappear into the dough before dropping in the next chunk.
Don’t panic here! As the butter goes in, the dough will suddenly look slippery, greasy, and completely fall apart. This is totally normal. Resist the urge to dump in extra flour. Keep the mixer running for 8 to 10 minutes.
As you knead, the gluten network will steadily absorb all that butter. Suddenly, the dough will transform into a gorgeous, silky-smooth, super elastic ball that slaps cleanly against the sides of the bowl.
The Windowpane Test: Want to know if your dough is ready? Pinch off a golf-ball-sized piece of dough and gently stretch it out between your thumbs and forefingers. If you can stretch it thin enough that light passes through like translucent parchment paper without tearing, your gluten structure is fully built!
4. The First Rise (Bulk Fermentation)
Shape the dough into a smooth ball and place it in a lightly greased bowl. Cover the bowl tightly with plastic wrap or a damp kitchen towel.
Set it in a warm, draft-free spot (like an unheated oven with the light turned on) for 60 to 90 minutes, or until it has doubled in size. When you gently press a floured finger into the dough, the indentation should stay without immediately springing back.
5. Portion and Shape Tight Dough Balls
- Punch down the center of the dough to release the large gas bubbles, then transfer it onto a clean work surface.
- Divide the dough into 16 equal pieces. (If you have a kitchen scale, each piece will weigh roughly 55g to 60g).
- Shape each piece into a taut, smooth ball: flatten a piece into a small round disk, fold the edges into the center like a little purse, flip it seam-side down on the counter, and cup your hand over it. Roll it in small circles against the countertop with gentle downward pressure to pull the surface skin tight.
6. Pan Layout and Second Rise
- Lightly butter a 9×13-inch metal baking pan or large round baking dish.
- Arrange the 16 dough balls in rows with about ½-inch of space between them so they have room to expand.
- Cover the pan loosely with a clean towel and let them rise for 45 to 60 minutes.
- You’ll know they’re ready to bake when the rolls have puffed up, touch each other to fill the entire pan, and feel delicate and airy when gently tapped.
7. Egg Wash, Garnish, and Bake
- Preheat your oven to 350°F (175°C) with the rack in the center.
- Gently brush the tops of the rolls with the egg yolk + milk mixture using a light hand so you don’t deflate them.
- Sprinkle the centers with white sesame seeds.
- Bake at 350°F (175°C) for 22 to 26 minutes. They should be deeply golden on top and sound hollow when gently tapped.
- (Pro Tip: If your oven runs hot and the tops look dark around the 15-minute mark, loosely tent a sheet of aluminum foil over the top to keep them from over-browning).
- Pull the pan from the oven and immediately brush the hot tops with 2 tablespoons of melted butter for that brilliant bakery shine. Let them cool in the pan for 15 minutes before tearing into them!
Real-World Baking Troubleshooting
- Why did my dough stay a sticky, soupy mess? Either the milk was too hot when mixed in, or the butter was too warm (melted instead of soft). If you find yourself in this spot, put the entire mixing bowl in the fridge for 20 minutes to cool down the butter fats, then resume kneading.
- Why did the rolls turn out dense? The most common culprit is adding too much flour during the kneading or shaping process. Stick strictly to the measurements, and trust the kneading process to tame the stickiness.
- Can I make these ahead of time? Yes! You can shape the rolls, place them in the baking dish, cover tightly with plastic wrap, and place them in the fridge overnight. The next morning, let them sit at room temperature for about 1 to 1.5 hours to complete their rise before egg washing and baking.
Storage and Freezing
- On the Counter: Store completely cooled rolls in an airtight zip-top bag at room temperature for up to 4 days. A 10-second zap in the microwave brings back that fresh-out-of-the-oven softness.
- In the Freezer: Wrap the baked, cooled slab of rolls tightly in a double layer of foil, slide into a freezer bag, and freeze for up to 3 months. Thaw at room temperature for an hour, then warm in a 300°F (150°C) oven for 8 minutes to serve piping hot.