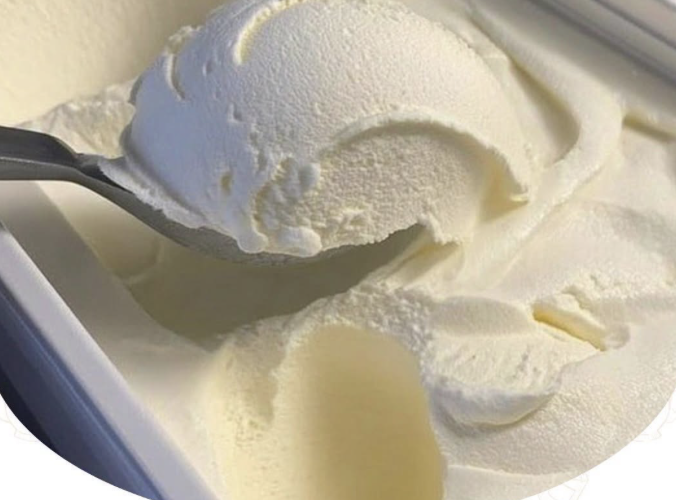
Nothing beats the rich, nostalgia-infused taste of true Homemade Vanilla Ice Cream. Made with wholesome ingredients, real dairy, and aromatic vanilla, this old-fashioned custard-style ice cream is unbelievably creamy, dense, and packed with classic, deep flavor.
Unlike commercial tubs that are pumped full of excess air, artificial stabilizers, and high-fructose corn syrup, preparing your ice cream from scratch lets you control every single element. By balancing heavy cream, whole milk, real sugar, and pure vanilla, you create a velvet-smooth frozen dessert that coats the spoon and melts softly on the tongue.
The Science of Silky Ice Cream
Achieving that luxurious, crystal-free ice cream texture comes down to three crucial elements: fat content, sugar balance, and temperature management.
- The Ideal Fat Ratio: Using an equal 1:1 ratio of heavy whipping cream (around 36% butterfat) to whole milk (around 3.5% butterfat) yields an overall fat content of about 18–20%. Fat is critical in ice cream making because it coats the tongue, delivers a rich mouthfeel, and physically blocks ice crystals from forming as the base freezes.
- Sugar as an Anti-Freeze: Granulated sugar does far more than just sweeten the ice cream. Dissolved sugar lowers the freezing point of the liquid mixture. This prevents the ice cream from freezing into a solid, un-scoopable block of ice, leaving you with a soft, pliable texture even straight out of the freezer.
- The Role of Chilling: Cooling your liquid base thoroughly in the refrigerator before churning is non-negotiable. Cold liquid churns faster, which prevents the fat molecules from separating into greasy bits and ensures the ice crystals remain microscopic.
Ingredients
For the Master Ice Cream Base:
- 2 cups (480 ml) heavy whipping cream, cold
- 2 cups (480 ml) whole milk
- ¾ cup (150 g) granulated sugar
- 1 pinch fine sea salt (heightens the sweetness and cuts through heavy fat)
- 2 teaspoons pure vanilla extract (or the scraped seeds of 1 whole vanilla bean, or 2 teaspoons vanilla bean paste)
Optional French-Style Custard Addition (for ultra-rich ice cream):
- 5 large egg yolks, room temperature
Step-by-Step Instructions
Step 1: Dissolve the Sugar and Infuse
If you are using vanilla bean paste or a whole vanilla bean, start by combining the 2 cups whole milk, ¾ cup granulated sugar, pinch of salt, and your vanilla seeds/pod in a medium saucepan over medium heat. Warm the mixture, stirring constantly, for about 3 to 5 minutes just until the sugar completely dissolves and tiny bubbles form around the edges of the pan. Do not let it come to a hard boil. Remove from the heat.
(If using standard pure vanilla extract, hold off on adding it until the very end of cooking, as high heat can cause the aromatic alcohol compounds in the extract to evaporate).
Step 2: Chill the Base Thoroughly
Pour the warm milk mixture into a large bowl or glass pitcher. Stir in the 2 cups of cold heavy whipping cream (and the 2 teaspoons of pure vanilla extract if you haven’t added vanilla yet).
Cover the bowl tightly with plastic wrap and transfer it to the refrigerator. Let the base chill for at least 4 hours, or ideally overnight. The base should be completely cold (around 40°F / 4°C) before it goes near your ice cream maker.
Tip: Place your ice cream maker’s churning bowl in the back of your freezer at least 24 hours before making the ice cream so it is frozen solid.
Step 3: Churn to Soft-Serve Consistency
Pour the cold ice cream base into the frozen bowl of your automatic or manual ice cream maker. Turn on the machine and let it churn according to the manufacturer’s directions—usually about 20 to 25 minutes.
As the paddle spins, it incorporates microscopic air bubbles while scraping frozen ice cream off the sides of the bowl. You’ll know it’s ready when the mixture thickens up to the texture of soft-serve ice cream and holds its shape on a spoon.
Step 4: The Hard Freeze (Packing and Ripening)
Using a silicone spatula, quickly transfer the soft ice cream into an insulated ice cream tub or a shallow 9×5-inch metal loaf pan. Smooth the top surface flat.
Press a piece of parchment paper or wax paper directly onto the surface of the ice cream to prevent freezer burn and keep ice crystals from forming on top. Cover with a tight lid or aluminum foil and freeze for at least 4 to 6 hours (or overnight) to allow the ice cream to “ripen” and set into a firm, scoopable consistency.
Baker’s Pro-Tips
- Elevate the Vanilla: Because vanilla is the absolute star of the show here, the quality of your vanilla matters. While pure vanilla extract works great, using vanilla bean paste or a whole Madagascar Bourbon vanilla bean will leave beautiful black specks throughout the ice cream and give it an aromatic, warm flavor profile that mimics high-end artisanal creameries.
- No-Churn Alternative: If you don’t own an ice cream maker, you can adapt these ingredients! Whip the 2 cups of heavy cream to stiff peaks. In a separate bowl, whisk 1 can (14 oz) of sweetened condensed milk with the vanilla and salt, then fold the whipped cream into the condensed milk mixture. Freeze for 6 hours for a quick, no-churn version.
- Serving Texture: Homemade ice cream doesn’t contain artificial chemical softeners, so it freezes quite firm. Pull your container out of the freezer and let it sit on the kitchen counter for 5 to 10 minutes before scooping. Dip your ice cream scoop into a glass of warm water between scoops for smooth, professional-looking rounds!