🧀 Homemade Mozzarella Cheese – Fresh, Creamy & Easy
Making homemade cheese is easier than you might think! With just full-fat milk, vinegar or lemon juice, and a little salt, you can create a fresh, mild, milky cheese right in your kitchen.
This simple stovetop recipe is a wonderful introduction to cheesemaking. The milk separates into soft curds and golden whey, leaving you with a fresh cheese that you can slice, crumble, or add to salads, sandwiches, pasta, and homemade pizza.
A quick note about texture: This vinegar- or lemon-set version produces a fresh mozzarella-style cheese that may be soft and crumbly rather than the elastic, stretchy mozzarella sold in stores. Traditional stretchy mozzarella generally requires carefully controlled acidity and a rennet-based curd. This beginner-friendly method is best for fresh homemade cheese.
Recipe at a Glance
- Prep time: 10 minutes
- Cook time: 20–25 minutes
- Draining time: 20–30 minutes
- Total time: Approximately 50–65 minutes
- Yield: About 250–400 g, depending on the milk and how firmly the curds are drained
- Difficulty: Easy
- Best for: Salads, sandwiches, pasta, and fresh cheese plates
Ingredients
- 2 liters full-fat milk (approximately 8½ cups), preferably non-ultra-pasteurized
- 2 tablespoons white vinegar or lemon juice
- ¼ teaspoon salt, or to taste
- 2 tablespoons water, for diluting the vinegar
Important: Use regular pasteurized milk that has not been ultra-pasteurized (UHT). Ultra-pasteurized milk may not form good curds. Fresh, full-fat milk generally gives the best flavor and yield.
Equipment
- Large, heavy-bottomed saucepan
- Cooking thermometer, if available
- Wooden spoon or heatproof spatula
- Colander or fine-mesh strainer
- Cheesecloth or clean, thin cotton cloth
- Large bowl to collect the whey
- Slotted spoon
Instructions
Step 1: Prepare the Acid
Pour the 2 tablespoons of vinegar into a small bowl and mix with the 2 tablespoons of water.
If you prefer lemon juice, use freshly squeezed juice and strain out any seeds and pulp. Different vinegars and lemons have different acidity levels, so the amount required may vary.
Step 2: Heat the Milk
Pour the milk into a large, heavy-bottomed saucepan.
Heat it slowly over medium-low heat, stirring occasionally to prevent scorching. Bring the milk to approximately 185°F (85°C), just below a rolling boil.
Small bubbles may form around the edges, and the milk should be steaming. Avoid boiling it vigorously.
Step 3: Add the Vinegar
Turn off the heat.
Slowly pour in the diluted vinegar while stirring gently. Stir for approximately 10–15 seconds, just enough to distribute the acid evenly.
You should begin seeing white curds separating from a yellowish or pale-green liquid called whey.
If the milk does not separate clearly, let it sit for 2–3 minutes. If necessary, add a little more vinegar, about 1 teaspoon at a time, stirring gently after each addition until distinct curds appear.
Tip: Avoid vigorous stirring, which can break the curds into tiny pieces and make draining more difficult.
Step 4: Let the Curds Rest
Cover the saucepan and let the mixture rest for 10 minutes.
During this time, the curds will firm up and separate more fully from the whey.
The liquid should look relatively translucent rather than uniformly white and milky. If it remains very white, the separation may be incomplete.
Step 5: Separate the Curds from the Whey
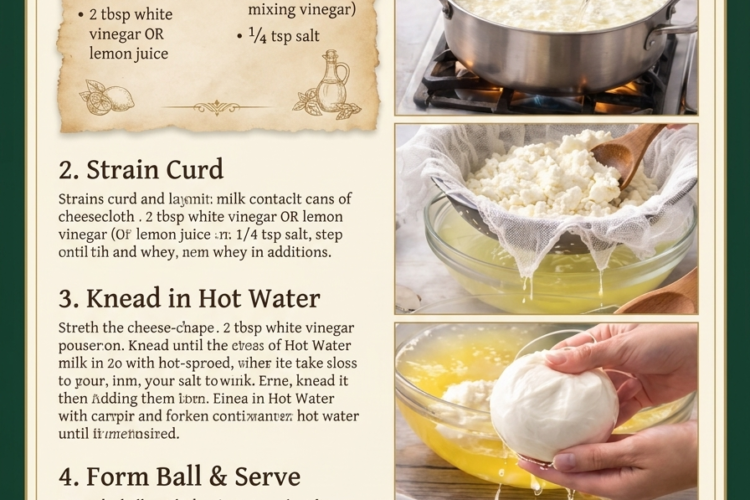
Place a colander over a large bowl and line it with cheesecloth.
Using a slotted spoon, gently transfer the curds into the lined colander. Alternatively, carefully pour the mixture through the cloth.
Allow the whey to drain for 10–15 minutes. Do not press too hard at first, as the fresh curds are delicate.
You can save the leftover whey for bread dough, pancakes, soups, or other cooking applications, provided it has been handled and stored safely.
Step 6: Add the Salt
Transfer the drained curds to a clean bowl.
Sprinkle in the ¼ teaspoon of salt and gently mix it through the cheese. Taste a small amount and adjust the salt if necessary.
At this stage, the cheese should be mild, creamy, and pleasantly milky.
Step 7: Shape the Cheese
Gather the cheesecloth around the curds and gently squeeze out excess whey.
Transfer the cheese to a small bowl or mold and press lightly to form a round or compact block. For a softer texture, press less firmly; for a more sliceable cheese, allow more whey to drain.
Refrigerate the cheese promptly in a clean, covered container.
Step 8: Chill and Serve
Let the cheese chill for at least 30–60 minutes so it firms up before slicing or crumbling.
Enjoy it fresh with tomatoes and basil, scatter it over pasta, or add it to sandwiches and salads.
Remember that this acid-set cheese will not necessarily melt or stretch like traditional mozzarella. For a truly elastic, pizza-style mozzarella, use a tested recipe formulated with suitable cheesemaking acid and rennet.
Expert Tips for the Best Homemade Cheese
Choose the right milk. Avoid ultra-pasteurized or UHT milk, which may produce weak or incomplete curds.
Heat slowly. Rapid heating can scorch the milk on the bottom of the pan and negatively affect the flavor.
Add acid gradually. Different milk brands respond differently. Add a little more vinegar only when necessary rather than pouring in extra immediately.
Handle curds gently. Large, delicate curds are easier to drain and produce a better texture than curds that have been aggressively stirred.
Do not discard the whey immediately. Whey can be useful in cooking and baking, although it will be acidic because vinegar or lemon juice was used.
Keep the cheese refrigerated. Fresh homemade cheese contains moisture and has a short shelf life. Use clean utensils and refrigerate it promptly.
Ways to Enjoy Homemade Mozzarella-Style Cheese
🍅 Tomato and Cheese Salad
Slice the chilled cheese and layer it with ripe tomatoes, fresh basil, olive oil, and black pepper.
🍕 Homemade Pizza
Crumble or slice the cheese and add it to pizza. Its melting behavior will differ from conventional mozzarella, so use it as a fresh-cheese topping rather than expecting long cheese pulls.
🥪 Sandwiches and Wraps
Add slices to sandwiches with lettuce, tomatoes, cucumbers, and your favorite dressing.
🍝 Pasta and Baked Dishes
Crumble the cheese over warm pasta, roasted vegetables, or baked casseroles for a mild, creamy finish.
🌿 Fresh Herb Cheese
Mix the drained curds with finely chopped parsley, basil, or oregano for a simple homemade spread.
Storage Instructions
Refrigerator: Store the cheese in a clean, airtight container at 40°F (4°C) or below and use it within 3–4 days for best quality. Refrigerate it as soon as possible after preparation.
Freezing: Freezing is not recommended for this fresh, moist cheese because it can become grainy or crumbly after thawing.
Whey storage: If saving the whey, transfer it to a clean, covered container and refrigerate promptly. Use it within a few days.
Discard the cheese if it develops an unusual odor, visible mold, or an unexpected slimy texture. Do not taste it to determine whether it is safe.
Frequently Asked Questions
1. Why did my milk not form curds?
The milk may have been ultra-pasteurized, the temperature may have been too low, or the acid may not have been sufficient. Heat the milk to about 185°F (85°C) and add more diluted vinegar gradually if separation is incomplete.
2. Can I use lemon juice instead of vinegar?
Yes. Lemon juice can be used as the acid, although its acidity varies. Add it gradually until the curds separate.
3. Why is my homemade cheese crumbly?
Acid-set curds naturally tend to be more crumbly than traditional mozzarella curds. Too much acid, vigorous stirring, or excessive draining can make the cheese firmer and drier.
4. Will this cheese stretch on pizza?
Usually not like commercial mozzarella. The vinegar method creates acid-set curds rather than the rennet-set curds used for classic stretchy mozzarella. For that familiar elastic texture, use a proper mozzarella cheesemaking recipe that includes rennet and controlled acidification.
5. Can I use low-fat milk?
You can try it, but the cheese may have a lower yield and a less creamy texture. Full-fat milk is recommended.
6. Is the leftover liquid useful?
Yes. The whey can be used in bread dough, pancakes, and soups to add moisture and a mild tang. Refrigerate it promptly and use it within a few days.
Estimated Nutrition
Approximate values per 50 g serving, assuming a finished yield of around 300 g:
- Calories: 100–130
- Protein: 7–10 g
- Fat: 6–9 g
- Carbohydrates: 1–3 g
- Sodium: Varies with the salt added
These values are estimates. The amount of protein and fat retained in the cheese depends on the milk, the curd formation, and how much liquid drains away.
Final Thoughts
Homemade mozzarella-style cheese is a simple, satisfying way to turn everyday milk into a fresh ingredient for your favorite meals. With just a few ingredients and some careful heating, you can make a mild, tender cheese at home without specialized equipment.
Serve it chilled with fresh vegetables, crumble it over pasta, or enjoy it with olive oil and herbs. For authentic stretchy mozzarella, however, choose a recipe designed specifically for rennet-based cheesemaking. 🧀