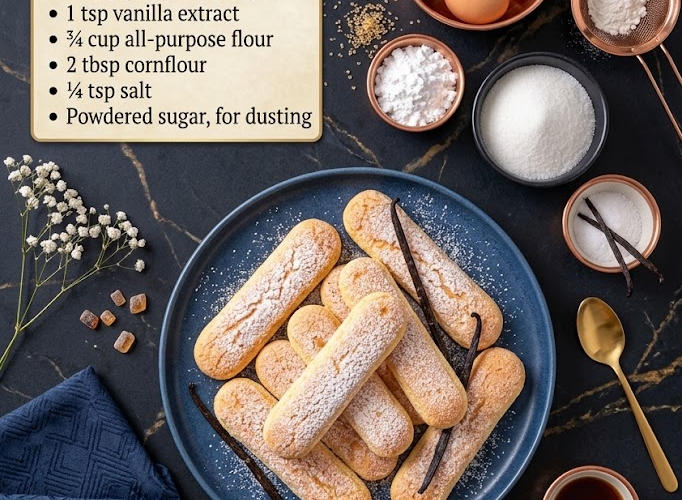
🍰✨ Homemade Ladyfingers
Light, airy, and delicately crisp on the outside, these homemade Ladyfingers are the perfect sponge cookies for tiramisu, trifles, charlottes, and other elegant desserts.
Made with a simple whipped egg batter, these classic Italian-style cookies have a beautifully soft center and lightly crisp exterior. A generous dusting of powdered sugar gives them their signature finish.
They’re especially delicious when used to make homemade tiramisu because they absorb coffee and cream beautifully without falling apart.
⏱️ Recipe Information
Prep Time: 20 minutes
Bake Time: 10–12 minutes
Cooling Time: 15 minutes
Total Time: About 45 minutes
Yield: 24–30 ladyfingers
Difficulty: Easy
Method: Oven-Baked
🛒 Ingredients
- 4 large eggs, separated
- ½ cup (100 g) granulated sugar, divided
- 1 teaspoon vanilla extract
- ¾ cup (95 g) all-purpose flour
- 2 tablespoons (16 g) cornstarch
- ¼ teaspoon salt
- Powdered sugar, for dusting
👩🍳 Instructions
1. Prepare the Oven
Preheat your oven to 350°F (175°C).
Line two large baking sheets with parchment paper.
For easier piping, you can lightly draw rows approximately 3–4 inches long on the underside of the parchment, then turn the paper over.
2. Separate the Eggs
Separate the egg whites from the yolks carefully.
Place the whites in a completely clean, dry mixing bowl.
Place the yolks in a separate bowl.
Make sure no yolk gets into the egg whites, as even a small amount of fat can prevent them from whipping properly.
3. Beat the Egg Yolks
Add approximately ¼ cup of the sugar to the egg yolks.
Beat with an electric mixer for 2–3 minutes, until the mixture becomes pale, thick, and creamy.
Add the vanilla extract and mix briefly.
Set aside.
4. Whip the Egg Whites
Using clean beaters, begin beating the egg whites on medium speed.
Once they become foamy, gradually add the remaining sugar.
Increase the speed to medium-high and continue beating until the whites form glossy medium-stiff peaks.
The meringue should hold its shape without looking dry or grainy.
5. Combine the Dry Ingredients
In a separate bowl, sift together:
- All-purpose flour
- Cornstarch
- Salt
Sifting helps keep the batter light and prevents flour pockets from forming.
6. Fold the Yolks Into the Meringue
Gently fold the whipped egg yolk mixture into the egg whites using a rubber spatula.
Use slow, sweeping motions from the bottom of the bowl upward.
Avoid vigorous stirring so you don’t deflate the whipped eggs.
7. Fold in the Dry Ingredients
Gradually sift the flour mixture over the whipped eggs.
Fold gently after each addition until just combined.
Stop mixing as soon as there are no visible streaks of flour.
The batter should remain light and airy.
🍰 Pipe the Ladyfingers
8. Transfer the Batter
Transfer the batter to a piping bag fitted with a large round tip.
If you don’t have a piping bag, use a sturdy zip-top bag and snip off one corner.
9. Pipe the Cookies
Pipe the batter onto the prepared baking sheets into straight strips approximately 3–4 inches (7–10 cm) long.
Leave about 1 inch of space between each cookie because they will spread slightly.
10. Dust With Powdered Sugar
Generously dust the piped ladyfingers with powdered sugar.
Wait approximately 1–2 minutes, then dust them once more.
The double coating helps create the classic lightly crisp exterior.
🔥 Bake
11. Bake Until Lightly Golden
Bake for 10–12 minutes, or until the ladyfingers are lightly golden around the edges and feel set.
Don’t overbake them if you want a softer texture.
For ladyfingers intended for tiramisu, you can allow them to bake slightly longer so they become firmer and better able to absorb coffee.
12. Cool
Remove the baking sheets from the oven.
Allow the ladyfingers to cool on the trays for approximately 5 minutes.
Carefully transfer them to a wire rack and allow them to cool completely.
They will firm up further as they cool.
⭐ Chef’s Tips
Use room-temperature eggs
Room-temperature egg whites whip more easily and create greater volume.
Keep the bowl completely clean
Any grease or traces of egg yolk can prevent the whites from whipping properly.
Don’t overmix
The air incorporated into the eggs is what gives ladyfingers their light, sponge-like texture.
Sift the flour
Adding the flour through a sieve helps prevent heavy pockets of flour and makes folding easier.
Pipe quickly
Once the flour is incorporated, the batter should be piped and baked promptly to preserve its volume.
Dust twice
Two light layers of powdered sugar create a beautiful classic crust.
☕ Perfect for Tiramisu
Homemade ladyfingers are ideal for making:
- Classic tiramisu
- Strawberry tiramisu
- Chocolate tiramisu
- Lemon tiramisu
- Berry trifles
- Charlotte cakes
- Icebox desserts
- Layered pudding desserts
Their porous texture allows them to absorb coffee, syrups, fruit juices, and cream while still maintaining their structure.
🍓 Easy Variations
Lemon Ladyfingers
Add 1 teaspoon finely grated lemon zest to the egg yolk mixture.
Almond Ladyfingers
Replace half of the vanilla extract with almond extract and sprinkle the tops with finely chopped almonds.
Chocolate Ladyfingers
Replace 1 tablespoon of the flour with 1 tablespoon unsweetened cocoa powder.
Orange Ladyfingers
Add 1 teaspoon orange zest and a small splash of orange extract.
🧊 Storage
Once completely cooled, store ladyfingers in an airtight container at room temperature for up to 5 days.
Keep them somewhere cool and dry.
❄️ Freezing
Ladyfingers can be frozen for up to 2 months.
Arrange them in an airtight freezer-safe container with parchment paper between layers.
Thaw at room temperature before using.
For tiramisu, slightly stale or thawed ladyfingers work especially well because they absorb the coffee mixture without becoming overly mushy.
🍰✨ Final Result
These Homemade Ladyfingers are light, delicate, and beautifully airy, with a subtly crisp sugary exterior and tender sponge-like center.
They’re delicious on their own with coffee or tea, but they truly shine when layered into classic tiramisu, trifles, and elegant no-bake desserts.
Once you make homemade ladyfingers, you’ll never look at tiramisu the same way again! ☕🍰✨