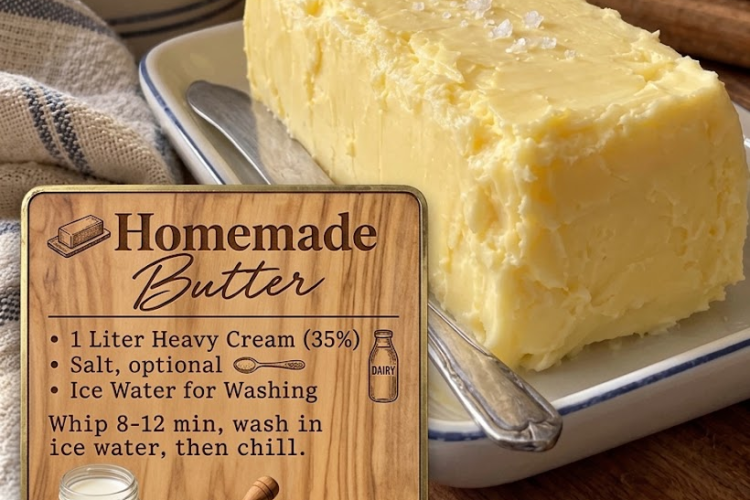
🧈 Homemade Butter
Rich, creamy, fresh, and surprisingly easy to make, homemade butter requires just one main ingredient: heavy cream.
With a stand mixer, food processor, or even a large mixing bowl and hand mixer, you can transform cream into golden homemade butter. The cream first becomes whipped cream, then suddenly separates into solid butter and thin buttermilk.
A thorough ice-water wash removes leftover buttermilk and helps the butter stay fresh longer.
⏱️ Recipe Information
- Prep Time: 5 minutes
- Churning Time: 10–15 minutes
- Total Time: 20–25 minutes
- Yield: Approximately 350–450 g butter, depending on the cream
- Difficulty: Easy
- Method: Churning
🛒 Ingredients
- 1 liter heavy cream, preferably high-fat
- Ice water, as needed for washing
- Salt, optional, to taste
Optional Flavor Additions
- Freshly cracked black pepper
- Minced garlic
- Chopped fresh herbs
- Honey
- Cinnamon
- Roasted garlic
👩🍳 Instructions
1. Pour in the Cream
Pour the 1 liter heavy cream into a stand mixer fitted with the whisk attachment.
Alternatively, use a food processor or a large mixing bowl with a hand mixer.
If using a stand mixer, make sure the bowl has plenty of room because the cream will expand and may splash once it begins separating.
2. Start Churning
Begin mixing on medium speed.
The cream will first become liquid and foamy, then gradually thicken into whipped cream.
Continue mixing.
Don’t stop when it reaches whipped-cream consistency—the churning process needs to continue until the fat separates from the liquid.
3. Watch for the Separation
After several more minutes, the whipped cream will become grainy and begin to look curdled.
Keep mixing.
You’ll eventually see small yellowish clumps of butter surrounded by a thin, pale liquid.
This is the butter separating from the buttermilk.
At this stage, reduce the mixer speed to prevent splashing.
4. Drain the Buttermilk
Once the butter has clearly separated, stop the mixer.
Pour the contents through a fine-mesh sieve or cheesecloth-lined strainer placed over a bowl.
Press the butter gently with a spatula or the back of a spoon to remove as much liquid as possible.
Don’t throw away the liquid.
The strained liquid is fresh buttermilk and can be used for pancakes, biscuits, waffles, fried chicken, or baking.
🧊 Wash the Butter
5. Rinse With Ice Water
Transfer the butter solids to a clean bowl.
Add plenty of very cold ice water.
Use a spatula, wooden spoon, or clean hands to gently knead and press the butter under the water.
The water will become cloudy as remaining buttermilk is released.
6. Drain and Repeat
Pour off the cloudy water.
Add fresh ice water and continue gently pressing and kneading the butter.
Repeat until the water is mostly clear.
This washing step is important because leftover buttermilk can cause homemade butter to spoil more quickly.
🧈 Work the Butter
7. Remove Excess Water
Drain the final washing water.
Using a clean spatula or butter paddles, press and knead the butter repeatedly.
Continue until very little liquid comes out.
Pour away any water that collects.
The finished butter should feel smooth and cohesive rather than wet or watery.
8. Add Salt
If you want salted butter, add a small amount of salt.
Start with approximately ½ teaspoon fine salt per 450 g butter, then taste and adjust.
Knead thoroughly so the salt is evenly distributed.
For unsalted butter, simply leave the salt out.
9. Shape the Butter
Transfer the finished butter to a piece of parchment paper.
Shape it into:
- A block
- A log
- Small individual portions
- Butter balls
Wrap tightly in parchment paper or place in an airtight container.
🧊 Chill
10. Refrigerate
Refrigerate the butter for at least 1 hour before serving.
Chilling firms the butter and makes it easier to slice or spread.
For a softer spreading texture, allow it to sit at room temperature for a few minutes before serving.
🥖 How to Use Homemade Butter
Homemade butter is delicious spread over:
- Freshly baked bread
- Toast
- Biscuits
- Pancakes
- Waffles
- Corn on the cob
- Baked potatoes
- Dinner rolls
- Steamed vegetables
It’s also excellent for cooking and baking.
🌿 Easy Flavored Butter Variations
🧄 Garlic Herb Butter
Mix softened butter with minced garlic, chopped parsley, chives, and a pinch of salt.
Perfect for garlic bread, steak, vegetables, and roasted chicken.
🍯 Honey Butter
Mix softened butter with honey and a pinch of salt.
Delicious on warm biscuits, cornbread, pancakes, and waffles.
🌶️ Chili Butter
Add chili flakes, smoked paprika, and a little garlic powder for a spicy compound butter.
🌿 Fresh Herb Butter
Combine softened butter with finely chopped parsley, rosemary, thyme, or chives.
🍋 Lemon Herb Butter
Add fresh lemon zest, a little lemon juice, and chopped parsley.
Excellent with fish, chicken, and roasted vegetables.
⭐ Chef’s Tips
Use High-Fat Cream
Cream with a higher butterfat percentage generally produces more butter and can make the process more efficient.
Don’t Stop at Whipped Cream
The cream must continue churning beyond the whipped-cream stage. The dramatic change from whipped cream to separated butter happens quickly near the end.
Keep the Butter Cold
Cold water helps keep the butter firm while you’re washing and working it.
Wash Thoroughly
The more buttermilk you remove, the better the butter will keep.
Don’t Throw Away the Buttermilk
The liquid left after churning is useful in baking and cooking. Use it in pancakes, biscuits, waffles, muffins, or marinades.
Work Out as Much Water as Possible
Excess water shortens the butter’s shelf life. Press and knead the butter thoroughly during the final working stage.
🧊 Storage
Store homemade butter in an airtight container in the refrigerator for up to 1–2 weeks, provided it has been thoroughly washed and excess liquid removed.
For the best flavor, use it while fresh.
❄️ Freezing
Homemade butter freezes very well.
Wrap it tightly in parchment paper and then place it in a freezer-safe bag or airtight container.
Freeze for up to 6 months for best quality.
Thaw overnight in the refrigerator before using.
🧈✨ Final Result
This Homemade Butter is wonderfully rich, fresh, and creamy, with a flavor that’s noticeably more delicate and satisfying than many store-bought varieties.
All you need is heavy cream, ice water, and a little patience.
Churn it, wash it, work it, chill it—and you’ve got beautiful homemade butter! 🧈🥖✨