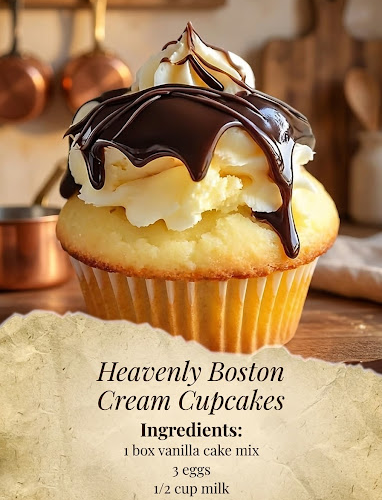
🍫 Heavenly Boston Cream Cupcakes — Soft Vanilla Cake, Creamy Custard & Chocolate Ganache
Get ready to fall in love with these Heavenly Boston Cream Cupcakes! Inspired by the classic Boston cream pie, these irresistible cupcakes feature soft, buttery vanilla cake filled with silky vanilla pudding and topped with a rich, glossy chocolate ganache.
Every bite brings together three delicious layers: tender vanilla cake, smooth and creamy custard, and decadent chocolate topping. Best of all, this recipe uses convenient cake and pudding mixes, making it easy to create a bakery-style dessert right in your own kitchen!
Perfect for birthdays, holidays, family gatherings, bake sales, or whenever you’re craving something truly special, these cupcakes look elegant and taste absolutely heavenly. ❤️
Recipe Details
- Prep Time: 25 minutes
- Bake Time: 18–22 minutes
- Cooling Time: 30 minutes
- Chilling Time: 30–60 minutes
- Total Time: Approximately 1 hour 45 minutes
- Yield: 18–24 cupcakes, depending on cake mix and portion size
- Course: Dessert
- Cuisine: American-inspired
- Difficulty: Easy
- Method: Oven-baked, filled, and frosted
Ingredients
For the Vanilla Cupcakes
- 1 box vanilla cake mix (approximately 15.25 oz / 432 g)
- 3 large eggs
- ½ cup (120 ml) milk
- ½ cup (120 ml) vegetable oil
- 1 teaspoon vanilla extract
For the Creamy Vanilla Filling
- 1 box instant vanilla pudding mix (approximately 3.4 oz / 96 g)
- 2 cups (480 ml) cold milk
For the Chocolate Ganache
- ½ cup (120 ml) heavy cream
- 1 cup (170 g) semisweet chocolate chips
- 1 tablespoon (14 g) unsalted butter
Instructions
Step 1: Prepare the Oven and Cupcake Pan
Preheat your oven to 350°F (175°C).
Line two standard muffin pans with paper cupcake liners, or prepare one pan and bake in batches if necessary.
Make sure the liners are positioned securely in the muffin cavities. This helps the cupcakes bake evenly and makes them easier to remove.
Step 2: Make the Vanilla Cake Batter
In a large mixing bowl, combine the vanilla cake mix, eggs, milk, vegetable oil, and vanilla extract.
Beat with an electric mixer on low speed for about 30 seconds, just until the ingredients begin to combine. Increase to medium speed and beat for another 1–2 minutes, until the batter is smooth.
Scrape down the sides of the bowl as needed.
Tip: Use room-temperature eggs and milk for a more evenly mixed batter. Avoid overmixing, which can make the cupcakes less tender.
Step 3: Fill the Cupcake Liners
Divide the batter evenly among the prepared cupcake liners, filling each approximately two-thirds full.
Avoid overfilling, as the cupcakes need room to rise without spilling over the edges.
If making 18 larger cupcakes, distribute the batter accordingly. For 24 smaller cupcakes, use a little less batter in each liner.
Step 4: Bake the Cupcakes
Place the pans on the center rack of the preheated oven.
Bake for 18–22 minutes, or until the cupcake tops spring back gently when touched and a toothpick inserted into the center comes out clean or with a few moist crumbs.
Begin checking at around 18 minutes because oven temperatures and cake mix brands vary.
Remove the cupcakes from the oven and allow them to cool in the pans for 5 minutes. Transfer them to a wire rack and let them cool completely before filling.
Step 5: Prepare the Vanilla Pudding Filling
While the cupcakes cool, pour the cold milk into a medium mixing bowl.
Add the instant vanilla pudding mix and whisk vigorously for approximately 2 minutes, or according to the package instructions, until the mixture begins to thicken.
Let the pudding stand for another 3–5 minutes to finish setting.
The filling should be thick, smooth, and creamy enough to stay inside the cupcakes without immediately running out.
Cover and refrigerate until ready to use.
Step 6: Prepare the Cupcakes for Filling
Once the cupcakes are completely cool, use a small paring knife or cupcake corer to remove a small portion from the center of each cupcake.
Create a hole approximately ¾ inch (2 cm) wide and about 1 inch (2.5 cm) deep, taking care not to cut through the bottom.
Keep the removed cake pieces if you’d like to replace a small portion over the filling before adding the chocolate topping.
Alternatively, transfer the pudding to a piping bag fitted with a round tip and gently insert the tip into each cupcake to fill the center without removing much cake.
Step 7: Fill the Cupcakes with Vanilla Pudding
Spoon or pipe the chilled vanilla pudding into the center of each cupcake.
Fill each cavity generously without overfilling. The pudding should sit just below the top of the cupcake.
If you removed cake plugs, trim them slightly and place a small piece back over the filling if desired. This creates a neater surface for the chocolate ganache.
Arrange the filled cupcakes on a tray and refrigerate while preparing the topping.
Step 8: Heat the Cream for the Chocolate Ganache
Place the semisweet chocolate chips in a heatproof bowl.
Pour the heavy cream into a small saucepan and warm over medium-low heat until steaming and just beginning to simmer around the edges. Do not allow it to boil vigorously.
Pour the hot cream over the chocolate chips and let the mixture stand for 2 minutes.
Step 9: Make the Ganache Smooth and Glossy
Stir the chocolate and cream slowly, beginning in the center of the bowl and gradually moving outward until the chocolate melts completely.
Add the tablespoon of butter and stir until incorporated. The butter gives the ganache a beautiful sheen and a slightly silkier texture.
If a few chocolate pieces remain unmelted, warm the mixture very gently in short intervals, stirring between each one.
Allow the ganache to cool for about 5–10 minutes, until it is thick enough to coat the cupcakes without running off too quickly.
Step 10: Top the Cupcakes with Chocolate
Remove the filled cupcakes from the refrigerator.
Spoon approximately 1–2 teaspoons of ganache onto the center of each cupcake, allowing it to spread naturally toward the edges.
For a smooth bakery-style finish, gently tilt each cupcake to distribute the chocolate evenly. Alternatively, spread the ganache with the back of a small spoon.
Avoid using ganache while it is too hot, as excessive heat can soften the cupcake and filling.
Step 11: Chill Until Set
Place the finished cupcakes in the refrigerator for approximately 30–60 minutes, or until the chocolate topping has set.
Arrange them on a serving platter once the ganache is firm.
For the best flavor and texture, allow each cupcake to stand at room temperature for about 5–10 minutes before serving, while keeping within safe food-handling limits.
Step 12: Serve and Enjoy
Cut one open to reveal the soft vanilla cake, creamy pudding center, and rich chocolate topping.
Serve chilled or slightly softened with coffee, tea, or a glass of milk.
Enjoy your homemade Boston cream cupcakes — a classic dessert in a delightful individual-sized package! 🍫
Tips for Perfect Boston Cream Cupcakes
- Cool completely before filling. Warm cupcakes can melt the pudding and make the filling runny.
- Use instant pudding, not cook-and-serve pudding. Instant pudding sets quickly with cold milk and is convenient for cupcake fillings.
- Let the pudding thicken fully. This helps it stay inside the cupcakes.
- Don’t overfill the centers. Leave a little room for the cake plug or chocolate topping.
- Use good-quality chocolate chips. Semisweet chocolate balances the sweetness of the cake and filling.
- Cool the ganache before topping. Slightly thickened ganache is easier to control and less likely to run off.
- Make a small test cupcake first if needed. Different cake mixes produce different yields and baking times.
- Keep the finished cupcakes chilled. The pudding filling is perishable and needs refrigeration.
Delicious Variations
🍫 Double Chocolate Boston Cream Cupcakes
Use chocolate cake mix instead of vanilla for a richer chocolate exterior with the classic creamy vanilla filling and ganache topping.
🍮 Extra-Creamy Custard Cupcakes
Replace the instant pudding with a thick, fully chilled homemade pastry cream for a more traditional Boston cream flavor. Ensure the filling is completely cooled before piping it into the cupcakes.
🤍 White Chocolate Ganache Cupcakes
Replace the semisweet chocolate chips with white chocolate chips. White chocolate is sweeter, so use a little less cream initially and adjust carefully for a smooth, pourable consistency.
🍓 Strawberry Cream Cupcakes
Add a tiny spoonful of thick strawberry jam to the center along with the vanilla pudding for a fruity twist.
☕ Mocha Chocolate Cupcakes
Dissolve ½ teaspoon instant espresso powder into the warm cream before pouring it over the chocolate chips. The coffee enhances the chocolate flavor without overwhelming the vanilla filling.
🌰 Chocolate Hazelnut Cupcakes
Spread a thin layer of chocolate-hazelnut spread over the cupcake before adding the ganache, or sprinkle chopped toasted hazelnuts over the topping.
🎉 Mini Boston Cream Cupcakes
Use a mini muffin pan and reduce the baking time, checking the cupcakes early. Fill them with a small amount of pudding and finish with a little ganache for bite-sized party treats.
What to Serve with Heavenly Boston Cream Cupcakes
These cupcakes are delicious on their own, but they pair beautifully with:
- Fresh strawberries or raspberries
- A cup of coffee or cappuccino
- Cold milk
- Hot chocolate
- Vanilla ice cream
- A platter of cookies and chocolate truffles
For celebrations, place the cupcakes in decorative paper liners and arrange them on a tiered cake stand. The shiny chocolate topping makes them look elegant without requiring complicated decorations.
Make-Ahead and Storage
Make ahead: Bake the cupcakes up to one day ahead and store them covered. Prepare the pudding filling and ganache separately, then fill and finish the cupcakes closer to serving time.
Refrigeration: Store filled cupcakes in a covered container in the refrigerator and enjoy within 3 days for best quality.
Freezing: The unfilled cupcakes can be frozen in an airtight container for up to 2 months for best quality. Thaw completely before filling and decorating. Freezing the assembled cupcakes is not recommended for the best pudding texture.
Serving: For a softer cake texture, let refrigerated cupcakes stand for about 5–10 minutes before serving.
Food safety: Because the cupcakes contain a milk-based pudding filling, keep them refrigerated at 40°F (4°C) or below. Do not leave them at room temperature for more than 2 hours, or more than 1 hour when temperatures exceed 90°F (32°C).
Frequently Asked Questions
Why is my pudding filling too runny?
The pudding may not have set fully, or too much milk may have been added. Follow the instant pudding package instructions carefully and allow it to thicken before filling the cupcakes.
Can I use homemade vanilla pudding?
Yes. Homemade pastry cream works wonderfully, provided it is thick and completely chilled before being piped into the cupcakes.
Can I make these without removing the cupcake centers?
Yes. Insert a piping bag fitted with a round tip into the center of each cupcake and gently squeeze in the pudding. This is a convenient method when you want to avoid cutting holes.
Why is my chocolate ganache too thin?
It may be too warm or contain too much cream. Allow it to cool further, stirring occasionally. If it remains too thin, add a little more melted chocolate and mix until smooth.
Why did the ganache turn grainy?
Chocolate can become grainy if it overheats or if the mixture is stirred too aggressively while the chocolate is melting. Use gently heated cream, let it stand over the chocolate briefly, then stir slowly until smooth.
Can I make Boston cream cupcakes the night before?
Absolutely! Fill and top them the day before, then refrigerate in a covered container. The flavors will blend nicely, although the cupcake texture may gradually soften as it sits.
Can I use milk chocolate instead of semisweet chocolate?
Yes, but milk chocolate is sweeter and may produce a softer ganache. If using it, consider reducing the cream slightly or using a little more chocolate to achieve the desired thickness.
How do I get a neat chocolate topping?
Let the ganache cool until slightly thickened, then spoon a small amount onto each cupcake. Refrigerate the cupcakes until the topping sets before arranging them for serving.
❤️ A Little Bakery Magic in Every Cupcake
These Heavenly Boston Cream Cupcakes bring together three irresistible layers: tender vanilla cake, smooth creamy pudding, and rich chocolate ganache.
With convenient cake and pudding mixes, they are simple enough for home bakers yet beautiful enough for parties and special occasions. Prepare them ahead, chill until perfectly set, and serve each cupcake with its luscious filling and glossy chocolate top.
One bite delivers the comforting flavor of classic Boston cream pie in a fun, individual-sized treat that chocolate and custard lovers will adore! 🍫🧁