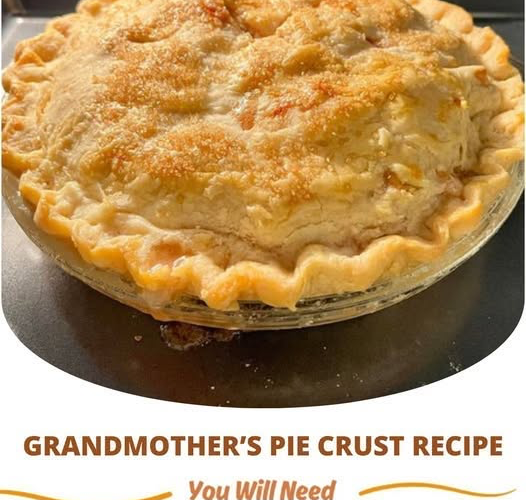
This Grandmother’s Pie Crust delivers that prized heirloom texture—tender, shatteringly flaky, and sturdy enough to hold your favorite fruit, meat, or custard fillings without getting soggy!
Master Recipe Overview
| Active Prep Time | Chill Time | Bake Time | Yield | Difficulty |
| 15 minutes | 30 minutes | 12–15 mins (blind-bake) / 45–55 mins (filled) | 2 Double Crusts (or 4 Single Crusts) | Easy / Heritage Classic |
🥧 Printable Recipe Card
Culinary Science & Flaky Pastry Dynamics
   [ Cream of Tartar + Vinegar Acidity ] ──► Softens Flour Gluten Proteins for Melt-in-Mouth Crust
                                                    │
                                                    ▼
   [ Cold Fat Pockets (Pea-Sized) ]     ──► Flashes Steam in Hot Oven to Puff Flaky Layers
                                                    │
                                                    ▼
   [ Egg Protein Binder Matrix ]        ──► Makes Dough Pliable & Easy to Roll Without Tearing
- The Acid Tenderizer Secret: Traditional old-fashioned pie crusts incorporate cream of tartar and vinegar. Acid inhibits gluten development in the flour, preventing toughness even if the dough is handled slightly more during rolling.
- Cold Fat Steam Pockets: Keeping pea-sized chunks of butter/shortening visible in the dry flour creates physical barriers. When baked at high heat, the moisture in these fat pockets turns to steam instantly, lifting the pastry into thin, flaky leaves.
Complete Ingredients List
Dry Base:
- 3 cups (360 g) all-purpose flour, spooned and leveled
- ¼ teaspoon cream of tartar
- 1 teaspoon fine salt
Fat Layer:
- 1 cup (2 sticks / 225 g) cold unsalted butter, vegetable shortening, or lard (cubed)
Liquid Binding Emulsion:
- 1 large egg, beaten
- 1 tablespoon distilled white vinegar or apple cider vinegar
- ½ cup (120 ml) ice-cold water
Step-by-Step Instructions
Phase 1: Mix Dry Ingredients & Cut Fat
- Combine Dry Base: In a large mixing bowl, whisk together 3 cups flour, ¼ tsp cream of tartar, and 1 tsp salt.
- Cut in Fat: Add 1 cup cold cubed butter (or shortening). Use a pastry cutter, two forks, or your fingertips to cut the fat into the dry flour until it resembles coarse meal with pea-sized chunks remaining.
- Whisk Liquids: In a small bowl or measuring cup, whisk together 1 egg, 1 tbsp vinegar, and ½ cup ice-cold water.
- Form Dough Ball: Pour the cold liquid mixture into the flour mixture. Gently fold together with a fork or spatula until the dough just comes together into a shaggy ball. (Do not overwork!)
- Divide & Chill: Divide dough into 2 or 4 equal portions, flatten each into a ½-inch thick disc, and wrap tightly in plastic wrap. Refrigerate for at least 30 minutes before rolling out.
Phase 2: Roll & Shape Dough
- Roll Dough: On a lightly floured surface, roll a chilled dough disc out from the center into a 12-inch circle (about ⅛-inch thick).
- Transfer to Pan: Carefully drape dough over a 9-inch pie dish. Trim excess overhang to about ½ inch, fold the edges under, and crimp or flute the edges decoratively.
Phase 3: Complete Baking Guidelines
Option A: Blind-Baking / Pre-Baking (For Cold & Custard Pies)
Use for pies filled with unbaked custard or cold fillings (e.g., Chocolate Pie, Lemon Meringue, Cream Pies).
- Preheat Oven: Preheat oven to 400°F (200°C).
- Fit & Dock: Prick the bottom and sides of the fitted pie crust all over with a fork (docking).
- Add Weights: Line the dough with a sheet of parchment paper and fill to the top with pie weights, dried beans, or raw rice.
- Initial Bake (With Weights): Bake for 12 to 15 minutes until the edges are set and light golden.
- Final Bake (Fully Baked Shell): Carefully lift out the parchment paper and weights. Return the empty shell to the oven for 5 to 8 minutes until the bottom is fully cooked and golden-brown.
- Cool: Cool completely on a wire rack before adding cold or custard fillings.
Option B: Double-Crust Filled Baking (For Fruit & Meat Pies)
Use for baked double-crust pies (e.g., Apple, Peach, Berry, Chicken Pot Pie).
- Preheat Oven: Preheat oven to 400°F (200°C).
- Assemble: Line the bottom of your 9-inch pie pan with the bottom crust, add your prepared filling, and top with the second rolled crust sheet (or weave a lattice).
- Seal & Vent: Pinch top and bottom crusts together to seal, crimp the rim, and cut 3–4 small slashes in the center of the top crust to allow steam to escape.
- Egg Wash (Optional): Brush top crust with an egg wash (1 egg beaten with 1 tbsp water) and sprinkle with coarse sugar.
- Bake: Bake at 400°F (200°C) for 45 to 55 minutes (up to 60 minutes for fruit pies) until the crust is deep golden-brown and filling bubbles thickly in the center vents.
- Rest: Cool on a wire rack for at least 1 to 2 hours so the filling sets before slicing!
Pro Baking Tips
- Prevent Excess Edge Browning: If the crimped edges turn dark brown before the center filling finishes cooking, loosely tent a strip of aluminum foil or a pie crust shield over the outer rim during the last 20 minutes of baking.
- Cold Dough Entry: Make sure the pie dough is thoroughly chilled right before going into the preheated oven. Cold fat meeting a hot oven creates maximum steam for a shatteringly flaky crust!
Storage Instructions
- Refrigeration: Dough discs wrapped tightly in plastic wrap keep in the refrigerator for up to 3 days.
- Freezing: Freeze wrapped dough discs for up to 3 months. Thaw overnight in the refrigerator before rolling out.