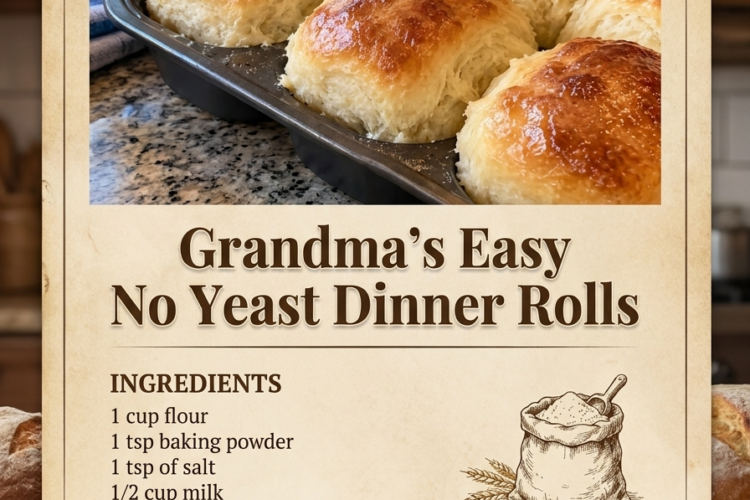
🍞 Grandma’s Easy No-Yeast Dinner Rolls
Soft, fluffy, buttery, and beautifully golden, these Grandma’s Easy No-Yeast Dinner Rolls are perfect when you want fresh homemade bread without the wait! No yeast, no kneading marathon, and absolutely no rising time required.
Made with simple pantry ingredients, these little rolls come together quickly and bake into tender, golden bites with a soft center and a lightly crisp exterior. They’re wonderful alongside soups, stews, roasted chicken, holiday dinners, or simply enjoyed warm with a little butter.
The best part? You can have homemade dinner rolls on the table in about 25 minutes!
Recipe Details
- Prep Time: 10 minutes
- Cook Time: 15–18 minutes
- Total Time: 25–28 minutes
- Yield: 4 small rolls
- Course: Bread, Side Dish
- Cuisine: American
- Difficulty: Easy
Ingredients
For the Rolls
- 1 cup (125 g) all-purpose flour
- 1 teaspoon baking powder
- ½ teaspoon salt
- ½ cup (120 ml) milk
- 2 tablespoons (28 g) unsalted butter, melted
For the Buttery Topping
- 1 tablespoon (14 g) unsalted butter, melted
- A small pinch of flaky salt, optional
Recipe note: The original list included 1 teaspoon of salt, but that can taste overly salty for just 1 cup of flour. This version uses ½ teaspoon for a more balanced flavor. Butter is an additional suggested ingredient for a softer, richer roll.
Instructions
1. Preheat the Oven
Preheat your oven to 400°F (200°C). Lightly grease a small baking dish or line a baking sheet with parchment paper.
2. Combine the Dry Ingredients
In a medium mixing bowl, whisk together the all-purpose flour, baking powder, and salt.
Make sure the baking powder is evenly distributed throughout the flour. This helps the rolls rise evenly as they bake.
3. Add the Wet Ingredients
Pour in the milk and melted butter.
Stir gently with a wooden spoon or spatula until a soft dough forms. Mix just until the flour is incorporated. The dough should be slightly sticky but thick enough to hold its shape.
Avoid overmixing, as this can make the rolls tough instead of tender.
4. Shape the Rolls
Lightly flour your hands or use a spoon to divide the dough into 4 equal portions.
Gently shape each portion into a ball. Don’t pack or knead the dough too firmly.
Arrange the dough balls in the prepared baking dish, leaving a little space between them. For softer sides, place them close together; for more golden edges, space them farther apart.
5. Bake Until Golden
Bake for 15–18 minutes, or until the tops are lightly golden and the centers are cooked through.
The exact baking time will depend on the size of your rolls and your oven. Avoid overbaking, as these small rolls can dry out quickly.
6. Brush With Butter
Remove the rolls from the oven and immediately brush the tops with melted butter.
For a little extra flavor, sprinkle with flaky salt.
Allow the rolls to cool for 5 minutes before serving. They’re especially delicious while still warm!
Expert Tips for Perfect No-Yeast Rolls
- Measure the flour carefully: Too much flour can make the rolls dense and dry. Spoon the flour into your measuring cup and level it off rather than scooping directly from the bag.
- Don’t overmix: Stir only until the ingredients come together. A little stickiness is perfectly fine.
- Use fresh baking powder: Baking powder provides the lift in this yeast-free recipe, so make sure it hasn’t expired.
- Avoid adding too much extra flour: If the dough feels sticky, lightly flour your hands rather than working lots of extra flour into the dough.
- Brush while warm: Adding melted butter straight from the oven gives the tops a lovely buttery finish.
- Serve fresh: These rolls are at their softest and fluffiest shortly after baking.
Delicious Variations
Garlic Butter Rolls: Add ½ teaspoon garlic powder to the dry ingredients. Brush the baked rolls with melted butter mixed with minced garlic and chopped parsley.
Cheesy Dinner Rolls: Fold ¼ cup (25 g) finely shredded cheddar or Parmesan into the dough before shaping.
Herb Rolls: Add ½ teaspoon dried Italian seasoning, rosemary, or thyme for a savory flavor.
Honey Butter Rolls: Add 1 tablespoon honey to the milk and butter mixture. Brush the baked rolls with honey butter for a slightly sweet finish.
Everything Bagel Rolls: Sprinkle the tops with everything bagel seasoning before baking.
Whole-Wheat Version: Replace up to half the all-purpose flour with whole-wheat flour. Add a small splash of milk if the dough feels too dry.
What to Serve With These Rolls
These quick homemade rolls are versatile enough to accompany almost any meal.
Try serving them with:
- Creamy chicken soup or vegetable soup
- Beef stew or pot roast
- Roast chicken or turkey
- Mashed potatoes and gravy
- Spaghetti and meatballs
- Creamy pasta dishes
- Fresh salads and roasted vegetables
They’re also delicious split open and filled with butter, jam, honey, or your favorite sandwich filling.
Make-Ahead Instructions
These rolls are best mixed and baked fresh because the baking powder begins working once it comes into contact with the wet ingredients.
For easier preparation, measure the flour, baking powder, and salt into an airtight container ahead of time. When you’re ready to bake, simply add the milk and melted butter, mix, shape, and bake.
Storage and Reheating
Room Temperature: Store completely cooled rolls in an airtight container at room temperature for up to 2 days.
Refrigeration: Refrigeration is generally unnecessary and can make bread stale faster. If your kitchen is particularly warm or humid, use an airtight container and enjoy them promptly.
Freezing: Allow the baked rolls to cool completely. Place them in a freezer-safe bag or container and freeze for up to 2 months.
Reheating in the Oven: Wrap the rolls loosely in foil and warm at 300°F (150°C) for approximately 5–8 minutes.
Microwave: Heat an individual roll for about 10–15 seconds. Avoid overheating, as it can make the bread chewy.
Brush with a little melted butter after reheating for a freshly baked taste.
Frequently Asked Questions
Do these dinner rolls really need no yeast?
Yes! Baking powder acts as the leavening agent, giving the rolls their lift without yeast or a rising period.
Do I need to let the dough rise?
No. Once the dough is mixed and shaped, the rolls can go straight into the preheated oven.
Are these rolls kneaded?
No traditional kneading is required. Simply stir the ingredients together until a soft dough forms, then gently shape the portions.
Why are my rolls dense?
The most common reasons are too much flour, overmixing, or baking powder that has lost its effectiveness. Measure carefully and handle the dough gently.
Can I use self-rising flour?
Yes, but self-rising flour already contains salt and baking powder. Replace the all-purpose flour, baking powder, and salt with 1 cup self-rising flour, then proceed with the milk and butter. The results may vary slightly depending on the flour.
Can I make the dough ahead of time?
It’s best to bake the rolls immediately after mixing. Baking powder begins reacting when wet ingredients are added, so preparing the dough too far ahead may reduce its rise.
Can I make smaller rolls?
Absolutely! Divide the dough into 6 smaller portions instead of 4 and begin checking for doneness around 10–13 minutes.
Estimated Nutrition
Approximate values per roll, based on 4 rolls and including the suggested butter topping. Actual nutrition will vary depending on the ingredients used.
- Calories: 190
- Protein: 4 g
- Carbohydrates: 25 g
- Fat: 8 g
- Saturated Fat: 5 g
- Fiber: 1 g
- Sugar: 2 g
- Sodium: 350 mg
Grandma’s Kind of Homemade Comfort ❤️
These Easy No-Yeast Dinner Rolls prove that homemade bread doesn’t have to be complicated. With just a handful of everyday ingredients and no waiting for dough to rise, you can enjoy warm, buttery rolls whenever the craving strikes.
Serve them fresh from the oven, brush them generously with butter, and watch them disappear from the dinner table. Simple, comforting, and wonderfully delicious!