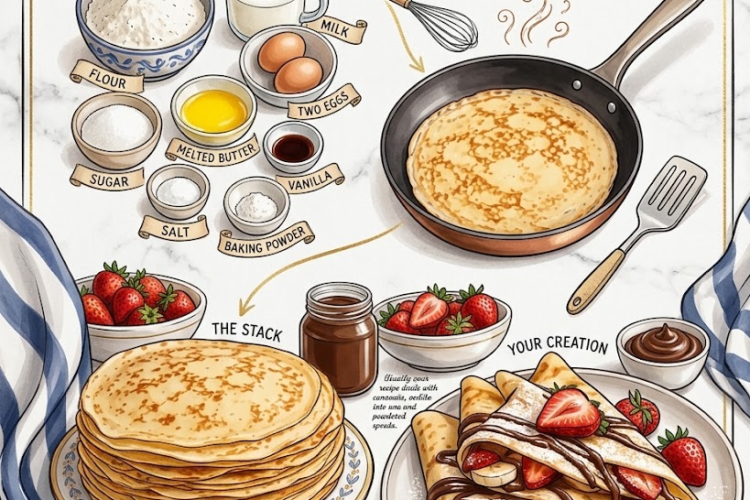
🥞 Easy Homemade Crepes
Thin, tender, buttery, and wonderfully versatile, these Easy Homemade Crepes come together with simple pantry ingredients and cook in just minutes.
The batter is smooth and lightly sweetened, making these crepes perfect for breakfast, brunch, dessert, or a quick snack. Fill them with fresh fruit and whipped cream, spread them with Nutella, or keep them savory with cheese, chicken, vegetables, or ham.
⏱️ Recipe Information
Prep Time: 10 minutes
Rest Time: 20–30 minutes
Cook Time: 20 minutes
Total Time: About 1 hour
Yield: 12–16 crepes
Difficulty: Easy
Method: Stovetop
🛒 Ingredients
- 2 cups (250 g) all-purpose flour
- 2 large eggs
- 2½ cups (600 ml) milk
- ¼ cup (60 g) butter, melted and slightly cooled
- 3 tablespoons (38 g) granulated sugar
- ½ teaspoon salt
- 1 teaspoon (5 ml) vanilla extract, optional
For the Pan
- A little butter or neutral oil, as needed
👩🍳 Instructions
1. Combine the Dry Ingredients
In a large mixing bowl, whisk together the flour, sugar, and salt.
Make sure the ingredients are evenly distributed.
2. Whisk the Eggs and Milk
In a separate bowl or large measuring jug, whisk the eggs and milk together until well combined.
If using vanilla extract, add it at this stage.
3. Make the Batter
Gradually pour the milk mixture into the flour mixture while whisking continuously.
Keep whisking until the batter is smooth and mostly free of lumps.
The batter should be very thin and pourable, similar to heavy cream.
4. Add the Melted Butter
Slowly whisk in the melted butter.
Mix until completely incorporated.
If a few small lumps remain, pour the batter through a fine-mesh strainer into another bowl.
This creates an exceptionally smooth crepe batter.
5. Rest the Batter
Cover the bowl and let the batter rest for 20–30 minutes at room temperature.
Resting allows the flour to fully hydrate and helps produce crepes that are tender rather than chewy.
If preferred, the batter can be refrigerated for several hours or overnight.
🔥 Cook the Crepes
6. Heat the Pan
Place a nonstick 8–10-inch skillet or crepe pan over medium heat.
Lightly grease it with a small amount of butter or oil.
You only need a very thin coating.
7. Pour the Batter
Give the batter a gentle stir.
Pour approximately ¼ cup of batter into the center of the hot pan.
Immediately lift and tilt the pan in a circular motion, allowing the batter to spread into a thin, even layer.
Work quickly—the batter begins setting almost immediately.
8. Cook the First Side
Cook for approximately 45–60 seconds, or until:
- The surface looks set
- The edges begin to lift slightly
- The underside is lightly golden
If the crepe is browning too quickly, reduce the heat slightly.
9. Flip
Slide a thin spatula underneath the crepe.
Gently lift and flip it.
Cook the second side for approximately 15–30 seconds.
It only needs light browning.
Transfer the finished crepe to a plate.
10. Continue Cooking
Repeat with the remaining batter.
Lightly grease the pan only when necessary.
Stack the cooked crepes on top of one another to keep them soft.
If desired, cover the stack loosely with a clean kitchen towel.
⭐ Chef’s Tips
Rest the batter: This is one of the easiest ways to improve the texture of homemade crepes.
Keep the batter thin: If the crepes are too thick, whisk in 1–2 tablespoons of milk at a time.
Don’t overgrease the pan: Too much butter or oil can cause uneven cooking.
Find the right temperature: Medium heat usually works best. The pan should be hot enough for the batter to set quickly but not so hot that the crepe browns before you can spread it.
Make the first crepe a test: The first crepe often helps you determine whether the pan needs more or less heat.
Keep finished crepes covered: This traps a little steam and keeps the stack soft and flexible.
🍓 Sweet Filling Ideas
Strawberry & Cream
Fill with sliced strawberries, whipped cream, and a drizzle of chocolate sauce.
Nutella & Banana
Spread warm Nutella over the crepe and add sliced bananas.
Cinnamon Apple
Fill with sautéed apples, cinnamon, brown sugar, and a little butter.
Lemon Sugar
Sprinkle with sugar and fresh lemon juice, then fold and serve.
Berry Cheesecake
Add sweetened cream cheese and fresh berries, then finish with powdered sugar.
Chocolate & Peanut Butter
Spread with peanut butter and chocolate hazelnut spread for an indulgent combination.
🧀 Savory Filling Ideas
For a savory version, simply reduce or omit the sugar and vanilla.
Try filling the crepes with:
- Ham and cheese
- Chicken and mushrooms
- Spinach and ricotta
- Scrambled eggs and cheddar
- Sauteed vegetables
- Smoked salmon and cream cheese
- Chicken, cheese, and spinach
🍽️ How to Fold Crepes
Half-Moon
Fold the crepe in half for a simple presentation.
Triangle
Fold the crepe in half twice to create a neat triangular shape.
Rolled
Place the filling along one side and roll tightly.
Filled Pocket
Place filling in the center, fold the sides inward, then fold the bottom upward.
🧊 Storage
Allow cooked crepes to cool completely.
Stack them with parchment paper between each crepe and store in an airtight container.
Refrigerate for up to 3 days.
❄️ Freezing
Crepes freeze beautifully.
Place a piece of parchment or wax paper between each crepe and transfer the stack to a freezer-safe bag or container.
Freeze for up to 2 months.
Thaw in the refrigerator or gently separate them while still slightly frozen.
🔥 Reheating
Warm individual crepes in a skillet over medium-low heat for approximately 15–20 seconds per side.
You can also microwave a stack covered with a slightly damp paper towel in short intervals until warm.
🥞✨ Final Result
These Easy Homemade Crepes are wonderfully thin, soft, tender, and buttery, with just enough sweetness to make them perfect for almost any filling.
Once you’ve mastered the simple batter and swirling technique, you’ll have a versatile recipe you can make for breakfast, brunch, dessert, or a quick savory meal.
Fill, fold, drizzle, and enjoy! 🥞🍓🍫✨