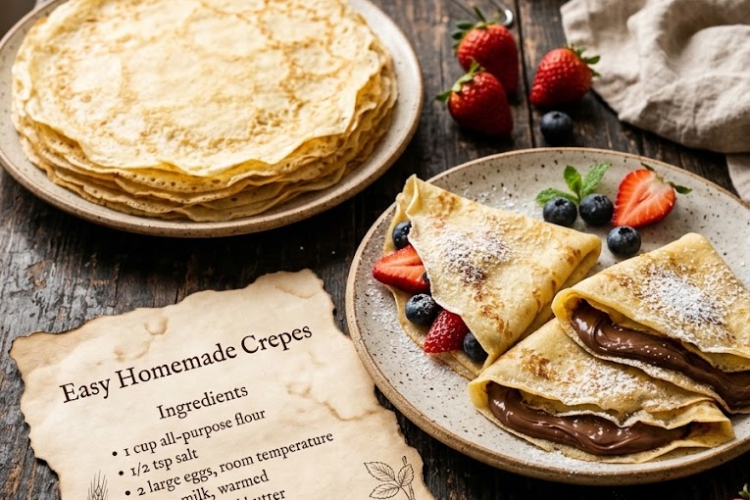
🥞 Easy Homemade Crepes – Thin, Soft & Delicious
These Easy Homemade Crepes are wonderfully thin, tender, buttery, and incredibly versatile. Made with simple pantry ingredients, they have delicate golden edges and a soft, flexible texture that makes them perfect for folding, rolling, or filling with your favorite sweet and savory ingredients.
Unlike thick, fluffy pancakes, crepes are light and delicate, with a smooth batter that spreads easily across a hot skillet. Enjoy them for breakfast, brunch, dessert, or a quick snack. Fill them with fresh strawberries, bananas, Nutella, whipped cream, or cream cheese—or make a savory version with cheese, chicken, mushrooms, and vegetables.
Best of all, you don’t need a special crepe pan or electric mixer. A regular nonstick skillet and a few simple techniques are all you need!
Recipe Information
- Prep Time: 10 minutes
- Resting Time: 20–30 minutes
- Cook Time: 15–20 minutes
- Total Time: Approximately 45–60 minutes
- Yield: 8–10 crepes
- Course: Breakfast, Brunch, Dessert, Snack
- Cuisine: French-inspired
- Difficulty: Easy
Ingredients
For the Crepe Batter
- 1 cup all-purpose flour (125 g)
- ½ teaspoon salt
- 2 large eggs, at room temperature
- 1 cup milk (240 ml), warmed but not hot
- 3 tablespoons unsalted butter (42 g), melted and slightly cooled
- ¼ cup water (60 ml)
For Cooking
- 2 tablespoons cooking oil (30 ml), for lightly greasing the skillet as needed
Optional for Sweet Crepes
- 1–2 tablespoons granulated sugar
- 1 teaspoon vanilla extract
- Finely grated lemon or orange zest, optional
The basic recipe is neutral in flavor, making it suitable for both sweet and savory fillings.
Instructions
Step 1: Combine the Dry Ingredients
In a large mixing bowl, whisk together the flour and salt until evenly combined.
If you’re making sweet crepes, add the optional sugar at this stage. For extra flavor, you can also add vanilla extract later with the wet ingredients.
Step 2: Whisk the Eggs and Milk
In a separate bowl, lightly whisk the eggs until the yolks and whites are combined.
Gradually whisk in the warm milk until smooth.
Make sure the milk is warm rather than hot. Very hot milk can partially cook the eggs, while lukewarm milk helps the ingredients combine easily.
Step 3: Make the Batter
Make a well in the center of the flour mixture. Slowly pour in the egg and milk mixture, whisking continuously from the center outward to incorporate the flour gradually.
Continue whisking until a smooth batter forms.
Add the melted butter and water, then whisk again until fully combined. The batter should be thin and pourable, similar to light cream.
If a few lumps remain, pass the batter through a fine-mesh sieve or blend briefly until smooth.
Tip: Don’t worry if the batter looks thinner than regular pancake batter. Crepes need a much more fluid consistency so they spread into a thin layer in the pan.
Step 4: Rest the Batter
Cover the bowl and let the batter rest at room temperature for 20–30 minutes.
Resting allows the flour to absorb the liquid and the gluten to relax, helping produce tender crepes that are easier to spread and less likely to tear.
If preparing the batter farther in advance, cover and refrigerate it. Give it a gentle whisk before cooking, as the ingredients may settle slightly.
Step 5: Prepare the Skillet
Place a nonstick skillet, approximately 8–10 inches (20–25 cm) wide, over medium heat.
Add a small amount of cooking oil and spread it over the bottom with a folded paper towel or heatproof brush. The surface should be lightly greased, not swimming in oil.
Allow the skillet to heat thoroughly before adding the batter.
To check the temperature, drop a small amount of batter into the pan. It should begin setting gently without immediately browning or burning.
Step 6: Cook the First Crepe
Give the batter a gentle stir.
Lift the skillet from the heat and pour in approximately ¼ cup (60 ml) of batter, adjusting the amount according to the size of your pan.
Immediately tilt and rotate the skillet in a circular motion so the batter spreads into a thin, even layer across the bottom.
Return the skillet to the heat and cook for approximately 45–90 seconds, until the surface looks set and the edges begin to lift slightly.
The underside should be lightly golden in places.
Step 7: Flip the Crepe
Carefully slide a thin spatula beneath the edges to loosen the crepe.
Once the crepe releases easily, gently flip it using the spatula. If you’re comfortable with the technique, you can also flip it with a quick movement of the skillet.
Cook the second side for approximately 20–40 seconds, until lightly golden and fully set.
Transfer the finished crepe to a plate.
Step 8: Repeat with the Remaining Batter
Lightly grease the skillet again only when needed.
Repeat the pouring, swirling, and cooking process with the remaining batter, stacking the finished crepes on the plate.
If the crepes brown too quickly, lower the heat slightly. If the batter takes too long to set, increase the heat a little.
The first crepe may not look perfect while you adjust the skillet temperature and batter quantity. This is completely normal.
Step 9: Fill and Fold
Allow the crepes to cool slightly before adding delicate fillings.
For sweet crepes, spread Nutella, jam, cream cheese, or whipped cream across one half, then add fresh fruit and fold into quarters or roll into a cylinder.
For savory crepes, add cheese, cooked chicken, mushrooms, or sautéed vegetables. Fold or roll the crepes, then warm briefly in the skillet if you want the filling heated through.
Step 10: Serve and Enjoy
Arrange the crepes on a serving platter and add your chosen toppings.
For sweet crepes, finish with powdered sugar, fresh berries, chocolate sauce, or caramel. For savory crepes, garnish with fresh herbs and serve with a simple salad.
Enjoy them warm for the best flavor and texture!
Chef’s Tips for Perfect Homemade Crepes
- Keep the batter thin: A fluid batter is essential for delicate, evenly shaped crepes.
- Rest before cooking: This improves the texture and makes the batter easier to handle.
- Use a nonstick skillet: It helps prevent sticking and makes flipping much easier.
- Grease lightly: Too much oil can create uneven surfaces and interfere with spreading.
- Swirl immediately: As soon as the batter hits the skillet, tilt the pan so the bottom is covered before the batter sets.
- Don’t rush the flip: Wait until the edges lift and the underside releases easily.
- Adjust the heat as needed: Medium heat generally works best; excessive heat can brown the crepes before they cook evenly.
- Keep the finished crepes covered: A clean kitchen towel placed loosely over the stack helps prevent the edges from drying out.
- Whisk the batter occasionally: Flour can settle at the bottom while the crepes are being cooked.
Delicious Crepe Filling Ideas
🍓 Strawberry and Cream Crepes
Fill with sliced strawberries and whipped cream or sweetened cream cheese. Finish with powdered sugar.
🍌 Nutella Banana Crepes
Spread Nutella over a warm crepe, add banana slices, and drizzle with melted chocolate.
🍏 Cinnamon Apple Crepes
Fill with sautéed apples cooked with butter, brown sugar, and cinnamon for an apple-pie-inspired treat.
🍫 Chocolate Cheesecake Crepes
Combine softened cream cheese, powdered sugar, and vanilla. Spread over the crepe and drizzle with chocolate sauce.
🧀 Savory Cheese Crepes
Fill with shredded cheddar, mozzarella, or Gruyère and warm in the skillet until the cheese melts.
🍗 Chicken and Mushroom Crepes
Fill with cooked chicken, sautéed mushrooms, and a creamy white sauce for a satisfying lunch or dinner.
🥬 Spinach and Cheese Crepes
Combine cooked spinach with ricotta or cream cheese, season with black pepper, and fold into the crepes.
Make-Ahead Instructions
The batter can be prepared up to 24 hours in advance and stored in a covered container in the refrigerator. Whisk gently before cooking.
Cooked crepes can also be made ahead. Allow them to cool, then stack them with small squares of parchment paper between them if you want to prevent sticking. Cover tightly and refrigerate until needed.
For serving, warm the crepes briefly in a skillet or microwave before adding your fillings.
Storage Instructions
Refrigerator: Store cooled, unfilled crepes in an airtight container or tightly wrapped stack for up to 3 days.
Freezer: Place parchment paper between the crepes, wrap the stack securely, and freeze for up to 2 months for best quality.
Thawing: Thaw frozen crepes in the refrigerator or at room temperature until pliable, keeping them covered to prevent drying.
Reheating: Warm individual crepes in a lightly greased skillet over low heat for a few seconds per side, or microwave briefly under a cover.
Storage tip: If the crepes have already been filled with cream, meat, or other perishable ingredients, refrigerate them promptly and follow the appropriate storage guidance for the filling.
Frequently Asked Questions
Why are my crepes tearing when I flip them?
They may be too thin, insufficiently cooked, or difficult to release from the pan. Let the underside set fully, use a thin spatula, and make sure the skillet is lightly greased.
Why are my crepes thick instead of thin?
The batter may be too thick, or you may be using too much for the size of your skillet. Add a tablespoon of water or milk if necessary, then use approximately ¼ cup of batter for an 8–10-inch pan.
Can I make crepes without a blender or mixer?
Absolutely! A hand whisk works perfectly. Add the wet ingredients gradually to the flour to minimize lumps, and strain the batter if necessary.
Can I use water instead of milk?
Yes, but the crepes will be less rich and tender. Milk gives them a softer texture and better flavor.
Can I make these crepes without butter?
Yes. You can replace the melted butter with an equal amount of neutral oil, although the flavor will be slightly different.
Why is my first crepe uneven?
The skillet may not have reached the correct temperature yet, or the pan may need a little more practice to swirl the batter evenly. Adjust the heat and batter amount for the remaining crepes.
Can I make this recipe sweet or savory?
Yes. The basic recipe is neutral. Add sugar and vanilla for dessert crepes, or leave them out and use savory fillings such as cheese, chicken, mushrooms, or spinach.
Serving Suggestions
Serve these Homemade Crepes with:
- Fresh strawberries, blueberries, or bananas
- Nutella or melted chocolate
- Honey, maple syrup, or caramel sauce
- Powdered sugar and lemon juice
- Whipped cream or vanilla ice cream
- Cheese, ham, cooked chicken, or sautéed mushrooms
- Fresh salads for a savory meal
For a brunch spread, make a stack of plain crepes and offer a selection of sweet and savory fillings so everyone can create their favorite combination.
Final Result
These Easy Homemade Crepes are thin, tender, buttery, and beautifully flexible, making them the perfect base for endless sweet or savory combinations. Their delicate texture and simple preparation make them a versatile favorite for breakfast, brunch, lunch, or dessert.
The secret to success: let the batter rest, keep it thin and pourable, heat the skillet evenly, and swirl the batter immediately after pouring. With these simple techniques, you’ll make delicious homemade crepes that are soft, golden, and easy to fill every time!