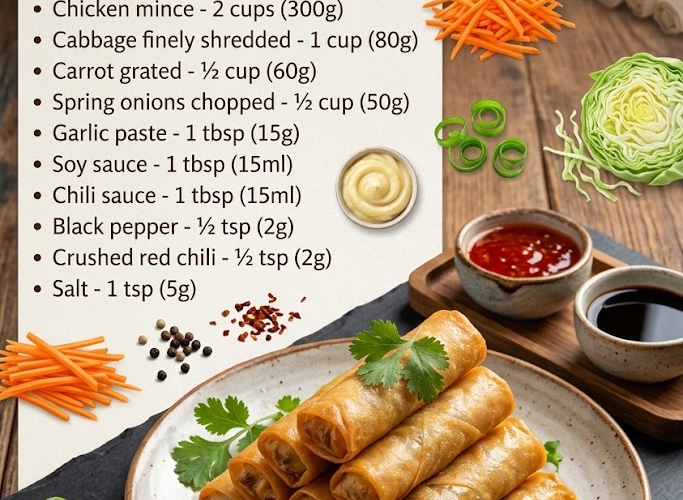
🥢 Crispy Chicken Spring Rolls
Golden, crispy, and packed with flavorful chicken and fresh vegetables, these homemade Chicken Spring Rolls make an irresistible appetizer, snack, or party favorite.
The filling is seasoned with soy sauce, chili sauce, garlic, and spices, then wrapped in thin spring roll sheets and fried until perfectly crisp.
⏱️ Recipe Information
Prep Time: 25 minutes
Cook Time: 15–20 minutes
Total Time: 40–45 minutes
Yield: 20 spring rolls
Difficulty: Easy
🛒 Ingredients
🍗 Chicken & Vegetable Filling
- 2 cups (300 g) chicken mince
- 1 cup (80 g) finely shredded cabbage
- ½ cup (60 g) grated carrot
- ½ cup (50 g) chopped spring onions
- 1 tablespoon (15 g) garlic paste
- 1 tablespoon (15 ml) soy sauce
- 1 tablespoon (15 ml) red chili sauce
- ½ teaspoon (2 g) black pepper
- ½ teaspoon (2 g) crushed red chili
- 1 teaspoon (5 g) salt
- 1 tablespoon (15 ml) oil
🥟 For Wrapping
- 20 spring roll sheets
- Oil, about 500 ml, for deep frying
Optional Sealing Paste
- 1 tablespoon all-purpose flour
- 1½ tablespoons water
Mix together until smooth and thick enough to brush onto the edges of the wrappers.
👩🍳 Instructions
1. Prepare the Filling
Heat 1 tablespoon oil in a large skillet or wok over medium-high heat.
Add the chicken mince.
Cook for approximately 5–7 minutes, breaking it apart with a wooden spoon or spatula, until fully cooked and no longer pink.
2. Add the Garlic and Seasonings
Add the garlic paste, soy sauce, red chili sauce, black pepper, crushed red chili, and salt.
Stir well and cook for another 1–2 minutes, allowing the garlic and sauces to become fragrant.
3. Add the Vegetables
Add the shredded cabbage, grated carrot, and chopped spring onions.
Stir-fry over medium-high heat for approximately 2–3 minutes.
The vegetables should soften slightly while retaining some crunch.
Avoid overcooking them.
4. Cool the Filling
Remove the skillet from the heat.
Transfer the filling to a wide plate or bowl and spread it out so it cools more quickly.
Allow the mixture to cool completely before assembling the spring rolls.
Important: Hot or overly wet filling can make the spring roll wrappers soggy and difficult to seal.
If the filling appears watery, continue cooking for another minute or two until the excess moisture evaporates.
🥟 5. Fill the Spring Roll Sheets
Place one spring roll sheet on a clean work surface with one corner pointing toward you.
Place approximately 1½–2 tablespoons of filling near the lower third of the wrapper.
Don’t overfill.
6. Roll the Spring Rolls
Fold the bottom corner over the filling.
Fold the left and right corners toward the center.
Roll the spring roll upward tightly, keeping the filling contained.
Brush the final corner with flour paste or a little water.
Seal firmly.
Repeat with the remaining wrappers and filling.
🍳 7. Heat the Oil
Pour approximately 500 ml oil into a deep skillet or saucepan.
Heat to approximately 350°F (175°C).
The oil should be hot enough that a small piece of wrapper immediately sizzles when added.
🔥 8. Fry the Spring Rolls
Carefully place the spring rolls into the hot oil in small batches.
Don’t overcrowd the pan.
Fry for approximately 3–5 minutes, turning occasionally, until the wrappers are evenly golden brown and crisp.
Maintain the oil temperature between batches.
🧺 9. Drain
Remove the spring rolls with a slotted spoon or tongs.
Place them on a wire rack over a baking sheet to drain.
A wire rack helps prevent the bottoms from becoming soggy.
Let them rest for a couple of minutes before serving.
🥢 10. Serve
Serve the Chicken Spring Rolls hot and crispy with your favorite dipping sauce.
Great options include:
- Sweet chili sauce
- Soy-chili dipping sauce
- Garlic chili sauce
- Plum sauce
- Sriracha mayo
- Homemade spring roll dipping sauce
⭐ Chef’s Tips
Cool the Filling Completely
This is one of the most important steps. Warm filling creates steam inside the wrapper and can cause the spring rolls to split or become soggy.
Keep the Filling Dry
Excess moisture is the enemy of crispy spring rolls. Cook until most of the liquid has evaporated.
Don’t Overfill
Too much filling makes the wrapper difficult to roll and increases the chance of bursting during frying.
Roll Tightly
A snug roll creates a crisp, even shell and prevents oil from getting inside.
Seal Well
Make sure the final edge is firmly sealed before frying.
Fry in Small Batches
Crowding lowers the oil temperature and can result in greasy spring rolls.
🧊 Make-Ahead Instructions
Assemble the spring rolls and place them in a single layer on a parchment-lined tray.
Cover lightly and refrigerate for up to 24 hours before frying.
Don’t stack them directly on top of one another, as they can stick together.
❄️ Freezing Instructions
For longer storage, assemble the uncooked spring rolls and place them in a single layer on a tray.
Freeze until firm, then transfer to a freezer-safe bag or container.
They can be frozen for up to 2 months.
Fry directly from frozen—do not thaw first—adding extra cooking time as needed.
🔥 Air Fryer Option
For a lighter alternative, lightly brush or spray the assembled spring rolls with oil.
Air fry at 375°F (190°C) for approximately 10–14 minutes, turning halfway through, until golden and crisp.
Cooking time can vary depending on the air fryer and whether the spring rolls are fresh or frozen.
🍽️ Serving Ideas
Make these spring rolls part of an appetizer platter with:
- Vegetable fried rice
- Chicken fried rice
- Chow mein
- Dumplings
- Crispy wontons
- Asian cucumber salad
- Sweet chili dipping sauce
🧊 Storage
Store leftover fried spring rolls in an airtight container in the refrigerator for up to 3 days.
For the best texture, reheat in an air fryer or oven rather than the microwave.
🥢🍗 Final Result
These Chicken Spring Rolls are loaded with seasoned minced chicken, crisp vegetables, garlic, and chili, all wrapped in a delicate pastry shell and fried until deep golden, crunchy, and irresistibly crisp.
Savory chicken filling + crunchy vegetables + crispy wrapper + sweet chili dip = the perfect homemade appetizer! 🥢✨