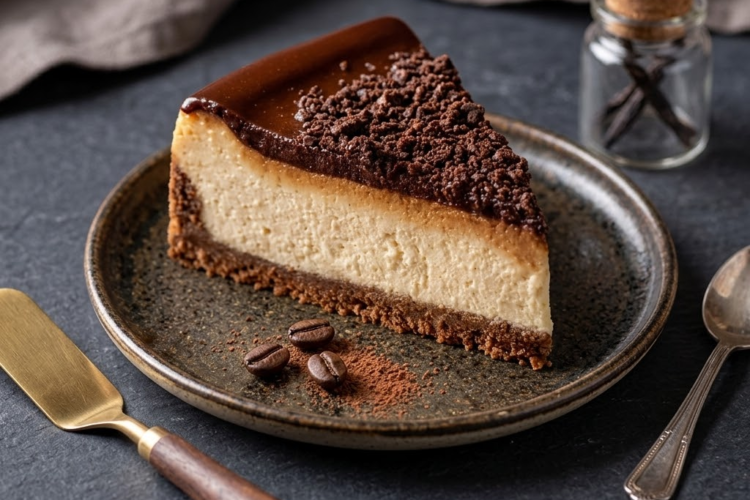
Creamy Coffee Cheesecake
Rich, silky, and infused with deep coffee flavor, this Creamy Coffee Cheesecake is the ultimate dessert for coffee lovers.
A buttery digestive biscuit crust supports a smooth, creamy coffee cheesecake filling that’s baked until just set and chilled until perfectly sliceable. Serve it plain, with whipped cream, or with a drizzle of chocolate for an elegant finish.
⏱ Recipe Information
Prep Time: 25 minutes
Bake Time: 50–60 minutes
Chill Time: 4–6 hours
Total Time: About 6 hours 25 minutes
Servings: 8–10 slices
Difficulty: Intermediate
Method: Oven-Baked
Ingredients
A. Biscuit Crust
- 2 cups digestive biscuit crumbs
- ½ cup (115 g) unsalted butter, melted
B. Coffee Cheesecake Filling
- 16 oz (450 g) full-fat cream cheese, softened
- ¾ cup (150 g) granulated sugar
- 3 large eggs, room temperature
- ½ cup (120 ml) sour cream
- 2 teaspoons vanilla extract
- 2 tablespoons instant espresso powder
- 1 tablespoon hot water
- 2 tablespoons all-purpose flour
- ¼ teaspoon salt
Optional Toppings
- Whipped cream
- Chocolate shavings
- Cocoa powder
- Chocolate sauce
- Coffee beans, for decoration
Instructions
1. Prepare the Oven
Preheat your oven to 325°F (165°C).
Grease the bottom and sides of a 9-inch springform pan.
For easier cleanup, you can wrap the outside bottom of the pan with aluminum foil if using a water bath.
2. Make the Biscuit Crust
Place the digestive biscuit crumbs in a medium bowl.
Add the melted butter and mix until all the crumbs are evenly coated.
The mixture should resemble damp sand and hold together when pressed.
3. Press the Crust Into the Pan
Transfer the crumb mixture into the prepared springform pan.
Press it firmly and evenly across the bottom.
Use the bottom of a glass or measuring cup to compact the crust.
For a slightly thicker crust, press some of the crumbs about 1 inch up the sides of the pan.
4. Bake the Crust
Bake the crust for 8–10 minutes.
Remove from the oven and allow it to cool while preparing the filling.
Make the Coffee Cheesecake Filling
5. Dissolve the Coffee
Place the instant espresso powder in a small bowl.
Add the hot water and stir until completely dissolved.
Set aside to cool slightly.
Using concentrated espresso gives the cheesecake a strong coffee flavor without adding too much liquid.
6. Beat the Cream Cheese
Place the softened cream cheese in a large mixing bowl.
Beat on low to medium speed until smooth and creamy.
Avoid whipping at high speed, as incorporating too much air can cause the cheesecake to puff and crack during baking.
7. Add the Sugar
Gradually add the granulated sugar.
Mix until completely incorporated and smooth.
Scrape down the sides of the bowl as needed.
8. Add the Eggs
Add the eggs one at a time, mixing gently after each addition.
Stop mixing as soon as each egg is incorporated.
9. Add the Remaining Ingredients
Add:
- Sour cream
- Vanilla extract
- Dissolved espresso
- Flour
- Salt
Mix on low speed until the filling is smooth and evenly combined.
Do not overmix.
10. Pour Into the Crust
Pour the cheesecake filling over the cooled biscuit crust.
Gently tap the pan against the counter a couple of times to release any large air bubbles.
Smooth the top with a spatula.
Bake the Cheesecake
11. Bake
Place the cheesecake in the preheated 325°F (165°C) oven.
Bake for approximately 50–60 minutes.
The cheesecake is ready when the edges are set but the center still has a slight wobble when the pan is gently shaken.
Don’t wait until the center is completely firm—the cheesecake will continue setting as it cools.
12. Cool Gradually
Turn off the oven and crack the oven door open.
Leave the cheesecake inside for approximately 30 minutes.
This gradual cooling helps reduce the risk of sudden temperature changes causing cracks.
Remove the cheesecake from the oven and allow it to cool completely at room temperature.
13. Chill
Cover the cheesecake and refrigerate for at least 4–6 hours.
For the best texture and cleanest slices, refrigerate it overnight.
14. Release the Cheesecake
Once completely chilled, carefully run a thin knife around the edge of the cheesecake.
Release the springform pan.
Transfer the cheesecake to a serving plate.
15. Decorate and Serve
Top with whipped cream if desired.
Finish with chocolate shavings, a light dusting of cocoa powder, or a drizzle of chocolate sauce.
Slice with a sharp knife and serve chilled.
For exceptionally clean slices, dip the knife in hot water, wipe it dry, and slice. Repeat between cuts.
Chef’s Tips
Use Full-Fat Cream Cheese
Full-fat cream cheese provides the richest flavor and creamiest texture.
Room-Temperature Ingredients Matter
Softened cream cheese and room-temperature eggs blend more easily and help prevent lumps.
Don’t Overbeat
Too much air can cause the cheesecake to rise dramatically and then collapse or crack as it cools.
Don’t Overbake
A slight jiggle in the center is exactly what you want. The cheesecake firms considerably during refrigeration.
Chill Thoroughly
Don’t rush the chilling stage. The cheesecake needs several hours to fully set.
Optional Water Bath
For an especially smooth cheesecake:
- Wrap the outside of the springform pan tightly with two layers of foil.
- Place the cheesecake pan inside a larger roasting pan.
- Pour hot water into the roasting pan until it reaches approximately halfway up the sides of the cheesecake pan.
- Bake as directed.
The gentle steam and even heat help create a smooth, creamy texture.
Flavor Variations
Mocha Cheesecake
Add ½ cup melted and cooled dark chocolate to the filling.
Coffee Caramel Cheesecake
Drizzle caramel sauce over the chilled cheesecake before serving.
Tiramisu Cheesecake
Add a little mascarpone to the filling and dust the finished cheesecake generously with cocoa powder.
Chocolate Biscuit Crust
Replace the digestive biscuits with chocolate sandwich cookies.
Hazelnut Coffee Cheesecake
Add 2 tablespoons hazelnut spread to the filling and finish with toasted chopped hazelnuts.
Make-Ahead Instructions
This cheesecake is ideal for making ahead.
Prepare it 1–2 days before serving and keep it refrigerated.
Add whipped cream and decorative toppings shortly before serving for the freshest presentation.
Storage
Keep the cheesecake covered and refrigerated.
Refrigerator: Up to 5 days.
For the best flavor, remove it from the refrigerator about 10–15 minutes before serving.
Freezing Instructions
Freeze the cheesecake without whipped cream or fresh toppings.
Chill it completely, then wrap individual slices tightly in plastic wrap and place them in a freezer-safe container.
Freezer: Up to 2 months.
Thaw overnight in the refrigerator.
Recipe Summary
This Creamy Coffee Cheesecake combines the richness of classic cheesecake with the deep, aromatic flavor of espresso.
A buttery digestive biscuit crust provides the perfect contrast to the silky coffee-infused filling, while optional chocolate and whipped cream toppings turn it into an elegant coffeehouse-style dessert.
Buttery biscuit crust + silky coffee cheesecake + chocolate finish = pure coffee-lover heaven.