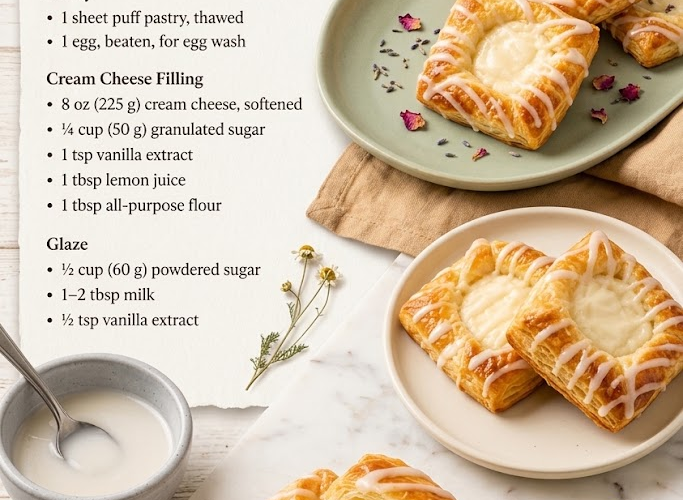
🥐 Cream Cheese Danish Pastries
Flaky, buttery, and beautifully golden, these easy Cream Cheese Danish Pastries feature crisp puff pastry wrapped around a rich, creamy vanilla-lemon filling. A simple sweet glaze adds the perfect finishing touch.
They’re wonderful for breakfast, brunch, afternoon coffee, holidays, or whenever you want a bakery-style pastry without making homemade laminated dough.
⏱️ Recipe Information
Prep Time: 15 minutes
Bake Time: 18–22 minutes
Total Time: 35–40 minutes
Yield: 6–8 pastries
Difficulty: Easy
🛒 Ingredients
🥐 Pastry
- 1 sheet puff pastry, thawed
- 1 large egg, beaten, for egg wash
🧀 Cream Cheese Filling
- 8 oz (225 g) cream cheese, softened
- ¼ cup (50 g) granulated sugar
- 1 teaspoon vanilla extract
- 1 tablespoon lemon juice
- 1 tablespoon all-purpose flour
🍚 Simple Glaze
- ½ cup (60 g) powdered sugar
- 1–2 tablespoons milk
- ½ teaspoon vanilla extract
👩🍳 Instructions
1. Prepare the Oven
Preheat the oven to 400°F (200°C).
Line a baking sheet with parchment paper.
Keep the puff pastry chilled until you’re ready to use it.
2. Make the Cream Cheese Filling
Place the softened cream cheese in a medium bowl.
Beat until smooth and creamy.
Add the sugar, vanilla extract, lemon juice, and flour.
Mix until completely combined and smooth.
Set aside.
The tablespoon of flour helps the filling hold its shape during baking rather than spreading excessively.
3. Prepare the Puff Pastry
Lightly flour your work surface if necessary.
Unfold the thawed puff pastry sheet.
If the pastry is very thick, gently roll it just enough to smooth out the creases.
Cut the pastry into 6–8 equal squares or rectangles.
Work quickly so the pastry stays cool.
4. Shape the Pastries
Place the pastry pieces on the prepared baking sheet.
For a classic Danish shape, lightly score a smaller square inside each piece, leaving about a ½-inch border around the edges.
Don’t cut all the way through.
Alternatively, fold the corners inward or create a simple oval-shaped Danish.
5. Add the Filling
Place approximately 1–1½ tablespoons of cream cheese filling in the center of each pastry.
Keep the filling inside the scored or folded area, leaving the outer edges exposed.
Avoid overfilling, as the cream cheese will expand slightly during baking.
6. Apply the Egg Wash
Brush the exposed puff pastry edges lightly with beaten egg.
Try not to let the egg wash drip down the sides of the pastry, as this can interfere with the puffing layers.
7. Chill Briefly
For especially flaky pastries, place the prepared Danish pastries in the refrigerator for 10–15 minutes before baking.
This helps the butter in the puff pastry remain cold and encourages better layers.
8. Bake
Bake for 18–22 minutes, or until the puff pastry is:
- Deep golden brown
- Crisp around the edges
- Fully puffed
- Cooked through underneath
The cream cheese filling should be set but still creamy.
9. Cool
Remove the pastries from the oven and let them cool on the baking sheet for about 10 minutes.
Transfer to a wire rack and allow them to cool further.
The filling will firm slightly as it cools.
10. Make the Glaze
In a small bowl, whisk together the powdered sugar, milk, and vanilla extract.
Start with 1 tablespoon of milk and add more a few drops at a time until the glaze reaches a smooth, drizzleable consistency.
11. Glaze and Serve
Drizzle the glaze over the cooled Danish pastries using a spoon or piping bag.
Allow the glaze to set for a few minutes.
Serve at room temperature or slightly warm.
⭐ Chef’s Tips
Keep Puff Pastry Cold
Cold pastry produces the best flaky layers. If it becomes soft while you’re working, refrigerate it briefly before baking.
Don’t Overfill
A modest amount of cream cheese filling keeps the pastries neat and prevents overflow.
Seal the Edges Carefully
If you’re folding or enclosing the filling, press the pastry gently so it stays together during baking.
Use Softened Cream Cheese
Room-temperature cream cheese creates a smooth filling without lumps.
Don’t Skip the Egg Wash
It gives the pastry a beautiful glossy, golden-brown finish.
Bake Until Deep Golden Brown
Underbaked puff pastry can remain doughy inside. Look for a well-puffed, golden exterior.
🍓 Easy Variations
Strawberry Cream Cheese Danish
Add 1 teaspoon strawberry jam to the center of each cream cheese filling before baking.
Blueberry Danish
Place a few fresh or frozen blueberries over the cream cheese filling.
Cherry Danish
Top each pastry with a spoonful of cherry pie filling.
Apple Cinnamon Danish
Add finely diced cooked apples and a pinch of cinnamon to the cream cheese filling.
Almond Danish
Add a few drops of almond extract to the filling and sprinkle sliced almonds over the pastry before baking.
Lemon Danish
Add extra lemon zest to the cream cheese filling and replace the vanilla glaze with a lemon glaze.
🧊 Storage
Store leftover Danish pastries in an airtight container in the refrigerator for up to 3 days.
Allow them to come close to room temperature before serving, or reheat briefly in the oven.
🔥 Reheating
For the best texture, reheat in a 325°F (165°C) oven for 5–8 minutes.
Avoid prolonged microwave heating, which can soften the puff pastry.
❄️ Make-Ahead Option
You can assemble the pastries several hours ahead of time.
Cover and refrigerate them unbaked.
Brush with egg wash immediately before baking.
For the flakiest result, bake them straight from the refrigerator.
🥐🧀 Final Result
These Cream Cheese Danish Pastries combine crisp, buttery puff pastry with a rich vanilla-lemon cream cheese filling and a delicate sweet glaze.
They’re quick enough for an everyday breakfast but elegant enough for a brunch spread.
Flaky pastry + creamy cheesecake-like filling + sweet glaze = an irresistible homemade Danish. 🥐✨