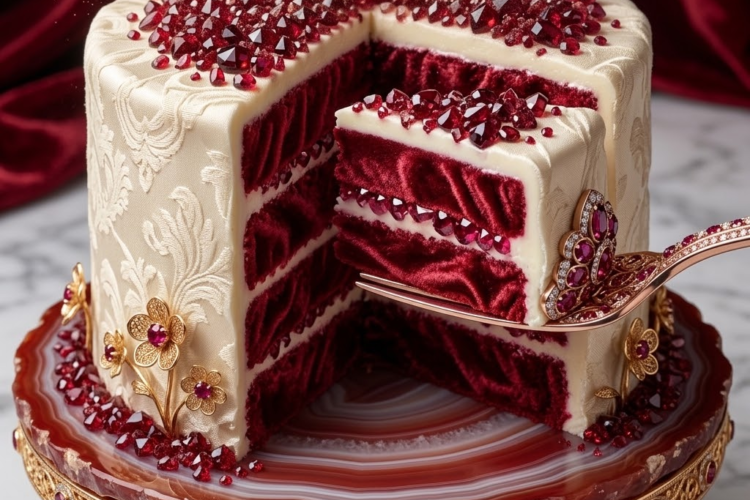
❤️🍰 Classic Red Velvet Cake
Velvety soft, moist, lightly cocoa-flavored, and covered in luscious cream cheese frosting, this classic Red Velvet Cake is an elegant dessert that’s perfect for birthdays, holidays, celebrations, and special occasions.
The cake gets its signature texture from buttermilk, butter, oil, and vinegar, while a small amount of cocoa provides its distinctive subtle chocolate flavor. Finished with a smooth, tangy cream cheese frosting, every bite is rich without being overwhelmingly sweet.
⏱️ Recipe Information
Prep Time: 25 minutes
Bake Time: 25–30 minutes
Cooling Time: 1 hour
Total Time: About 2 hours
Servings: 10–12
Difficulty: Easy
Method: Oven-Baked
Cake Pans: Two 9-inch round pans
🛒 Ingredients
For the Red Velvet Cake
- 2½ cups (315 g) all-purpose flour
- 1½ tablespoons unsweetened cocoa powder
- 1 teaspoon baking soda
- ½ teaspoon salt
- 1½ cups (300 g) granulated sugar
- ½ cup (113 g) unsalted butter, softened
- ½ cup (120 ml) vegetable oil
- 2 large eggs, room temperature
- 1 teaspoon vanilla extract
- 1 cup (240 ml) buttermilk, room temperature
- 1 tablespoon white vinegar
- 1–2 tablespoons red gel food coloring, depending on desired color
For the Cream Cheese Frosting
- 16 oz (450 g) full-fat cream cheese, softened
- ½ cup (113 g) unsalted butter, softened
- 4 cups (480 g) powdered sugar, sifted
- 2 teaspoons vanilla extract
- 1–2 tablespoons heavy cream or milk, if needed
- Pinch of salt
👩🍳 Instructions
Make the Red Velvet Cake
1. Prepare the Cake Pans
Preheat your oven to 350°F (175°C).
Grease two 9-inch round cake pans.
Line the bottoms with parchment paper, then lightly grease the parchment as well.
Set aside.
2. Combine the Dry Ingredients
In a medium bowl, whisk together:
- Flour
- Cocoa powder
- Baking soda
- Salt
Whisk until evenly combined and set aside.
3. Cream the Butter and Sugar
In a large mixing bowl, beat the softened butter and granulated sugar with an electric mixer for approximately 2–3 minutes.
The mixture should become lighter and fluffy.
4. Add the Oil
Slowly pour in the vegetable oil while continuing to mix.
Beat until the butter, sugar, and oil are well combined.
The oil helps keep the cake especially moist.
5. Add the Eggs and Vanilla
Add the eggs one at a time, mixing well after each addition.
Add the vanilla extract and mix briefly.
Scrape down the sides of the bowl as needed.
6. Add the Buttermilk and Dry Ingredients
With the mixer on low speed, add approximately one-third of the dry ingredients.
Mix briefly.
Add half of the buttermilk and mix until just incorporated.
Continue alternating the remaining dry ingredients and buttermilk, ending with the dry ingredients.
Do not overmix.
7. Add the Vinegar and Food Coloring
Add the white vinegar and red gel food coloring.
Mix just until the batter is evenly colored.
The batter should have a rich red color with a subtle cocoa aroma.
8. Divide the Batter
Divide the batter evenly between the prepared cake pans.
Smooth the tops gently with a spatula.
Tap the pans lightly on the counter once or twice to remove any large air pockets.
9. Bake
Bake for 25–30 minutes, or until a toothpick inserted into the center comes out clean or with a few moist crumbs attached.
Avoid overbaking—the cake should remain soft and moist.
10. Cool the Cakes
Remove the cakes from the oven and allow them to cool in their pans for approximately 10 minutes.
Run a thin knife around the edges, then carefully turn the cakes onto a wire rack.
Remove the parchment paper.
Allow the layers to cool completely before frosting.
🧁 Make the Cream Cheese Frosting
11. Beat the Cream Cheese and Butter
Place the softened cream cheese and butter in a large mixing bowl.
Beat with an electric mixer for 2–3 minutes, until completely smooth and creamy.
12. Add the Powdered Sugar
Gradually add the sifted powdered sugar, mixing on low speed until incorporated.
Increase the speed slightly and beat until smooth and fluffy.
13. Add Vanilla and Salt
Add the vanilla extract and a small pinch of salt.
Beat until fully combined.
If the frosting is too thick, add 1 tablespoon of heavy cream or milk and mix again.
Add another tablespoon only if necessary.
🎂 Assemble the Cake
14. Level the Cake Layers
Once completely cool, check the tops of the cake layers.
If they’re domed, carefully trim the tops with a serrated knife to create even layers.
Don’t discard the trimmings—they can be crumbled and used to decorate the cake.
15. Add the First Layer
Place one cake layer on a serving plate or cake stand.
Spread a generous layer of cream cheese frosting evenly over the top.
16. Add the Second Layer
Place the second cake layer on top.
Press down very gently to secure it.
Spread frosting over the top and sides of the cake.
17. Decorate
For a classic Red Velvet finish, crumble the reserved cake trimmings over the top of the frosted cake.
Alternatively, decorate with:
- Red velvet cake crumbs
- White chocolate shavings
- Fresh berries
- Small piped frosting swirls
- Chocolate curls
18. Chill Before Serving
Refrigerate the assembled cake for 30–60 minutes before slicing.
This allows the frosting to firm up and makes the cake easier to cut cleanly.
For the best flavor and texture, let it sit at room temperature for about 15–20 minutes before serving.
⭐ Chef’s Tips
Use gel food coloring: Gel coloring provides a strong red color without adding too much liquid to the batter.
Don’t overmix: Once the flour is added, mix only until the ingredients are combined.
Use room-temperature ingredients: Room-temperature eggs, buttermilk, butter, and cream cheese blend more evenly.
Don’t overbake: Red Velvet Cake should be moist and tender. Start checking around 25 minutes.
Use full-fat cream cheese: It produces a thicker, richer frosting that holds its shape better.
Chill the frosting if necessary: If the frosting becomes too soft, refrigerate it for 15–20 minutes before decorating.
For perfectly even layers: Weigh the batter and divide it equally between the two pans.
❤️ Easy Variations
Red Velvet Cupcakes
Divide the batter among lined muffin cups and bake at 350°F (175°C) for approximately 18–22 minutes.
Red Velvet Sheet Cake
Bake the batter in a greased 9×13-inch pan for approximately 30–35 minutes.
Chocolate Red Velvet Cake
Increase the cocoa powder to ¼ cup (about 20 g) for a slightly deeper chocolate flavor.
Red Velvet Cheesecake Cake
Add a thin baked cheesecake layer between the two Red Velvet layers for an impressive celebration dessert.
Mini Red Velvet Cakes
Bake the batter in small round cake pans, then stack individual layers with cream cheese frosting.
🍽️ Serving Suggestions
Serve slices with:
- Fresh strawberries
- Raspberries
- Vanilla ice cream
- Whipped cream
- Fresh berries
- White chocolate curls
- A drizzle of chocolate sauce
A cold glass of milk or a cup of freshly brewed coffee is also an excellent pairing.
🧊 Storage
Because the cake contains cream cheese frosting, keep it refrigerated.
Store the assembled cake in an airtight cake container or cover it well.
Refrigerate for up to 4–5 days.
For the best texture, let individual slices sit at room temperature for 15–20 minutes before serving.
❄️ Freezing
The unfrosted cake layers can be frozen for up to 3 months.
Wrap each completely cooled layer tightly in plastic wrap, followed by aluminum foil.
Thaw overnight in the refrigerator before frosting.
The finished frosted cake can also be frozen, preferably in individual slices, for up to 1 month.
❤️🍰 Final Result
This Classic Red Velvet Cake has everything you want from the beloved Southern-style dessert: soft, moist red velvet layers, a delicate cocoa flavor, subtle tang from buttermilk and vinegar, and a rich, creamy cream cheese frosting.
The striking red layers and snowy white frosting make it just as beautiful on a celebration table as it is delicious.
Moist, velvety, tangy, creamy, and absolutely irresistible. ❤️🍰✨