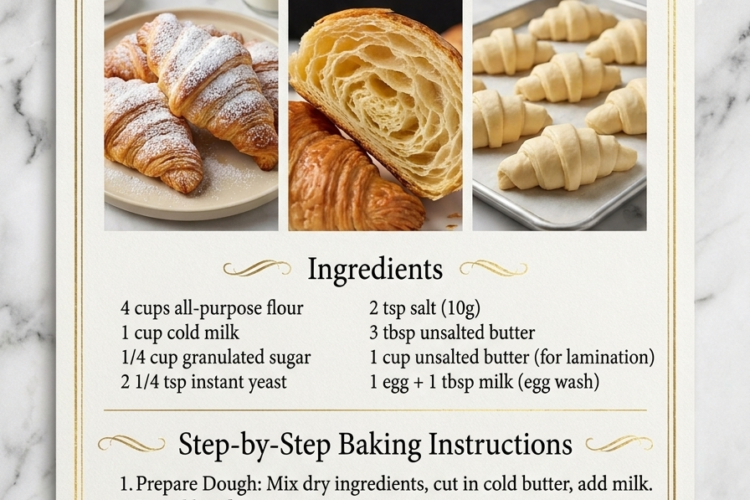
🥐 Classic Homemade Butter Croissants – Flaky, Golden & Buttery!
There’s nothing quite like biting into a freshly baked butter croissant: a beautifully golden, crisp exterior that breaks into delicate flakes, revealing a soft, airy interior with dozens of buttery layers.
These Classic Butter Croissants are made with a simple yeast dough and plenty of real butter, carefully folded and rolled to create the signature flaky layers everyone loves. Although croissants take a little patience because of the chilling and folding process, the result is absolutely worth it!
Perfect for breakfast, brunch, afternoon coffee, or a special homemade bakery-style treat, these croissants will make your kitchen smell like a French bakery. ❤️
Recipe Details
- Prep Time: 1 hour
- Chilling and Laminating Time: 6–8 hours, including overnight chilling
- Proofing Time: 2–2½ hours
- Bake Time: 18–22 minutes
- Total Time: Approximately 10–12 hours, including resting and chilling
- Yield: 12 croissants
- Course: Breakfast, Brunch, Pastry
- Cuisine: French-inspired
- Difficulty: Intermediate
Ingredients
For the Croissant Dough
- 4 cups (500 g) all-purpose flour
- 1 cup (240 ml) cold milk
- ¼ cup (50 g) granulated sugar
- 2¼ teaspoons (7 g) instant yeast
- 1 teaspoon (9–10 g) salt
- 3 tablespoons (42 g) unsalted butter, softened
For the Butter Layer
- 1 cup plus 2 tablespoons (250 g) unsalted European-style butter, cold
For the Egg Wash
- 1 large egg
- 1 tablespoon (15 ml) milk
Optional for Serving
- Honey or jam
- Butter
- Powdered sugar
- Chocolate hazelnut spread
Recipe note: The original ingredient list included the flour, milk, sugar, and yeast. Salt, butter for the dough, the separate butter block for laminating, and egg wash are suggested additions essential for making traditional flaky butter croissants.
Instructions
1. Prepare the Croissant Dough
In a large mixing bowl, combine the all-purpose flour, granulated sugar, instant yeast, and salt.
Add the cold milk and softened butter.
Mix with a wooden spoon or stand mixer fitted with a dough hook until a rough dough forms.
Knead on low speed for approximately 5–7 minutes, or by hand for 8–10 minutes, until the dough becomes smooth and elastic.
The dough should feel firm but pliable, not excessively sticky. Avoid adding too much extra flour.
Shape the dough into a rectangle, wrap tightly in plastic wrap, and refrigerate for approximately 1 hour.
2. Prepare the Butter Block
Place the cold butter between two sheets of parchment paper.
Using a rolling pin, gently pound and roll the butter into a rectangle approximately 7 × 8 inches (18 × 20 cm) and about ½ inch (1.25 cm) thick.
The butter should be pliable but still cold.
If it becomes too soft or starts sticking to the parchment, place it in the refrigerator for 10–15 minutes.
Important: The butter and dough should have a similar firmness when you begin laminating. If the butter is too hard, it may break into pieces inside the dough. If it is too soft, it may squeeze out during rolling.
3. Enclose the Butter
Remove the chilled dough from the refrigerator and place it on a lightly floured work surface.
Roll it into a rectangle approximately 16 × 8 inches (40 × 20 cm).
Place the butter block in the center of the dough.
Fold the right side of the dough over the butter, then fold the left side over it, like folding a letter.
Pinch the seams gently to seal the butter inside.
Turn the dough so the folded seam is facing you.
You now have the butter enclosed in the dough, ready for lamination.
4. Complete the First Fold
Lightly dust the work surface with flour.
Roll the dough gently into a long rectangle approximately 24 × 8 inches (60 × 20 cm).
Use even pressure, rolling from the center outward. Avoid pressing too hard or allowing the butter to break through the dough.
Brush away excess flour.
Fold the bottom third of the dough upward toward the center, then fold the top third down over it, just like folding a business letter.
This is called a single fold or letter fold.
Wrap the dough in plastic wrap and refrigerate for 30–45 minutes.
5. Complete the Remaining Folds
Remove the dough from the refrigerator.
Place it on a lightly floured surface with the open ends facing you.
Roll it into another long rectangle of approximately the same size, then repeat the letter fold.
Wrap and refrigerate for another 30–45 minutes.
Repeat this process one more time, completing a total of three single folds.
Always chill the dough between folds. If it starts feeling soft, sticky, or difficult to roll, return it to the refrigerator before continuing.
After the third fold, wrap the dough tightly and refrigerate for at least 2 hours, preferably overnight.
This resting period allows the gluten to relax and makes the dough easier to shape.
6. Roll Out the Croissant Dough
Lightly flour your work surface.
Remove the chilled dough and roll it into a large rectangle approximately 18 × 10 inches (45 × 25 cm), about ¼ inch (5–6 mm) thick.
Keep the edges as straight as possible for evenly sized croissants.
If the dough becomes too warm or difficult to handle, refrigerate it for 10–15 minutes before continuing.
7. Cut the Croissant Triangles
Trim the edges of the dough with a sharp knife or pizza cutter to create a neat rectangle.
Cut the dough into 12 long triangles, approximately 3 inches (7.5 cm) wide at the base and 8–9 inches (20–23 cm) long.
Make a small ½-inch (1 cm) slit in the center of the wide base of each triangle.
This helps the croissants open slightly as you roll them.
8. Shape the Croissants
Take one triangle and gently stretch it lengthwise, without tearing the dough.
Starting at the wide end, roll it toward the pointed tip.
Keep the roll snug but do not squeeze the layers together.
As you roll, gently pull the base corners outward to create the traditional crescent shape.
Place each croissant on a parchment-lined baking tray with the pointed tip tucked underneath.
Leave enough space between them for expansion during proofing and baking.
9. Proof Until Light and Puffy
Cover the shaped croissants loosely with plastic wrap or a clean kitchen towel.
Let them proof in a draft-free place at approximately 75–78°F (24–26°C) for 2–2½ hours, or until noticeably larger, light, and puffy.
The layers should be visible along the sides, and the croissants should jiggle slightly when the baking tray is gently moved.
Important: Avoid proofing in an overly warm environment. Temperatures above approximately 80°F (27°C) can soften or melt the butter, causing it to leak out and reducing the flaky texture.
10. Prepare the Egg Wash
In a small bowl, whisk together the egg and milk until smooth.
Once the croissants have finished proofing, gently brush the tops with a thin, even layer of egg wash.
Avoid letting the egg wash run heavily down the cut sides, as it can stick the delicate layers together.
11. Bake Until Golden
Preheat your oven to 400°F (200°C).
Bake the croissants for approximately 18–22 minutes, or until deeply golden brown, beautifully puffed, and crisp on the outside.
Rotate the baking tray if necessary for even browning.
If the tops become too dark before the centers are fully baked, lower the oven temperature slightly for the remaining baking time.
12. Cool and Enjoy
Remove the croissants from the oven and transfer them carefully to a wire rack.
Allow them to cool for at least 15–20 minutes.
Enjoy them slightly warm, when the outside is crisp and the inside is soft, airy, and wonderfully buttery.
Serve with butter, jam, honey, or your favorite breakfast spread. 🥐
Expert Tips for Perfectly Flaky Croissants
- Keep everything cold: Butter is the secret to beautiful layers. If it melts into the dough, the croissants won’t develop the same flaky texture.
- Use good-quality butter: European-style butter with a higher fat content is especially good for laminating because it is flavorful and pliable.
- Match the butter and dough firmness: Both should bend without cracking or becoming greasy.
- Don’t rush the chilling: Resting between folds prevents the dough from becoming difficult to roll and helps maintain distinct layers.
- Roll gently: Excessive pressure can squeeze butter out of the dough or destroy the layers.
- Brush away excess flour: Too much flour between folds can create dry patches and prevent the layers from sticking together.
- Avoid overproofing: Croissants should look puffy and airy but still hold their shape.
- Don’t skip the overnight rest: It makes the dough easier to handle and allows the flavor to develop.
- Bake until deeply golden: Pale croissants may look done on the outside but can remain doughy in the center.
Delicious Croissant Variations
Chocolate Croissants: Place 1–2 pieces of chocolate or a chocolate baking baton near the wide end of each triangle before rolling. Shape and bake as directed.
Almond Croissants: Fill baked, cooled croissants with almond cream, brush lightly with syrup, and top with sliced almonds. Bake briefly until the filling is heated and the almonds are golden.
Ham and Cheese Croissants: Add a thin slice of ham and a little grated Gruyère or Swiss cheese before rolling. Make sure the filling does not extend beyond the edges.
Cheese Croissants: Add a small amount of grated cheddar or Gruyère inside before shaping for a savory breakfast pastry.
Cinnamon Sugar Croissants: Sprinkle a little cinnamon sugar over the dough before cutting and shaping for a sweet variation.
Mini Butter Croissants: Cut smaller triangles and roll them into bite-sized croissants. Reduce the baking time and watch carefully for golden coloring.
What to Serve With Homemade Croissants
Freshly baked croissants are wonderful on their own, but they also pair beautifully with:
- Butter and fruit preserves
- Strawberry or raspberry jam
- Honey
- Chocolate hazelnut spread
- Scrambled eggs
- Cheese and sliced ham
- Fresh fruit
- Yogurt and granola
- Cappuccino, latte, or tea
For a special brunch, serve a basket of warm croissants alongside fresh fruit, eggs, cheese, and coffee.
Make-Ahead Instructions
Croissant dough is perfect for preparing ahead because it benefits from long chilling periods.
Overnight Dough: After completing all three folds, wrap the dough tightly and refrigerate overnight. Shape and proof the croissants the following day.
Make-Ahead Shaped Croissants: Shape the croissants, arrange them on a parchment-lined tray, cover well, and refrigerate overnight. The next day, allow them to proof at a cool room temperature until light and puffy before baking.
Avoid leaving shaped croissants in the refrigerator for too long, as they may overproof or the yeast may become less active.
Storage and Freezing
Room Temperature: Store completely cooled croissants in an airtight container or paper bag at room temperature for up to 1–2 days. Their crispness is best on the day they’re baked.
Refrigeration: Refrigeration is not recommended for plain croissants because it can make them stale more quickly.
Freezing Baked Croissants: Allow them to cool completely, then place in a freezer-safe bag or airtight container. Freeze for up to 2 months for best quality.
Freezing Unbaked Croissants: Shape the croissants and freeze them on a tray until firm. Transfer to a freezer-safe bag or container. For best results, freeze before the final proof. Thaw overnight in the refrigerator, then proof until light and puffy before baking.
Reheating: Place baked croissants in a preheated oven at 300°F (150°C) for approximately 5–8 minutes to refresh their crisp exterior.
Avoid microwaving if you want to preserve the flaky texture.
Frequently Asked Questions
Why aren’t my croissants flaky?
The most common reasons are butter that became too warm, insufficient folding, or dough that was rolled too aggressively. Keep the dough chilled and make sure the butter stays enclosed in distinct layers.
Why did butter leak out during baking?
This often happens when the butter melts during proofing, the layers were damaged during rolling, or the croissants were underproofed. Keep proofing temperatures moderate and allow the croissants to become properly puffy before baking.
Can I use salted butter?
Yes, but reduce the added salt in the dough slightly. Unsalted butter is easier to control when making laminated pastry.
Can I use bread flour instead of all-purpose flour?
Yes. Bread flour can produce a slightly chewier texture because it contains more protein. All-purpose flour works beautifully for a tender, crisp croissant.
Can I use active dry yeast instead of instant yeast?
Yes. Use approximately 7 g active dry yeast. Dissolve it in a little of the recipe’s milk with a small amount of the sugar, then allow it to become foamy before combining it with the other dough ingredients.
Why is my dough shrinking when I roll it?
The gluten may be too tense. Cover the dough and refrigerate it for 15–20 minutes to relax before rolling again.
Can I make croissants without a stand mixer?
Absolutely! Knead the dough by hand until smooth and elastic. It may take a little longer, but a stand mixer is not necessary.
How do I know when croissants are properly proofed?
They should look noticeably larger, feel light and airy, and jiggle gently when the tray is moved. The laminated layers should be visible along the sides.
Can I prepare the dough two days ahead?
You can refrigerate the dough after lamination for a longer rest, but for the most reliable rise and texture, shape and proof it after an overnight chill. For longer preparation, freezing is a better option.
Estimated Nutrition
Approximate values per croissant, assuming 12 croissants made with the suggested butter block and egg wash. Actual nutrition varies depending on butter, flour, and croissant size.
- Calories: 360
- Protein: 7 g
- Carbohydrates: 39 g
- Fat: 20 g
- Saturated Fat: 12 g
- Fiber: 1 g
- Sugar: 6 g
- Sodium: 260 mg
Fresh From the Oven, Straight From the Heart! ❤️
Homemade Classic Butter Croissants are a true labor of love, but every fold, chill, and roll is worth it when you pull that first golden batch from the oven.
With their delicate layers, crisp exterior, soft center, and rich buttery aroma, these croissants bring the magic of a French bakery right into your home.
Enjoy them warm with your favorite jam, fill them with chocolate, or serve them as part of a beautiful weekend breakfast. Once you taste homemade croissants, you’ll understand why they’re so special! 🥐