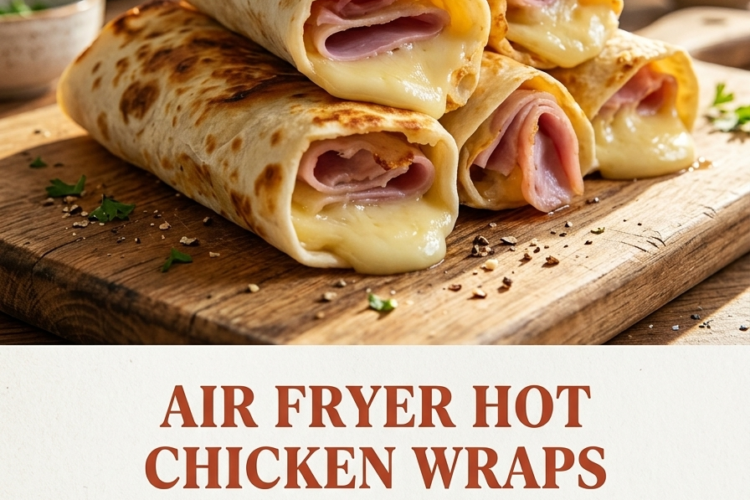
🌯🔥 Air Fryer Hot Chicken Wraps
Crispy, Juicy Chicken, Fresh Veggies, and Creamy Sauce in Every Delicious Bite!
Get ready for your new favorite quick meal! These Air Fryer Hot Chicken Wraps combine tender chicken coated in a crispy, golden crust with a spicy, buttery hot sauce, crunchy lettuce, fresh vegetables, and a cool, creamy dressing—all wrapped in soft flour tortillas.
The air fryer makes the chicken beautifully crisp without the need for deep-frying, while the spicy glaze brings that irresistible hot-chicken flavor. Wrapped up with fresh toppings, these wraps are perfect for lunch, dinner, meal prep, or a satisfying weekend treat.
They’re easy to customize, full of flavor, and ready in about 35 minutes!
Recipe Information
- Prep Time: 15 minutes
- Cook Time: 12–16 minutes
- Total Time: Approximately 30–35 minutes
- Servings: 4 wraps
- Course: Lunch, Dinner, Main Course
- Difficulty: Easy
- Cooking Method: Air fryer
Ingredients
For the Chicken
- 2 boneless, skinless chicken breasts (about 500–600 g)
- ½ cup (60 g) all-purpose flour
- 1 large egg
- 1 tablespoon milk
- 1 cup (60–75 g) panko breadcrumbs
- 1 teaspoon paprika
- ½ teaspoon garlic powder
- ½ teaspoon onion powder
- ½ teaspoon salt
- ¼ teaspoon black pepper
- Olive oil spray or a little cooking oil
For the Spicy Hot Chicken Glaze
- ¼ cup (60 ml) hot sauce, such as a cayenne-style pepper sauce
- 2 tablespoons (28 g) unsalted butter, melted
- 1 teaspoon honey, optional
- ¼ teaspoon cayenne pepper, optional, for extra heat
For the Wraps
- 4 large flour tortillas
- ½ cup shredded lettuce
- 1 medium tomato, diced or sliced
- ½ cup shredded cheddar or Monterey Jack cheese
- ¼ small red onion, thinly sliced, optional
- Pickle slices, optional
For the Creamy Sauce
- ¼ cup mayonnaise
- 2 tablespoons ranch dressing or plain Greek yogurt
- 1 teaspoon lemon juice
- ¼ teaspoon garlic powder
- Black pepper, to taste
Instructions
Step 1: Prepare the Chicken
Pat the chicken breasts dry with paper towels. Slice each breast lengthwise into strips of roughly equal thickness so they cook evenly.
If the breasts are particularly thick, gently flatten the thicker parts to create more uniform strips.
Set up three shallow bowls: one for the seasoned flour, one for the egg mixture, and one for the breadcrumbs.
Step 2: Season the Coating
In the first bowl, combine the flour, paprika, garlic powder, onion powder, salt, and black pepper. Mix well.
In the second bowl, whisk together the egg and milk until smooth.
Place the panko breadcrumbs in the third bowl.
Step 3: Coat the Chicken
Working with one chicken strip at a time, follow this coating sequence:
- Dredge the chicken in the seasoned flour, shaking off the excess.
- Dip it into the egg mixture, allowing the extra liquid to drip off.
- Press it into the panko breadcrumbs until coated on all sides.
Arrange the coated strips on a clean plate or tray.
For the crispiest result, make sure the chicken is coated evenly and that the breadcrumbs adhere well to the surface.
Step 4: Preheat the Air Fryer
Preheat the air fryer to 390°F (200°C) if your model recommends preheating.
Lightly spray the basket with oil. Arrange the breaded chicken strips in a single layer, leaving space between the pieces so hot air can circulate.
Cook in batches if necessary rather than overcrowding the basket.
Lightly spray the tops of the chicken with oil to help the coating turn golden and crisp.
Step 5: Air-Fry Until Golden and Cooked Through
Air-fry the chicken for approximately 12–16 minutes, turning the strips halfway through cooking and lightly spraying any dry-looking areas with oil.
The coating should become golden brown and crisp, while the chicken remains juicy inside.
Cooking time depends on the thickness of the strips and your air fryer. Check the thickest piece with a food thermometer; chicken must reach an internal temperature of 165°F (74°C) to be safe to eat.
If the coating is golden before the center is cooked, continue air-frying and check the temperature again.
Step 6: Prepare the Spicy Glaze
While the chicken cooks, combine the hot sauce, melted butter, and optional honey in a small bowl.
Stir until the mixture is smooth and glossy. Add the optional cayenne pepper if you prefer a hotter glaze.
Taste a small amount and adjust the heat or sweetness to your liking.
Step 7: Coat the Chicken with the Hot Sauce
Once the chicken is fully cooked, transfer the strips to a large bowl.
Pour the spicy glaze over the chicken and toss gently until the strips are evenly coated.
For maximum crunch, drizzle the sauce lightly over the chicken instead of fully tossing it. Alternatively, serve the sauce on the side so everyone can choose how much heat they want.
Step 8: Make the Creamy Sauce
In a small bowl, combine the mayonnaise, ranch dressing or Greek yogurt, lemon juice, garlic powder, and black pepper.
Stir until smooth and creamy.
Taste and adjust with an extra squeeze of lemon juice or a little more black pepper if desired.
Refrigerate the sauce while preparing the vegetables and tortillas.
Step 9: Prepare the Wrap Fillings
Wash and dry the lettuce, then shred it finely. Slice or dice the tomato and thinly slice the red onion if using.
Warm the flour tortillas briefly in a dry skillet or microwave according to the package directions. Warm tortillas are softer and easier to fold without tearing.
Keep the fillings ready so you can assemble the wraps while the chicken is still warm.
Step 10: Assemble the Wraps
Place a warm tortilla on a clean work surface.
Spread a spoonful of creamy sauce down the center, leaving space around the edges.
Add a handful of shredded lettuce, some tomato, and a sprinkle of cheese. Arrange the spicy chicken strips over the vegetables, then add pickle slices or red onion if desired.
Avoid overfilling the tortilla, as this makes it more difficult to roll securely.
Step 11: Fold and Roll
Fold the left and right sides of the tortilla inward. Bring the bottom edge up over the filling and roll firmly toward the top to form a neat wrap.
Place the wrap seam-side down. Repeat with the remaining tortillas and fillings.
For a warm, lightly toasted finish, return the assembled wraps to the air fryer at 350°F (175°C) for 1–2 minutes, if suitable for your appliance. Check frequently to prevent the tortillas from becoming too crisp or splitting.
Step 12: Slice and Serve
Cut each wrap in half diagonally using a sharp knife.
Serve immediately with extra creamy sauce, pickle slices, or a side of crispy potato wedges. Enjoy the combination of crunchy chicken, spicy glaze, fresh vegetables, and cool, creamy dressing!
Tips for the Best Air Fryer Hot Chicken Wraps
- Cut the chicken evenly: Uniform strips cook at a similar rate and help prevent smaller pieces from drying out.
- Use panko breadcrumbs: Their larger, airy crumbs create a particularly crisp coating.
- Don’t overcrowd the air fryer: Leave space between chicken strips for proper air circulation.
- Spray the coating lightly with oil: This helps the breadcrumbs brown without deep-frying.
- Check the internal temperature: Always confirm that the thickest chicken piece reaches 165°F (74°C).
- Control the spice level: Use less hot sauce for milder wraps or add cayenne for extra heat.
- Keep the sauce separate until serving: Tossing the chicken too early can soften the crispy coating.
- Warm the tortillas: This makes rolling easier and reduces tearing.
- Avoid overfilling: A modest amount of each ingredient produces a wrap that’s easier to fold and eat.
Delicious Variations
🌶️ Extra-Spicy Hot Chicken Wraps
Add extra cayenne pepper to the hot sauce glaze or use a hotter pepper sauce. Serve with extra creamy dressing to balance the heat.
🧀 Cheesy Hot Chicken Wraps
Use a generous handful of Monterey Jack or cheddar cheese. Add a little extra cheese on top of the warm chicken before assembling.
🥑 Avocado Hot Chicken Wraps
Add sliced avocado or a spoonful of guacamole for a creamy, buttery contrast to the spicy chicken.
🍯 Honey Hot Chicken Wraps
Increase the honey to 1 tablespoon for a sweet-and-spicy glaze that balances the tangy hot sauce.
🥬 Crunchy Ranch Chicken Wraps
Use extra lettuce, sliced cucumber, and ranch dressing for a fresher, milder version.
🥓 Bacon Cheddar Chicken Wraps
Add a few pieces of cooked, crumbled bacon and extra cheddar for a smoky, cheesy variation.
🌯 Buffalo Chicken Wraps
Replace the hot sauce glaze with your favorite Buffalo-style sauce and finish with blue cheese or ranch dressing.
What to Serve with Air Fryer Hot Chicken Wraps
These wraps pair beautifully with:
- Air fryer potato wedges
- Crispy sweet potato fries
- Coleslaw
- Corn on the cob
- Cucumber and tomato salad
- Pickles and carrot sticks
- Onion rings
- A simple green salad
For a complete meal, serve each wrap with potato wedges and a small bowl of extra creamy dipping sauce.
Make-Ahead Instructions
Prepare the sauce ahead: Mix the creamy sauce up to 2 days in advance and store it in a covered container in the refrigerator.
Prep the vegetables ahead: Shred the lettuce and slice the vegetables shortly before assembling, or prepare them a few hours ahead and refrigerate.
Cook the chicken ahead: Air-fry the chicken, cool it promptly, and refrigerate it in an airtight container. Reheat in the air fryer until hot throughout, then add the hot sauce glaze and assemble the wraps.
Best serving tip: Assemble the wraps just before serving. This keeps the lettuce crisp and prevents the tortillas from becoming soggy.
Storage and Reheating
Refrigeration: Store leftover cooked chicken in a shallow airtight container in the refrigerator within 2 hours. Use within 3–4 days. Store the sauce and fresh vegetables separately.
Reheating the chicken: Air-fry at approximately 350°F (175°C) until heated through and crisp again. Check that the chicken reaches 165°F (74°C) when reheating leftovers.
Microwave: You can microwave the chicken, but the coating will be softer rather than crisp.
Freezing: Freeze the cooked, unglazed chicken strips in a freezer-safe container for up to 2 months for best quality. Thaw in the refrigerator, reheat thoroughly, and add the hot sauce before assembling. Avoid freezing completed wraps because lettuce and creamy sauce can become watery.
Frequently Asked Questions
Can I use chicken thighs instead of chicken breasts?
Absolutely! Boneless, skinless chicken thighs are flavorful and stay juicy. Cut them into strips of similar thickness and cook until they reach 165°F (74°C).
How do I make the chicken extra crispy?
Use panko breadcrumbs, apply a light coating of oil, avoid overcrowding the basket, and let the air fryer circulate hot air around each piece.
Can I make these wraps without breading the chicken?
Yes. Season the chicken strips with paprika, garlic powder, onion powder, salt, pepper, and a little oil. Air-fry until cooked through, then coat with the hot sauce glaze. The chicken won’t have the same crunchy crust, but the wraps will still be delicious.
Can I make the wraps less spicy?
Yes. Reduce the hot sauce and omit the cayenne pepper. Add a little extra butter and honey to create a milder glaze.
Can I use store-bought crispy chicken?
Yes. Cook store-bought chicken strips according to their package directions, then toss them with the hot sauce glaze and assemble the wraps.
Why are my wraps soggy?
The chicken may have been sauced too far in advance, or the vegetables may have released excess moisture. Keep the sauce separate until assembly, dry the lettuce and tomatoes well, and serve immediately.
A Crispy, Spicy Wrap You’ll Want Again and Again! 🌯🔥
These Air Fryer Hot Chicken Wraps combine crunchy chicken, a bold buttery hot sauce, fresh vegetables, melty cheese, and a cool creamy dressing in one easy, satisfying meal.
They’re simple enough for a weeknight dinner, delicious enough for weekend lunches, and easy to customize for everyone at the table.
Air-fry that chicken until golden, drizzle it with spicy sauce, wrap it up with fresh toppings, and enjoy every flavorful bite!