🎄🍰 Little Debbie Christmas Tree Cake Balls
Turn everyone’s favorite festive snack cakes into adorable, bite-sized Christmas treats! These Christmas Tree Cake Balls combine soft vanilla snack cakes with creamy cheesecake-style filling, then get dipped in smooth white chocolate and decorated with red and green holiday details.
They’re perfect for Christmas cookie trays, parties, gift boxes, or a fun holiday baking project with the family.
⏱ Recipe Information
Prep Time: 30 minutes
Chill Time: 1 hour
Total Time: About 1½ hours
Yield: 20–24 cake balls
Difficulty: Easy
Method: No-Bake
🛒 Ingredients
🎄 Cake Balls
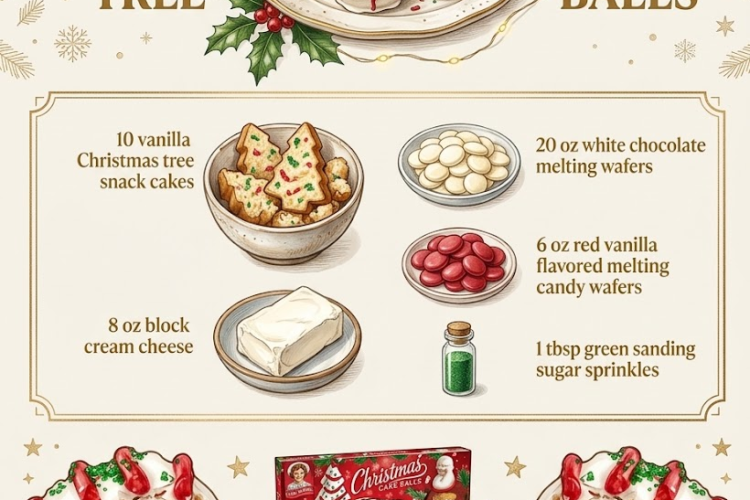
- 10 Little Debbie Vanilla Christmas Tree Cakes
- 8 oz (226 g) block cream cheese, softened
🤍 White Chocolate Coating
- 20 oz (567 g) white chocolate melting wafers
❤️ Christmas Decorations
- 6 oz (170 g) red vanilla-flavored melting candy wafers
- 1 tablespoon green sanding sugar sprinkles
Optional Decorations
- White nonpareils
- Red sprinkles
- Green sprinkles
- Edible glitter
- Mini Christmas sprinkles
Instructions
1. Prepare the Cake Mixture
Remove the Christmas Tree Cakes from their packaging.
Break the cakes into smaller pieces and place them in a large mixing bowl.
Add the softened cream cheese.
2. Mix Until Smooth
Using a sturdy spoon, pastry cutter, or your hands, mix the cakes and cream cheese together until they form a soft, cohesive mixture.
You want a texture similar to soft cookie dough.
Don’t Overdo the Cream Cheese
The snack cakes already contain frosting and filling, so the mixture should be moist enough to hold together without becoming overly soft.
🎄 3. Shape the Cake Balls
Using a small cookie scoop, portion out the mixture.
Roll each portion between your palms to create smooth balls approximately 1 inch in diameter.
Place them on a parchment-lined baking sheet.
❄️ 4. Chill
Refrigerate the cake balls for approximately 30–45 minutes.
For an even firmer coating, you can chill them for up to an hour.
Tip: Cold cake balls are much easier to dip and are less likely to fall apart in the melted chocolate.
🤍 5. Melt the White Chocolate
Place the white chocolate melting wafers in a microwave-safe bowl.
Microwave in 20–30 second intervals, stirring thoroughly between each interval.
Continue until completely smooth.
Avoid overheating the chocolate.
🍫 6. Dip the Cake Balls
Remove the chilled cake balls from the refrigerator.
Using a fork or dipping tool, place one cake ball into the melted white chocolate.
Turn it gently until completely coated.
Lift it out and allow excess chocolate to drip back into the bowl.
Place the coated cake ball onto the parchment-lined baking sheet.
Repeat with the remaining cake balls.
❤️ 7. Add the Red Decoration
Melt the red vanilla-flavored candy wafers according to the package directions.
Transfer the melted candy to a piping bag or small zip-top bag.
Snip off a tiny corner.
Drizzle thin red lines over the white chocolate coating.
You can also create little zigzags or decorative stripes.
💚 8. Add the Green Sprinkles
While the red candy is still wet, sprinkle the green sanding sugar over the cake balls.
The sprinkles will stick to the melted candy.
For a more festive appearance, add a few extra holiday sprinkles.
❄️ 9. Let Them Set
Allow the decorated cake balls to sit at room temperature until the chocolate is completely firm.
Alternatively, refrigerate them for approximately 15–20 minutes to speed up the process.
🎁 Serve
Arrange the finished cake balls on a Christmas platter or place them in mini cupcake liners.
They’re especially cute served alongside:
- Hot cocoa
- Coffee
- Peppermint tea
- Eggnog
⭐ Chef’s Tips
Use Block Cream Cheese
For the best texture, use full-fat cream cheese in a block rather than soft tub-style cream cheese.
Don’t Add Too Much Cream Cheese
Start with the amount listed and only add more if absolutely necessary. The snack cakes already contain plenty of moisture.
Chill Before Dipping
Cold cake balls are sturdier and easier to coat.
Keep the Chocolate Warm
If the melting wafers become too thick while dipping, warm them briefly and stir well.
Work in Batches
Keep most of the cake balls refrigerated while you’re decorating a smaller batch. This prevents them from becoming too soft.
🎄 Fun Decorating Ideas
Classic Christmas Trees
Use red drizzle and green sanding sugar for a simple holiday look.
Snowy Trees
Add white sprinkles or edible pearl sprinkles over the white chocolate.
Peppermint
Crush candy canes finely and sprinkle them over the coating.
Chocolate Drizzle
Use melted milk or dark chocolate instead of red candy for a more chocolate-forward version.
Christmas Sprinkle Mix
Use red, green, white, and gold sprinkles for a festive party platter.
Storage
Store finished cake balls in an airtight container in the refrigerator.
Refrigerator: Up to 5 days.
Let them sit at room temperature for approximately 10–15 minutes before serving for a softer texture.
❄️ Freezing
Place the finished cake balls in a freezer-safe airtight container.
Freeze for up to 1 month.
Thaw overnight in the refrigerator before serving.
For the best appearance, place parchment between layers.
🎄🍰 Recipe Summary
These Little Debbie Christmas Tree Cake Balls are an incredibly easy holiday treat made with just a handful of ingredients.
Vanilla Christmas Tree Cakes + cream cheese + creamy white chocolate + festive red and green decorations = the cutest Christmas bite!
They’re soft, creamy, sweet, festive, and completely no-bake—perfect for holiday parties, dessert trays, or edible Christmas gifts. 🎄❤️💚