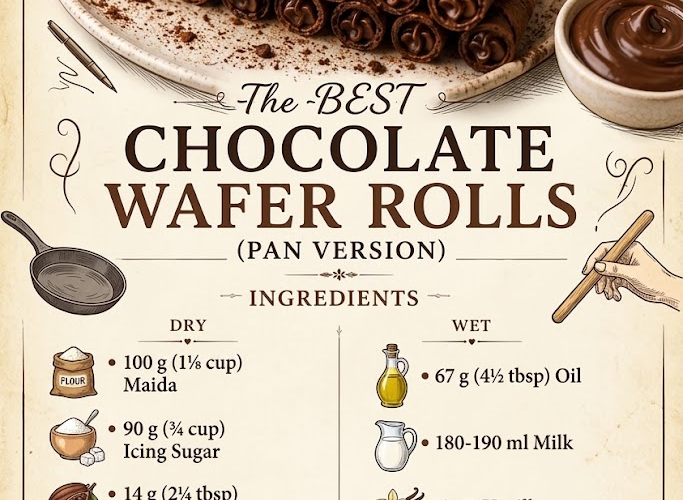
🍫 The BEST Chocolate Wafer Rolls — Pan Version
Thin, crisp, chocolatey, and wonderfully delicate, these homemade Chocolate Wafer Rolls are made right on the stovetop—no special wafer machine required! The batter cooks into thin chocolate wafers that are rolled while warm, then become beautifully crisp as they cool.
⏱ Recipe Information
Prep Time: 15 minutes
Cook Time: 20–25 minutes
Total Time: About 40 minutes
Yield: 18–22 wafer rolls
Difficulty: Medium
Method: Stovetop
🛒 Ingredients
🍫 Dry Ingredients
- 100 g (1⅛ cups) maida/all-purpose flour
- 90 g (¾ cup) icing sugar
- 14 g (2¼ tablespoons) unsweetened cocoa powder
- 8 g (1 tablespoon) milk powder
- 3 g (¾ teaspoon) baking powder
- Pinch of salt
🥛 Wet Ingredients
- 1 large egg
- 120 ml (½ cup) whole milk
- 30 g (2 tablespoons) melted unsalted butter
- 1 teaspoon vanilla extract
Optional
- ½ teaspoon instant espresso powder
- Melted chocolate, for dipping
- Crushed nuts, for decoration
Instructions
1. Prepare the Dry Ingredients
Sift the maida, icing sugar, cocoa powder, milk powder, baking powder, and salt into a large bowl.
Sifting is especially important here because it creates a smooth, lump-free batter.
If using espresso powder, add it with the dry ingredients.
🥛 2. Prepare the Wet Ingredients
In a separate bowl, whisk together:
- Egg
- Milk
- Melted butter
- Vanilla
Whisk until smooth and well combined.
Make sure the melted butter has cooled slightly before adding it to the egg.
🍫 3. Make the Batter
Gradually pour the wet ingredients into the dry ingredients.
Whisk gently until you have a smooth batter.
The batter should be thin and pourable, similar to a crepe batter.
Important: Don’t make the batter too thick. Thin batter is what creates those delicate, crisp wafer rolls.
If it seems too thick, add 1–2 teaspoons milk at a time until the correct consistency is reached.
🔥 4. Heat the Pan
Use a flat, nonstick frying pan or skillet.
Heat it over low to medium-low heat.
Lightly grease the pan with a tiny amount of butter or neutral oil.
Wipe away any excess.
A properly heated pan is essential. Too much heat will brown the wafer before you have time to roll it.
🥄 5. Cook the Wafer
Pour approximately 1 tablespoon of batter into the center of the pan.
Immediately spread it into a very thin circle, approximately 4–5 inches wide.
You can use the back of a spoon, small offset spatula, or crepe spreader.
The thinner you spread it, the crispier the finished wafer will be.
🍪 6. Cook Until Crisp Around the Edges
Cook for approximately 1–2 minutes.
Look for:
- Dry-looking surface
- Slightly darker edges
- Firm enough to lift from the pan
The wafer should be cooked through but still flexible.
🌯 7. Roll Immediately
This is the most important step.
As soon as the wafer comes off the pan, quickly roll it around a wooden spoon handle, chopstick, metal tube, or wafer-roll mold.
Press the seam gently for a few seconds to help it seal.
Work quickly! The wafer becomes crisp within seconds as it cools. Once it hardens, it won’t roll without breaking.
❄️ 8. Let It Cool
Slide the rolled wafer off the mold and place it on a wire rack.
Allow it to cool completely.
It will become noticeably crisp as it cools.
Repeat with the remaining batter.
🍫 9. Optional Chocolate Finish
For an extra-decadent version, dip one end of each cooled wafer roll into melted chocolate.
Place them on parchment paper.
Allow the chocolate to set completely.
You can also sprinkle the chocolate-dipped ends with:
- Chopped nuts
- Coconut
- Sprinkles
- Cocoa nibs
⭐ Chef’s Tips
Keep the Heat Low
High heat makes the wafers brown too quickly and leaves you with very little time to roll them.
Spread Very Thin
The thinner the batter, the more delicate and crispy your wafer rolls will be.
Roll Immediately
Don’t cook several wafers first and roll them later. Roll each one while it’s hot.
Keep the Batter Consistent
Stir the batter occasionally because some of the dry ingredients may settle as it sits.
Don’t Overgrease the Pan
A nonstick pan should require very little grease. Too much oil can make spreading difficult.
Use a Metal or Wooden Handle
A smooth, narrow handle makes a convenient homemade rolling mold.
🍦 Filling Ideas
Once the rolls have cooled, you can leave them hollow or fill them with your favorite cream.
Vanilla Cream
Whip heavy cream with powdered sugar and vanilla until stiff.
Chocolate Cream
Fill with chocolate whipped cream or chocolate ganache.
Nutella-Style Filling
Pipe in chocolate-hazelnut spread.
Coffee Cream
Add a little instant espresso powder to sweetened whipped cream.
Ice Cream
Fill with softened ice cream and freeze until firm for a delicious frozen wafer treat.
🔥 Troubleshooting
Wafer Is Breaking While Rolling
It has probably cooled too much. Return the next wafer to the pan for a few seconds to soften it before rolling.
Wafer Is Too Soft After Cooling
It may be too thick or slightly undercooked. Spread the next ones thinner and cook until the surface is dry and the edges are crisp.
Wafer Burns Before You Can Roll It
Lower the heat. The pan is likely too hot.
Batter Is Difficult to Spread
Thin it with a small amount of milk, adding only a teaspoon at a time.
Rolls Are Not Crisp
Allow them to cool completely before judging their texture. If still soft, place them in a low oven for a few minutes to dry further.
📦 Storage
Once completely cooled, store the wafer rolls in an airtight container at room temperature.
Best quality: 4–5 days.
Keep them away from humidity, as moisture will quickly soften them.
If they become slightly soft, place them in a low oven for a few minutes and allow them to cool again.
🍫✨ Recipe Summary
These Chocolate Wafer Rolls are thin, crisp, delicate, and intensely chocolatey, yet they require nothing more than a simple pan and a handful of pantry ingredients.
The secret is simple: thin batter + low heat + quick rolling while hot.
Fill them with cream, dip them in chocolate, or enjoy them completely plain with a cup of coffee. 🍫☕