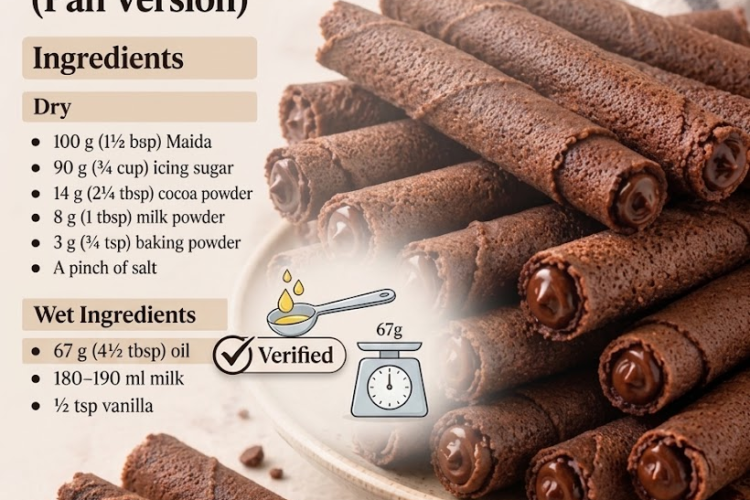
🍫 The BEST Chocolate Wafer Rolls (Pan Version)
These homemade Chocolate Wafer Rolls are thin, crisp, intensely chocolatey, and rolled while warm into delicate little cylinders. No wafer maker or special machine is needed—just a good nonstick skillet and a little patience.
They’re delicious on their own, but even better filled with whipped cream, chocolate mousse, ice cream, or sweetened cream.
Recipe Details
- Prep Time: 15 minutes
- Cook Time: 20–30 minutes
- Total Time: About 45 minutes
- Yield: 12–16 wafer rolls
- Difficulty: Medium
- Method: Pan-Cooked
Ingredients
Dry Ingredients
- 100 g (about ¾ cup + 2 tablespoons) maida/all-purpose flour
- 90 g (¾ cup) icing sugar, sifted
- 14 g (2¼ tablespoons) unsweetened cocoa powder
- 8 g (1 tablespoon) milk powder
- 3 g (¾ teaspoon) baking powder
- Pinch of salt
Wet Ingredients
- 2 large egg whites
- 60 ml (¼ cup) whole milk
- 40 g (3 tablespoons) unsalted butter, melted and cooled slightly
- 1 teaspoon vanilla extract
Optional for Filling
- 1 cup whipping cream, cold
- 2 tablespoons powdered sugar
- ½ teaspoon vanilla extract
Instructions
1. Prepare the Dry Ingredients
Sift the maida, icing sugar, cocoa powder, milk powder, and baking powder into a medium bowl.
Add the pinch of salt and whisk everything together thoroughly.
Sifting is important because cocoa powder and icing sugar can easily form lumps.
2. Mix the Wet Ingredients
In a separate bowl, whisk the egg whites gently until they become slightly foamy.
Do not whip them into stiff peaks.
Add the milk, melted butter, and vanilla extract.
Whisk until evenly combined.
3. Make the Batter
Gradually add the dry ingredients to the wet mixture.
Whisk gently until you have a smooth, thin batter.
The consistency should be similar to a crepe batter—fluid enough to spread into a very thin circle.
If the batter seems too thick, add 1 tablespoon milk at a time until it reaches the correct consistency.
Let the batter rest for 5–10 minutes.
4. Heat the Pan
Place a good-quality nonstick skillet over low to medium-low heat.
The pan should be evenly heated but not extremely hot.
You generally won’t need to grease the pan because the batter already contains butter.
5. Cook the Wafer
Spoon approximately 1 tablespoon of batter into the center of the pan.
Immediately spread it into a very thin circle, approximately 4–5 inches wide.
The thinner you spread the batter, the crispier and more delicate the finished wafer will be.
Cook for approximately 1–2 minutes, or until the surface looks dry and the underside is cooked.
Carefully flip and cook the other side for approximately 20–30 seconds.
Don’t allow the wafer to become dark or overly crisp while it’s still flat—you need it pliable enough to roll.
6. Roll Immediately
This is the most important step.
While the wafer is still hot, quickly remove it from the skillet.
Place it on a clean work surface and immediately roll it tightly around the handle of a wooden spoon, chopstick, or another narrow cylindrical utensil.
Press the seam gently for a few seconds to help it hold its shape.
Once the wafer cools, it will become crisp and maintain its rolled shape.
Work quickly—these wafers harden within seconds.
7. Repeat
Continue with the remaining batter.
Keep the pan at a steady low-medium temperature.
If the pan becomes too hot, allow it to cool for a minute before cooking the next wafer.
8. Make the Optional Cream Filling
For a simple vanilla cream, place the cold whipping cream in a chilled mixing bowl.
Add the powdered sugar and vanilla.
Beat until medium-stiff peaks form.
Transfer the cream to a piping bag.
9. Fill the Wafer Rolls
Once all the wafer rolls have cooled completely, pipe the whipped cream into both ends of each roll.
For an extra chocolatey finish, dip one or both ends into melted chocolate and allow them to set.
Chef’s Tips
- Thin batter = crisp wafer rolls. If the batter is too thick, the wafers will be more cake-like and difficult to roll.
- Keep the heat low to medium-low. High heat can brown the wafer before you have time to roll it.
- Roll immediately. Don’t wait for the wafer to cool.
- Make one wafer at a time until you get comfortable with the technique.
- If the wafer cracks while rolling, it’s usually because it has cooled too much.
- If the wafer is too soft after cooling, cook the next ones slightly longer.
- If the wafers become brittle before you can roll them, lower the heat slightly and remove them from the pan a little sooner.
Troubleshooting
The wafers are cracking
They’re probably being allowed to cool before rolling. Roll them immediately while they’re hot and flexible.
The batter won’t spread
Add a small amount of milk—about 1 teaspoon at a time—until the batter becomes thin enough to spread.
The wafers are soft instead of crisp
They may be too thick or undercooked. Spread the batter more thinly and cook slightly longer.
The wafers are burning
Your skillet is too hot. Reduce the heat and allow the pan to cool slightly between batches.
The rolls won’t hold their shape
Make sure you press the seam against the roll for several seconds immediately after shaping.
Delicious Variations
🍫 Double Chocolate
Add 30–40 g finely chopped dark chocolate to the batter or dip the finished rolls in melted chocolate.
☕ Mocha
Add 1 teaspoon instant espresso powder to the dry ingredients.
🥥 Chocolate Coconut
Add 2 tablespoons finely desiccated coconut to the batter and dip the finished rolls in chocolate.
🍓 Strawberry Cream
Fill the rolls with whipped cream mixed with finely chopped strawberries.
🍌 Chocolate Banana
Fill with whipped cream and thinly sliced banana just before serving.
🍦 Ice Cream Rolls
Leave the rolls empty and fill them with softened vanilla, chocolate, or coffee ice cream just before serving.
Storage
Store completely cooled, unfilled wafer rolls in an airtight container at room temperature for up to 5 days.
Keep them away from humidity, as moisture will quickly soften them.
Filled wafer rolls are best eaten the same day because cream fillings can soften the wafers.
The Result
Thin, crisp, chocolatey, and wonderfully delicate, these pan-made Chocolate Wafer Rolls have that classic bakery-style crunch without requiring a wafer machine. The secret is simple: spread the batter thin, cook gently, and roll while piping hot. 🍫