Nothing elevates a homemade sandwich quite like baking your own bread from scratch. This Homemade Subway-Style Sandwich Bread produces golden, pillowy sub rolls with a feather-light interior and a soft crust that holds up to heavy fillings without crumbling or turning soggy.
Using basic kitchen staples—flour, yeast, warm water, olive oil, sugar, and salt—this beginner-friendly formula yields four footlong sandwich rolls (or eight 6-inch sub rolls) ready to pile high with cold cuts, meatballs, crispy chicken, or toasted cheeses.
Recipe Overview
- Prep Time: 20 minutes
- First Rise Time: 45 to 60 minutes
- Second Rise (Shaped): 30 to 40 minutes
- Bake Time: 15 to 18 minutes
- Total Time: ~2 hours (mostly hands-off rising)
- Yield: 4 footlong rolls (approx. 11–12 inches each) or 8 six-inch mini sub rolls
- Skill Level: Beginner / Hand-kneaded or Stand Mixer
Bread Science: Achieving the Iconic Soft Crumb
Commercial sandwich bread relies on specific dough mechanics to achieve that signature soft bite:
- Hydration Balance: Using 1 cup of water for 3 cups of flour creates an approximate 65% hydration dough. This keeps the dough soft and supple, allowing it to stretch smoothly during shaping while retaining enough strength to rise high rather than spreading flat on the baking tray.
- Olive Oil as a Crumb Softener: Liquid fat coats the gluten strands in the dough, preventing them from forming a tough, chewy sourdough-like web. This yields a tight, velvety crumb that slices cleanly without tearing.
- Sugar for Yeast Fuel & Browning: 1 tablespoon of sugar provides immediate fermentable fuel for the yeast while encouraging rapid caramelization on the crust in a relatively short bake time.
- Steam Baking for a Thin, Soft Crust: Introducing a small pan of hot water on the bottom rack of your oven during the first 8 minutes of baking keeps the outer skin elastic, giving the rolls maximum oven spring and a tender crust.
Equipment Checklist
- Large mixing bowl (or stand mixer fitted with dough hook)
- Large rimmed baking sheet (half-sheet pan)
- Parchment paper or silicone baking mat
- Rolling pin
- Sharp knife, lame, or baker’s razor (for scoring)
- Pastry brush
- Plastic wrap or clean kitchen towels
- Wire cooling rack
Detailed Ingredient Breakdown
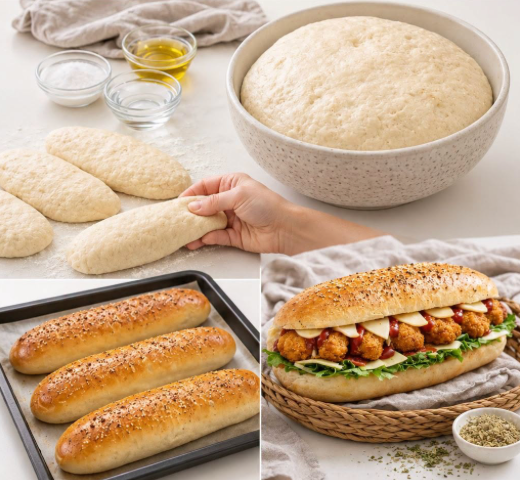
- 3 cups (approx. 375g to 400g) All-Purpose Flour: Standard unbleached all-purpose flour provides the ideal balance of protein for a soft, tender crumb. (Bread flour can also be used if you prefer slightly more chew).
- 1 cup (240ml) Warm Water: Temperature should be between 105°F and 110°F (40°C to 43°C)—warm to the touch like bathwater, but not hot enough to kill the yeast.
- 1 tbsp (approx. 9g to 10g / 1 standard packet) Active Dry Yeast or Instant Yeast: Fast-acting yeast provides rapid, reliable rising power.
- 1 tbsp (12g) Granulated White Sugar: Activates the yeast and creates a golden-brown crust.
- 1 tsp (6g) Fine Salt: Tightens the gluten structure and provides essential savory flavor.
- 2 tbsp (30ml) Extra Virgin Olive Oil (plus a splash for oiling the bowl): Tenderizes the crumb and imparts a rich bakery aroma.
Optional Toppings & Seasoning Blends:
- Italian Herb & Cheese: 2 tbsp finely grated Parmesan cheese + 1 tsp dried oregano, dried basil, and garlic powder.
- Seeded Top: 2 tbsp sesame seeds or everything bagel seasoning.
- Herb Butter Wash: 2 tbsp melted butter mixed with ½ tsp garlic powder and dried parsley for brushing immediately after baking.
Step-by-Step Instructions
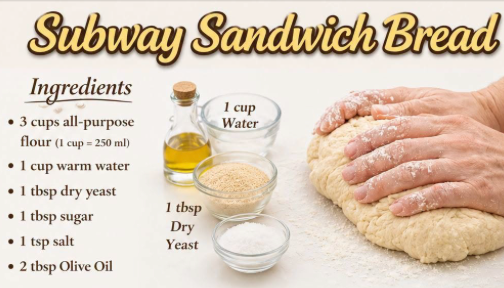
1. Activate and Bloom the Yeast
In a large mixing bowl (or the bowl of your stand mixer), pour in the 1 cup of warm water (105°F–110°F). Add the 1 tbsp of granulated sugar and 1 tbsp of dry yeast. Whisk gently to dissolve.
Let the mixture rest undisturbed for 5 to 10 minutes at room temperature. The yeast is active when the surface becomes thick, frothy, and bubbly with a distinct beer-like aroma.
2. Mix the Dough
Add the 2 tbsp of olive oil and 1 tsp of fine salt to the frothy yeast mixture.
Add the 3 cups of flour all at once. Stir with a sturdy wooden spoon or Danish dough whisk until the flour absorbs the liquid and forms a shaggy, rough dough mass with no dry flour remaining at the bottom of the bowl.
3. Knead Until Silky and Elastic
- By Hand: Turn the shaggy dough out onto a lightly floured countertop. Knead vigorously for 8 to 10 minutes using the heels of your hands, pushing the dough forward, folding it back over itself, and rotating it 90 degrees.
- By Stand Mixer: Knead using the dough hook on medium-low speed (Speed 2) for 6 to 8 minutes.
- Texture Check: The kneaded dough should be smooth, soft, slightly tacky (not sticky), and spring back when gently pressed with a finger.
4. First Rise (Bulk Fermentation)
Lightly oil the inside of a large, clean bowl with ½ teaspoon of olive oil. Form the kneaded dough into a smooth ball and place it in the oiled bowl, rolling it around once to coat the entire surface in oil.
Cover the bowl tightly with plastic wrap or a damp kitchen towel. Place in a warm, draft-free spot (such as an unheated oven with the light turned on) and let rise for 45 to 60 minutes, or until doubled in volume.
5. Divide and Portion
Gently punch down the risen dough to release trapped gas. Turn the dough out onto a clean, un-floured work surface.
Using a bench scraper or sharp knife, divide the dough evenly into 4 equal pieces (approx. 160g each for 12-inch sub rolls) or 8 equal pieces (for 6-inch sandwich rolls). Cover the dough portions loosely with a towel and let them rest for 5 minutes to relax the gluten.
6. Shape the Subway Rolls
Working with one piece of dough at a time:
- Using your hands or a rolling pin, flatten the dough portion into an even oval/rectangle (about 6 inches wide and 8 inches long).
- Starting from the top long edge, roll the dough down tightly into a compact, firm cylinder (like rolling a jelly roll).
- Pinch the bottom long seam firmly shut with your fingers to seal it. Gently pinch and tuck the two outer tapered ends inward.
- Place your flat palms over the cylinder and gently roll it back and forth against the counter, stretching it outward until it forms a uniform 11-to-12-inch long loaf.
7. Second Rise (Proofing)
Line a large rimmed baking sheet with parchment paper. Arrange the 4 shaped loaves lengthwise on the prepared tray, leaving at least 2 to 3 inches of space between each roll so they don’t stick together as they expand.
Cover the shaped loaves loosely with oiled plastic wrap or a light kitchen towel. Let proof in a warm spot for 30 to 40 minutes, until puffy, airy, and nearly doubled in size.
8. Preheat Oven and Prep for Steam
About 15 minutes before the proofing is complete, preheat your oven to 375°F (190°C).
Place an empty metal baking pan on the very bottom rack of the oven to preheat.
9. Score, Brush, and Season
Gently brush the tops and sides of the proofed rolls with water or a little milk using a pastry brush. If adding toppings (like Italian herbs, grated Parmesan, or sesame seeds), sprinkle them generously over the wet surface now so they stick.
Using a razor blade, lame, or very sharp knife, make 3 to 4 diagonal slashes (about ¼-inch deep) across the top of each roll.
10. Bake to Golden Perfection
Place the baking sheet with your sub rolls onto the center oven rack. Immediately pour ½ cup of hot tap water into the empty preheated pan on the bottom rack and quickly close the oven door to trap the steam.
Bake at 375°F (190°C) for 15 to 18 minutes. The rolls are done when the crust is a uniform golden-brown color and the bottom sounds hollow when tapped.
11. Brush and Cool
Remove the bread from the oven. For an extra-soft, glossy Subway-style finish, immediately brush the hot tops with 1 tablespoon of melted butter.
Transfer the rolls to a wire cooling rack and let them cool completely for at least 20 minutes before slicing horizontally.
Baker’s Pro Secrets
- Don’t Add Too Much Flour: It is normal for this dough to feel slightly tacky during early kneading. Resist adding excess flour, which makes the bread heavy and dense.
- The Steam Trick: Pouring water into a hot pan on the bottom rack creates instant steam. This prevents the crust from setting prematurely, allowing the dough to expand to its maximum height.
- Clean Slicing: Always use a long serrated bread knife with a gentle sawing motion. Never press down flat with a smooth blade, which will crush the airy interior.
Storage, Freezing, and Sandwich Building
- Room Temperature Storage: Keep whole, uncut rolls in a sealed zip-top bag or bread box at room temperature for up to 3 to 4 days.
- Freezing: Slice the cooled rolls horizontally, wrap individually in plastic wrap, and store inside a freezer bag for up to 3 months. Thaw at room temperature for 15 minutes or toast directly from frozen.
- Toasting for Sandwiches: To make a hot toasted sub, slice the roll open, layer with meats and cheese, and place under the oven broiler at 400°F (200°C) for 2 to 3 minutes until the cheese is bubbling and the edges are crisp.