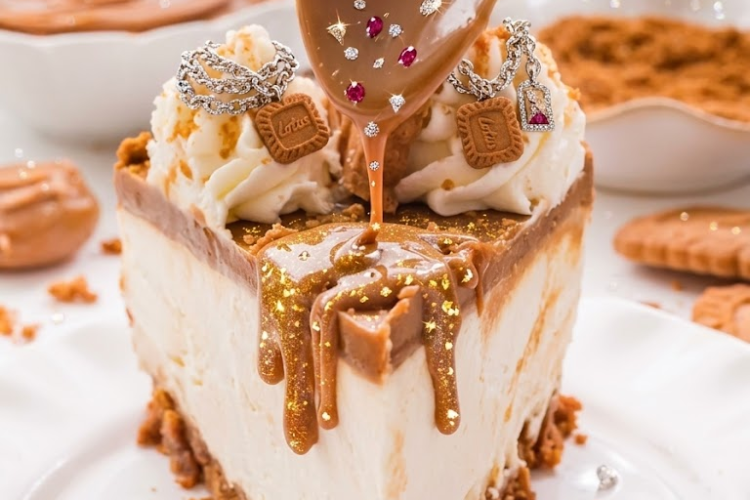
No-Bake Biscoff Cheesecake
Creamy, silky, and packed with irresistible cookie-butter flavor, this No-Bake Biscoff Cheesecake is the perfect dessert for hot days when you want to keep the oven switched off.
A buttery Biscoff cookie crust is topped with a rich and fluffy Biscoff cheesecake filling, then finished with a smooth layer of melted cookie butter and crunchy cookie crumbs. It’s indulgent, refreshing when chilled, and surprisingly easy to make.
⏱ Recipe Information
Prep Time: 25 minutes
Chill Time: 6 hours
Total Time: 6 hours 25 minutes
Servings: 10–12
Difficulty: Easy
Method: No-Bake
Ingredients
Biscoff Cookie Crust
- 2 cups Biscoff cookie crumbs
About 25–28 cookies - 6 tablespoons unsalted butter, melted
- 1 tablespoon brown sugar, optional
- Pinch of salt
Biscoff Cheesecake Filling
- 16 oz full-fat cream cheese, softened
- ¾ cup Biscoff cookie butter
- ½ cup powdered sugar
- 1 teaspoon vanilla extract
- 1½ cups heavy whipping cream, cold
Biscoff Topping
- ½ cup Biscoff cookie butter
- 4–6 Biscoff cookies, crushed or roughly chopped
Instructions
1. Prepare the Biscoff Crumbs
Place the Biscoff cookies in a food processor and pulse until finely crushed.
You can also place the cookies in a sealed bag and crush them with a rolling pin.
Measure out 2 cups of crumbs for the crust.
2. Make the Crust
Add the cookie crumbs, melted butter, brown sugar if using, and salt to a bowl.
Mix until the crumbs are evenly coated and the mixture resembles wet sand.
3. Press Into the Pan
Transfer the mixture to a 9-inch springform pan.
Firmly press the crumbs into an even layer across the bottom.
Use the bottom of a glass or measuring cup to compact the crust.
For a decorative finish, press some of the crumbs slightly up the sides of the pan.
Refrigerate for at least 20–30 minutes.
4. Prepare the Cream Cheese
Place the softened cream cheese in a large mixing bowl.
Beat with an electric mixer until completely smooth and creamy.
Scrape down the sides of the bowl as needed.
5. Add the Cookie Butter
Add the ¾ cup Biscoff cookie butter, powdered sugar, and vanilla extract.
Beat until the mixture is smooth, thick, and completely combined.
6. Whip the Cream
In a separate chilled bowl, beat the cold heavy whipping cream until stiff peaks form.
Be careful not to overwhip.
The whipped cream should be thick enough to hold its shape.
7. Fold the Filling Together
Add approximately one-third of the whipped cream to the Biscoff cream cheese mixture.
Gently fold it in using a spatula.
Add the remaining whipped cream in two additions, folding gently after each addition.
Do not vigorously stir, as this can deflate the whipped cream.
8. Fill the Crust
Remove the chilled crust from the refrigerator.
Spoon the cheesecake filling over the crust.
Spread the top evenly using an offset spatula.
Gently tap the pan on the counter a few times to remove large air pockets.
9. Chill the Cheesecake
Cover the cheesecake tightly with plastic wrap.
Refrigerate for at least 6 hours, preferably overnight.
The longer chilling time allows the cheesecake to become firm enough to slice cleanly.
Prepare the Biscoff Topping
10. Melt the Cookie Butter
Place the ½ cup Biscoff cookie butter in a microwave-safe bowl.
Microwave for approximately 15–20 seconds.
Stir well.
Continue in short intervals if necessary until the cookie butter becomes smooth and pourable.
Do not overheat it.
11. Add the Topping
Once the cheesecake has completely set, carefully pour the melted cookie butter over the top.
Spread it gently toward the edges, allowing it to form a smooth layer.
12. Add the Cookies
Immediately sprinkle the crushed Biscoff cookies over the cookie-butter layer.
For a more elegant presentation, arrange a few whole or halved Biscoff cookies around the edge.
13. Chill Again
Return the cheesecake to the refrigerator for approximately 30 minutes, or until the topping has set.
14. Remove and Serve
Carefully run a thin, warm knife around the edge of the cheesecake before releasing the springform pan.
Transfer the cheesecake to a serving plate.
Slice with a sharp knife and serve chilled.
Chef’s Tips
Use Full-Fat Cream Cheese
Full-fat cream cheese provides the best flavor and structure for a no-bake cheesecake.
Soften the Cream Cheese
Room-temperature cream cheese blends more smoothly and prevents lumps.
Keep the Whipping Cream Cold
Cold cream whips faster and produces a more stable filling.
Don’t Rush the Chill
A minimum of 6 hours is recommended. Overnight chilling produces the firmest, cleanest slices.
Don’t Overheat the Cookie Butter
You only need to warm it enough to make it pourable. Excessive heat can make it oily and difficult to spread.
How to Get Perfect Slices
For clean, professional-looking slices:
- Chill the cheesecake thoroughly.
- Dip a sharp knife in hot water.
- Wipe the knife dry.
- Make one clean cut.
- Wipe and warm the knife again.
- Repeat for each slice.
This prevents the creamy filling from sticking heavily to the knife.
Optional Decorations
Take the presentation up a level with:
- Whole Biscoff cookies
- Crushed Biscoff crumbs
- Whipped cream swirls
- Extra cookie butter drizzle
- Caramel sauce
- Chocolate curls
- A light dusting of cookie crumbs
For individual servings, add a small dollop of whipped cream and half a Biscoff cookie to each slice.
Make-Ahead Instructions
This cheesecake is ideal for making ahead.
Prepare it 1–2 days before serving and keep it refrigerated.
For the freshest appearance, add the cookie-butter topping and cookie crumbs on the day you plan to serve it.
Storage
Keep the cheesecake covered and refrigerated.
Refrigerator: Up to 4–5 days.
Store it in the coldest part of the refrigerator and avoid leaving it at room temperature for extended periods.
Freezing Instructions
For best results, freeze the cheesecake without the final cookie-butter topping.
Place the cheesecake in the freezer until firm, then wrap tightly in plastic wrap and aluminum foil.
Freeze for up to 1 month.
Thaw overnight in the refrigerator.
Add the Biscoff topping and cookie crumbs after thawing.
Recipe Summary
This No-Bake Biscoff Cheesecake is the ultimate warm-weather dessert. There’s no oven, no complicated baking technique, and no need to heat up the kitchen.
With a buttery Biscoff crust, creamy cookie-butter cheesecake filling, silky Biscoff topping, and plenty of crunchy cookie crumbs, every bite is rich, smooth, and completely irresistible.
No oven. Maximum Biscoff. Perfectly chilled.