🥞 Homemade Buttermilk Pancakes
These Homemade Buttermilk Pancakes are everything a great pancake should be: fluffy and golden on the outside, tender in the center, and lightly crisp around the buttery edges. Buttermilk gives them a subtle tang and helps create an irresistibly soft texture.
They’re perfect for lazy weekend breakfasts, brunch, or making ahead for quick weekday meals.
Recipe Details
- Prep Time: 10 minutes
- Cook Time: 15–20 minutes
- Total Time: 25–30 minutes
- Yield: 12–14 pancakes
- Difficulty: Easy
- Method: Stovetop
Ingredients
Pancake Batter
- 2 cups (250 g) all-purpose flour
- 3 tablespoons (38 g) granulated sugar
- 2 teaspoons baking powder
- 1 teaspoon baking soda
- ½ teaspoon fine salt
- 2 cups (480 ml) buttermilk
- 2 large eggs
- 4 tablespoons (56 g) unsalted butter, melted and slightly cooled
- 2 teaspoons vanilla extract
For Cooking
- Butter or neutral oil, as needed
For Serving
- Butter
- Pure maple syrup
- Fresh berries
- Sliced bananas
- Powdered sugar
- Whipped cream, optional
Instructions
1. Prepare the Dry Ingredients
In a large mixing bowl, whisk together the flour, sugar, baking powder, baking soda, and salt.
Make sure the baking powder and baking soda are evenly distributed throughout the flour.
2. Combine the Wet Ingredients
In a separate bowl, whisk together the buttermilk and eggs.
Add the melted butter and vanilla extract.
Whisk until everything is evenly combined.
Make sure the melted butter has cooled slightly before adding it so it doesn’t cook the eggs.
3. Make the Batter
Pour the wet ingredients into the dry ingredients.
Using a whisk or rubber spatula, gently mix until just combined.
Do not overmix.
A few small lumps are completely fine. Overmixing develops gluten and can make pancakes tough instead of fluffy.
The batter should be thick and pourable.
4. Rest the Batter
Let the batter rest for 5–10 minutes.
This gives the flour time to hydrate and allows the leavening agents to begin working, resulting in lighter, more tender pancakes.
5. Heat the Pan
Place a nonstick skillet, griddle, or cast-iron pan over medium-low to medium heat.
Lightly grease the surface with butter or a small amount of neutral oil.
The pan is ready when a small drop of batter begins to sizzle gently without immediately browning.
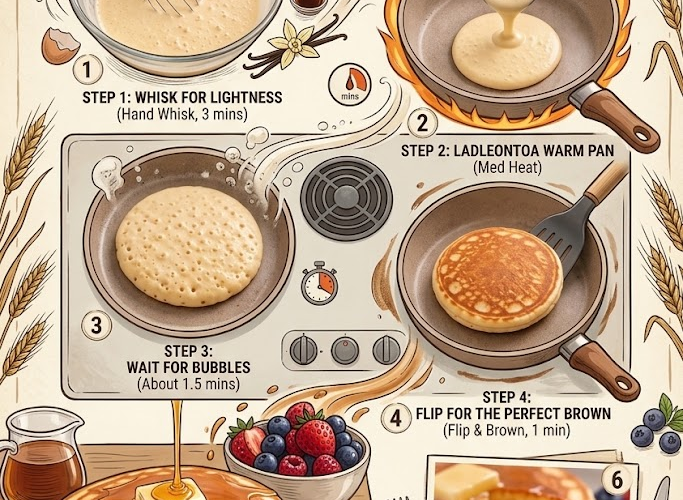
6. Cook the Pancakes
Pour approximately ¼ cup of batter onto the hot pan for each pancake.
Leave enough space between pancakes so they don’t run together.
Cook for about 2–3 minutes, or until bubbles begin appearing across the surface and the edges look set.
7. Flip
Carefully slide a spatula underneath the pancake and flip it in one confident motion.
Cook for another 1–2 minutes, until the second side is golden brown and the pancake is cooked through.
Avoid pressing down on the pancakes with your spatula—you’ll push out the air that makes them fluffy.
8. Repeat
Continue cooking the remaining batter.
Add a little more butter or oil to the pan between batches as needed.
If the pancakes begin browning too quickly, reduce the heat slightly.
9. Serve
Stack the warm pancakes on a plate.
Top with a pat of butter and plenty of maple syrup.
Add fresh berries, sliced fruit, whipped cream, or powdered sugar if desired.
Chef’s Tips
- Don’t overmix the batter. Lumps are good; a perfectly smooth batter can mean tougher pancakes.
- Let the batter rest for a few minutes before cooking.
- Keep the pan around medium-low to medium heat. Too hot and the outside will brown before the center cooks.
- Use approximately ¼ cup batter per pancake for evenly sized pancakes.
- Wait for bubbles and set edges before flipping.
- Flip only once whenever possible.
- Don’t flatten the pancakes after flipping.
- For extra-crispy buttery edges, add a small pat of butter to the pan before each batch.
How to Tell When They’re Ready to Flip
Look for three signs:
- Bubbles have formed across the surface.
- Some bubbles have popped and remain open.
- The edges look slightly dry and set.
That’s your cue to flip.
Make-Ahead & Meal Prep
These pancakes are excellent for meal prep.
Allow cooked pancakes to cool completely, then stack them with a small piece of parchment paper between each pancake.
Store in an airtight container or freezer bag.
Refrigerator
Refrigerate for up to 4 days.
Reheat in the microwave, toaster, or skillet.
Freezer
Freeze for up to 2 months.
To prevent sticking, freeze the pancakes in a single layer first, then transfer them to a freezer-safe bag or container.
Reheat directly from frozen in a toaster, toaster oven, or microwave.
Easy Variations
🫐 Blueberry Buttermilk Pancakes
Gently scatter fresh or frozen blueberries over each pancake immediately after pouring the batter onto the pan.
🍫 Chocolate Chip Pancakes
Add ½ cup mini chocolate chips to the batter or sprinkle them over each pancake as it cooks.
🍌 Banana Pancakes
Add one finely mashed ripe banana to the wet ingredients. Reduce the buttermilk slightly if the batter becomes too loose.
🥜 Cinnamon Pecan Pancakes
Add ½ teaspoon cinnamon and ½ cup finely chopped toasted pecans.
🍎 Apple Cinnamon
Fold in ½ cup finely diced apple and ½ teaspoon ground cinnamon.
🥞 Extra-Buttermilk Fluffy Pancakes
For an especially thick batter, reduce the buttermilk slightly to about 1¾ cups. This produces taller, more substantial pancakes.
Serving Suggestions
Build the ultimate pancake stack with:
- Butter + maple syrup
- Fresh strawberries and blueberries
- Bananas + toasted pecans
- Whipped cream + chocolate chips
- Cinnamon butter + warm syrup
- Greek yogurt + fresh fruit
For a restaurant-style finish, dust the stack lightly with powdered sugar just before serving.
The Result
Fluffy centers, golden surfaces, crisp buttery edges, and that unmistakable tang of real buttermilk make these Homemade Buttermilk Pancakes a breakfast classic. Stack them high, add plenty of butter and maple syrup, and enjoy them warm. 🥞🍁