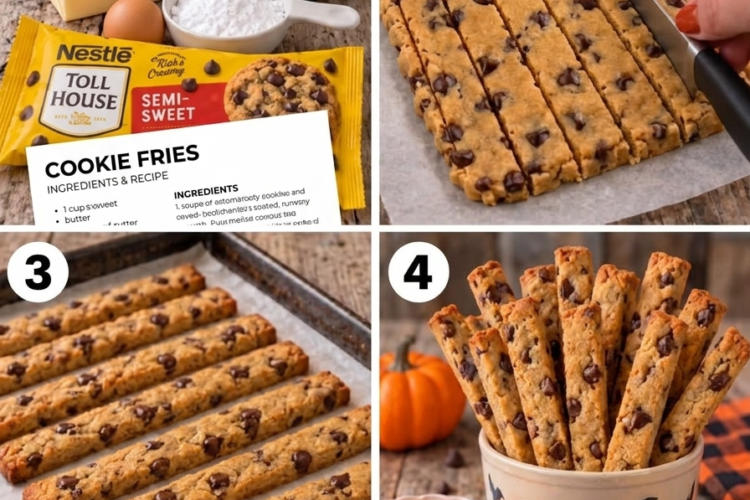
🎃 Halloween Cookie Fries with Colorful Frosting Dips
Turn ordinary sugar cookie dough into the cutest Halloween treat! These Halloween Cookie Fries are golden, buttery, crisp around the edges, and soft in the middle, shaped just like French fries and served with colorful frosting dips.
Each cookie fry has a delicate vanilla flavor and a delicious buttery crunch, while the festive dipping frostings bring all the spooky fun. Think orange pumpkin frosting, purple monster dip, and green witch-inspired frosting—perfect for dunking, decorating, and sharing!
They’re easy to make with simple baking ingredients and are wonderful for Halloween parties, classroom celebrations, movie nights, or a fun afternoon baking project with kids.
Recipe Information
- Prep Time: 25 minutes
- Chilling Time: 30 minutes
- Bake Time: 10–13 minutes per batch
- Total Time: Approximately 1 hour 15 minutes
- Yield: 40–50 cookie fries
- Servings: 8–10
- Course: Dessert, Snack
- Cuisine: American-inspired
- Difficulty: Easy
Ingredients
For the Cookie Fries
- 2¼ cups (280 g) all-purpose flour
- ½ teaspoon baking powder
- ¼ teaspoon salt
- ¾ cup (170 g) unsalted butter, softened
- ¾ cup (150 g) granulated sugar
- 1 large egg, at room temperature
- 2 teaspoons vanilla extract
- 1 tablespoon milk, if needed
For the Halloween Frosting Dips
- 1 cup (120 g) powdered sugar, sifted
- 2 tablespoons (28 g) unsalted butter, softened
- 1–2 tablespoons (15–30 ml) milk or heavy cream
- ½ teaspoon vanilla extract
- Orange gel food coloring
- Purple gel food coloring
- Green gel food coloring
Optional Halloween Decorations
- Halloween sprinkles
- Candy eyes
- Mini chocolate chips
- Black and orange sanding sugar
- Edible Halloween-themed decorations
Instructions
Step 1: Prepare the Oven and Baking Sheets
Preheat your oven to 350°F (175°C). Line two baking sheets with parchment paper.
Keeping the baking sheets lined helps prevent sticking and makes it easier to transfer the delicate cookie fries after baking.
Step 2: Mix the Dry Ingredients
In a medium bowl, whisk together the flour, baking powder, and salt until evenly combined.
Set aside while you prepare the cookie dough.
Step 3: Cream the Butter and Sugar
In a large mixing bowl, beat the softened butter and granulated sugar with an electric mixer for about 2–3 minutes, until the mixture looks pale and fluffy.
Add the egg and vanilla extract. Beat again until smooth, scraping down the sides of the bowl as needed.
Creaming the butter and sugar properly helps create tender cookies with a delicate texture.
Step 4: Make the Cookie Dough
Gradually add the dry ingredients to the butter mixture, mixing on low speed until a soft dough forms.
The dough should hold together without being overly sticky. If it seems too dry or crumbly, add the tablespoon of milk a little at a time.
Avoid adding too much liquid, as a softer dough can spread excessively during baking.
Step 5: Chill the Dough
Divide the dough into two portions and flatten each into a disc. Wrap or cover and refrigerate for 30 minutes.
Chilling firms up the butter, making the dough easier to roll and helping the cookie fries maintain their shape in the oven.
Step 6: Shape the Cookie Fries
Lightly flour your work surface and rolling pin. Roll one portion of dough into a rectangle approximately ¼ inch (6 mm) thick.
Using a sharp knife or pizza cutter, trim the edges to create a neat rectangle. Cut the dough into long, narrow strips approximately ¼–⅓ inch (6–8 mm) wide and 3–4 inches (7.5–10 cm) long.
These strips will resemble French fries when baked.
Carefully transfer them to the prepared baking sheets, leaving about 1 inch (2.5 cm) between each strip. Gather the dough scraps, gently press them together, and reroll once if needed.
Repeat with the remaining dough.
Shaping tip: Keep the strips fairly uniform in thickness so they bake evenly. For a more rustic, homemade appearance, allow some strips to be slightly shorter or narrower than others.
Step 7: Bake Until Lightly Golden
Bake for 10–13 minutes, checking the cookies near the 9-minute mark.
The cookie fries are ready when their edges are just beginning to turn light golden and the centers look set. Thinner strips may finish sooner, so watch them carefully.
Do not wait for the entire cookie to become deeply golden; they will continue to firm up as they cool.
Remove the baking sheets from the oven and let the cookies rest for 5 minutes before carefully transferring them to a wire rack.
Allow the cookie fries to cool completely before serving with frosting.
Step 8: Prepare the Vanilla Frosting Base
In a medium bowl, beat the softened butter until smooth and creamy.
Add the sifted powdered sugar and vanilla extract. Mix on low speed, then gradually add the milk or cream until the frosting becomes smooth and thick but still suitable for dipping.
The ideal consistency should be similar to a soft frosting or thick dip: it should cling to a cookie fry without running off immediately.
If the frosting is too thick, add a few drops of milk. If it is too thin, add a little more powdered sugar.
Step 9: Create the Halloween Colors
Divide the vanilla frosting evenly among three small bowls.
- Orange Pumpkin Dip: Add orange gel food coloring and mix until you reach a bright pumpkin-orange shade.
- Purple Monster Dip: Add purple gel food coloring for a spooky, vibrant purple.
- Green Witch Dip: Add green gel food coloring for a playful witch-inspired shade.
Start with a tiny amount of coloring and add more gradually until you achieve your desired colors. Gel coloring is ideal because it adds vibrant color without thinning the frosting too much.
Transfer each frosting into a small serving bowl. Decorate with Halloween sprinkles or candy eyes if desired.
Step 10: Arrange and Serve
Arrange the completely cooled cookie fries in a serving basket, paper-lined tray, or shallow bowl.
Place the orange, purple, and green frosting dips beside the cookies. For a fun Halloween presentation, use small black bowls or festive cups and scatter a few Halloween sprinkles around the serving platter.
Serve immediately, encouraging everyone to grab a cookie fry and dunk it into their favorite spooky frosting!
Tips for Perfect Cookie Fries
- Chill the dough: This is important for keeping the narrow cookie strips from spreading too much during baking.
- Roll evenly: Consistent thickness ensures the fries bake at the same rate.
- Use parchment paper: It helps prevent sticking and makes transferring the delicate strips easier.
- Watch the edges: The cookies should be lightly golden rather than deeply browned.
- Cool completely before dipping: Warm cookies can soften the frosting and make it slide off.
- Choose gel food coloring: It creates stronger Halloween colors with less added moisture.
- Make the frosting thick enough: A thicker dip clings nicely to the cookies, while a thinner frosting can become messy.
- Bake in batches: Keep unused dough chilled if your kitchen is warm.
Fun Halloween Variations
Chocolate Cookie Fries
Replace ¼ cup (30 g) of the flour with ¼ cup (25 g) unsweetened cocoa powder for chocolate-flavored cookie fries. The dough may be slightly more delicate, so chill it thoroughly before cutting.
Cinnamon Sugar Cookie Fries
Before baking, lightly brush the shaped cookies with a little milk and sprinkle with cinnamon sugar for a churro-inspired flavor.
Monster Cookie Fries
Add mini chocolate chips to the dough and decorate the purple frosting dip with candy eyes for a playful monster-themed treat.
Pumpkin Spice Cookie Fries
Add ½ teaspoon pumpkin pie spice to the dry ingredients for a warm, autumn-inspired flavor.
Chocolate Frosting Dip
Prepare a chocolate dip by mixing ½ cup (60 g) powdered sugar, 1 tablespoon cocoa powder, 1 tablespoon softened butter, and 1–2 tablespoons milk until smooth.
Candy-Dipped Cookie Fries
Dip the ends of the cooled cookie fries into melted chocolate or colored candy melts. Add Halloween sprinkles before the coating sets.
Make-Ahead and Storage Instructions
Cookie dough: Prepare the dough up to 2 days ahead and keep it tightly covered in the refrigerator. Let it soften slightly if it becomes too firm to roll.
Baked cookie fries: Store completely cooled, undecorated cookies in an airtight container at room temperature for up to 5 days.
Frosting dips: Prepare the frosting up to 3 days ahead and refrigerate in covered containers. Let it soften slightly and stir before serving. Add a few drops of milk if necessary to restore the dipping consistency.
Freezing: Freeze baked, undecorated cookie fries in an airtight container for up to 2 months for best quality. Thaw at room temperature before arranging and serving.
Party preparation: For the freshest texture, bake the cookies a day before the party and prepare the colored frosting on the day of serving.
Frequently Asked Questions
Why did my cookie fries spread in the oven?
The dough may have been too warm, the butter too soft, or too much liquid may have been added. Chill the shaped strips for 10–15 minutes before baking if your kitchen is warm.
Can I use store-bought sugar cookie dough?
Yes! Refrigerated sugar cookie dough can save time. Chill it until firm, roll it out, cut into narrow strips, and bake according to the package directions, checking early because smaller cookies may bake faster.
Can I make these cookie fries without an electric mixer?
Absolutely. A sturdy wooden spoon and a little patience work well for mixing the butter, sugar, and remaining ingredients.
Can I use royal icing instead of frosting?
Yes. Royal icing can be used as a firmer dipping option, but it sets harder than buttercream-style frosting. A soft buttercream dip is easier to scoop and enjoy with these cookies.
How do I keep the cookie fries crisp?
Let them cool completely before storing, and use an airtight container. Moisture from warm cookies or humid surroundings can soften the texture.
Are these cookie fries suitable for children?
Yes, they’re a fun baking activity for children with adult supervision. Children can help decorate the platter and choose their favorite colored dip. An adult should handle the oven, hot trays, and sharp cutting tools.
Final Thoughts
These Halloween Cookie Fries with Colorful Frosting Dips are a fun twist on traditional sugar cookies. Their playful French-fry shape, buttery vanilla flavor, and bright orange, purple, and green dips make them a fantastic addition to any Halloween celebration.
They’re easy to customize, simple to prepare ahead, and especially fun to serve on a party platter with several dipping options.
Grab a cookie fry, dunk it into your favorite spooky frosting, and enjoy a sweet little Halloween treat that’s almost too cute to eat! 🎃🧡💜💚