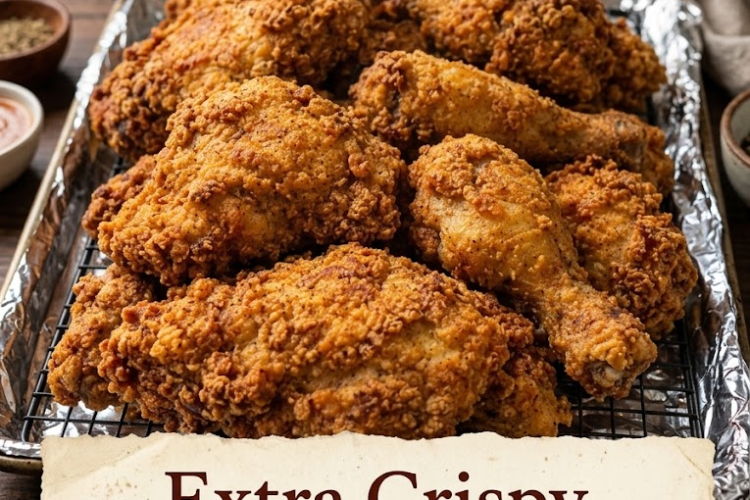
🍗 Classic Southern Fried Chicken
This Classic Southern Fried Chicken delivers everything you love about old-fashioned Southern comfort food: a crunchy, golden-brown crust, juicy and tender chicken, and a perfectly seasoned coating that keeps everyone reaching for another piece.
The secret is a tangy buttermilk marinade, a flavorful flour coating, and careful frying at the right temperature. Whether you’re preparing Sunday dinner, feeding a hungry family, or hosting a gathering, this homemade fried chicken is always a crowd-pleaser.
Recipe Information
- Prep Time: 20 minutes
- Marinating Time: 4 hours, preferably overnight
- Cook Time: 25–35 minutes per batch
- Total Time: Approximately 5 hours, including marinating
- Servings: 6
- Difficulty: Moderate
- Method: Deep-frying
Ingredients
For the Chicken Marinade
- 3 lbs (1.36 kg) bone-in chicken pieces
- 2 cups (480 ml) buttermilk
- 1 tablespoon (15 ml) hot sauce
- 1 teaspoon salt
- 1 teaspoon freshly ground black pepper
For the Crispy Coating
- 2 cups (250 g) all-purpose flour
- ½ cup (60 g) cornstarch
- 2 teaspoons paprika
- 1 teaspoon garlic powder
- 1 teaspoon onion powder
- 1 teaspoon salt
- 1 teaspoon freshly ground black pepper
- 1 teaspoon dried thyme
- 1 teaspoon dried oregano
- ½ teaspoon cayenne pepper, optional
- ½ teaspoon baking powder, optional, for extra crispiness
For Frying
- Approximately 1½–2 liters (6–8 cups) neutral frying oil, such as vegetable, canola, or peanut oil, or enough to fill your pot no more than halfway
Instructions
1. Prepare the Buttermilk Marinade
In a large bowl, whisk together the buttermilk, hot sauce, salt, and black pepper until combined.
Add the chicken pieces and turn them several times to ensure every piece is coated.
Cover the bowl and refrigerate for at least 4 hours, preferably overnight. The buttermilk helps tenderize the chicken and allows the seasonings to penetrate the meat.
Keep the chicken refrigerated throughout marinating.
2. Prepare the Seasoned Flour
In a large, shallow bowl, combine the flour, cornstarch, paprika, garlic powder, onion powder, salt, black pepper, thyme, oregano, and optional cayenne pepper and baking powder.
Whisk thoroughly until the seasonings are evenly distributed.
The cornstarch helps create a crispier coating, while the herbs and spices provide the classic savory flavor.
3. Create Extra-Crunchy Coating
For a more textured crust, drizzle 2–3 tablespoons of the buttermilk marinade into the seasoned flour.
Rub it gently through the flour with your fingertips until small, irregular clumps form.
These little flour clusters cling to the chicken and create delicious crunchy edges when fried.
4. Coat the Chicken
Remove the chicken from the refrigerator.
Lift each piece from the marinade, allowing the excess buttermilk to drip off. Do not rinse the chicken.
Place each piece into the seasoned flour mixture.
Press the flour firmly onto the chicken, making sure every surface is thoroughly covered, including around the joints and under any folds of skin.
Shake off only the loose excess flour.
For a thicker crust, dip the coated chicken briefly back into the buttermilk and dredge it in the flour a second time.
5. Rest the Coated Chicken
Arrange the coated chicken pieces on a wire rack.
Let them rest for 10–15 minutes while you heat the oil.
This helps the flour coating adhere to the chicken instead of falling off during frying.
6. Heat the Oil
Pour the frying oil into a heavy-bottomed pot or deep skillet, filling it no more than halfway.
Heat the oil to 325–350°F (163–177°C).
Use a deep-fry or instant-read thermometer to monitor the temperature.
Maintaining the correct oil temperature is essential: oil that is too hot can burn the coating before the chicken cooks through, while oil that is too cool can produce greasy chicken.
7. Fry the Chicken in Batches
Carefully lower several chicken pieces into the hot oil using tongs.
Do not overcrowd the pot, as adding too much chicken at once lowers the oil temperature.
Maintain an oil temperature of approximately 325°F (163°C) while the chicken cooks, adjusting the heat as necessary.
Fry for approximately:
- Wings: 8–12 minutes
- Drumsticks: 12–16 minutes
- Thighs: 14–18 minutes
- Bone-in breast pieces: 15–20 minutes
These are estimates; actual times depend on the size of the pieces and the oil temperature.
Turn the pieces occasionally so they brown evenly on all sides.
8. Check for Doneness
The chicken should have a deep golden-brown crust.
Check the internal temperature with a food thermometer, inserting it into the thickest part of the meat without touching the bone.
Every piece must reach at least 165°F (74°C) for food safety. Larger bone-in pieces may take longer than the estimated frying times.
If the coating is browning too quickly before the center is cooked, lower the oil temperature and continue cooking carefully.
9. Drain the Chicken
Transfer the cooked chicken to a wire rack set over a baking sheet.
Allow excess oil to drip away naturally.
A wire rack keeps the bottom of the chicken crisp. Placing fried chicken directly on paper towels can trap steam underneath and soften the crust.
If cooking multiple batches, keep the finished chicken warm in an oven set to approximately 200°F (95°C) while you finish frying. Avoid covering it tightly.
10. Rest Briefly
Allow the chicken to rest for about 5 minutes before serving.
This helps the meat settle and gives you time to prepare the sides.
11. Serve
Arrange the chicken on a large serving platter.
For extra flavor, finish with a light sprinkle of salt while the crust is still hot.
Serve immediately while the coating is crispy and the meat is juicy.
Chef’s Tips for the Crispiest Fried Chicken
- Marinate long enough: Four hours is a good minimum; overnight develops even more flavor.
- Use cornstarch: It helps produce a lighter, crispier coating.
- Create flour clumps: Small clusters in the coating form crunchy, irregular pieces.
- Press the flour onto the chicken: This helps the crust adhere.
- Let the coating rest: A short rest reduces the chance of the crust falling off.
- Don’t overcrowd the pot: Frying in batches maintains the oil temperature.
- Use a thermometer: Oil temperature and internal chicken temperature are both important.
- Drain on a wire rack: Air circulation keeps the crust crisp.
- Season while hot: A small pinch of salt immediately after frying enhances the flavor.
Delicious Variations
🌶️ Spicy Southern Fried Chicken
Increase the cayenne pepper to 1 teaspoon and add extra hot sauce to the buttermilk marinade.
🍯 Honey Butter Fried Chicken
Warm 3 tablespoons butter with 2 tablespoons honey and a tiny pinch of salt. Drizzle lightly over the fried chicken just before serving.
🧄 Garlic Herb Fried Chicken
Increase the garlic powder to 1½ teaspoons and add another ½ teaspoon dried thyme to the flour mixture.
🌶️ Nashville-Inspired Hot Chicken
Mix 2 tablespoons hot frying oil with 1 tablespoon cayenne pepper, 1 teaspoon paprika, ½ teaspoon garlic powder, and 1 tablespoon brown sugar. Brush a thin layer over the freshly fried chicken. Handle the hot oil carefully.
🍋 Lemon Pepper Fried Chicken
Add 1 teaspoon lemon pepper seasoning to the flour mixture and finish with a little fresh lemon zest.
Extra-Crunchy Double-Coated Chicken
After the first flour coating, dip each piece briefly in the buttermilk again and dredge a second time. Rest for 10–15 minutes before frying.
Make-Ahead Instructions
The chicken can marinate in the buttermilk mixture for up to approximately 24 hours under refrigeration.
The seasoned flour mixture can be prepared separately and stored in an airtight container.
For the crispiest results, coat the chicken shortly before frying rather than storing it coated for many hours.
Storage
Refrigerate leftover fried chicken in a shallow, airtight container within 2 hours of cooking and consume within 3–4 days.
To reheat while preserving the crust, place the chicken on a wire rack over a baking sheet and warm in a 375°F (190°C) oven until thoroughly hot.
An air fryer also works well for restoring crispness. Avoid tightly wrapping hot chicken, as trapped steam softens the coating.
Freezing
Let the fried chicken cool completely, then wrap individual pieces and store in a freezer-safe container for up to 3 months for best quality.
Thaw overnight in the refrigerator and reheat in the oven until hot throughout.
Best Side Dishes for Southern Fried Chicken
Serve this classic fried chicken with:
- Creamy mashed potatoes and gravy
- Buttermilk biscuits
- Creamy coleslaw
- Macaroni and cheese
- Southern green beans
- Cornbread
- Corn on the cob
- Potato salad
- Collard greens
- Pickles and hot sauce
For a classic Southern-style dinner, pair the chicken with mashed potatoes, coleslaw, warm biscuits, and a little honey or hot sauce on the side.
Final Result
Beautifully golden, crispy Southern Fried Chicken with a crunchy, seasoned crust and tender, juicy meat underneath. The tangy buttermilk marinade, aromatic herbs, garlic, paprika, and optional cayenne create layers of flavor in every piece. Serve it hot with your favorite comfort-food sides for an unforgettable homemade fried chicken dinner.