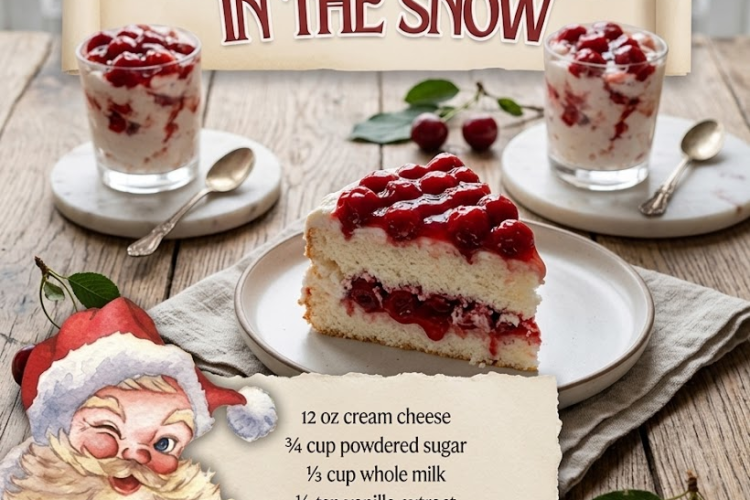
Cherries in the Snow
A classic no-bake dessert with layers of fluffy angel food cake, silky cream cheese filling, and sweet cherry pie topping.
Cherries in the Snow is an old-fashioned dessert that’s as beautiful as it is easy to make. Cubes of soft angel food cake are layered with a rich, creamy cheesecake-style mixture and finished with generous spoonfuls of glossy cherry pie filling.
It’s light, creamy, fruity, and wonderfully nostalgic—perfect for holidays, potlucks, family gatherings, and make-ahead desserts.
⏱ Recipe Information
Prep Time: 20 minutes
Chill Time: 4 hours
Total Time: 4 hours 20 minutes
Servings: 10–12
Difficulty: Easy
Method: No-Bake
Ingredients
Creamy Filling
- 12 oz cream cheese, softened
- ¾ cup powdered sugar
- ⅓ cup whole milk
- ½ teaspoon vanilla extract
- 8 oz whipped topping, thawed
Cake & Cherry Layers
- 1 angel food cake
- 2 cans (21 oz each) cherry pie filling
Instructions
1. Prepare the Cream Cheese
Place the softened cream cheese in a large mixing bowl.
Beat with an electric mixer on medium speed until completely smooth and creamy.
Make sure the cream cheese is fully softened before mixing. This helps prevent lumps in the finished filling.
2. Add the Powdered Sugar
Gradually add the powdered sugar to the cream cheese.
Continue beating until the sugar is completely incorporated and the mixture is smooth.
Scrape down the sides of the bowl as needed.
3. Add the Milk and Vanilla
Pour in the whole milk and add the vanilla extract.
Beat on low speed until combined, then increase the speed slightly and mix until the filling is smooth and creamy.
The mixture should be soft and easy to spread.
4. Fold in the Whipped Topping
Add the thawed whipped topping to the cream cheese mixture.
Using a rubber spatula, gently fold it in until fully incorporated.
Avoid vigorous mixing, as gentle folding helps keep the filling light and fluffy.
5. Prepare the Angel Food Cake
Cut the angel food cake into bite-sized cubes.
Try to keep the pieces relatively uniform so the layers are easy to assemble and serve.
6. Begin the First Layer
Use a large trifle dish, deep glass serving bowl, or 9 × 13-inch baking dish.
Arrange approximately half of the angel food cake cubes across the bottom.
Spread them into an even layer.
7. Add the Creamy Filling
Spoon approximately half of the cream cheese mixture over the angel food cake.
Gently spread it across the cake, making sure the filling reaches the edges.
8. Add the Cherry Layer
Spoon approximately half of the cherry pie filling over the creamy layer.
Spread the cherries evenly so every serving gets plenty of fruit and cherry sauce.
9. Repeat the Layers
Repeat the layers:
Angel food cake → creamy filling → cherry pie filling
Finish with a generous layer of cherry pie filling on top.
For a beautiful presentation, arrange some of the cherries evenly across the surface rather than spreading them completely flat.
10. Chill
Cover the dessert tightly with plastic wrap or a lid.
Refrigerate for at least 4 hours.
For the best flavor and texture, chill overnight.
This resting time allows the angel food cake to absorb some of the creamy filling while remaining soft and fluffy.
11. Serve
Scoop the chilled dessert into individual serving dishes.
For an extra-pretty presentation, make sure each portion contains visible layers of angel food cake, creamy filling, and cherries.
Serve cold.
Chef’s Tips
Soften the Cream Cheese
Allow the cream cheese to come to room temperature before mixing. Cold cream cheese can leave lumps in the filling.
Fold Gently
Once the whipped topping is added, fold gently to preserve its airy texture.
Chill Overnight
Although four hours is enough to set the dessert, overnight chilling gives the flavors more time to blend and produces an even better texture.
Use a Clear Dish
A glass trifle dish makes this dessert especially attractive because the white cream and bright red cherries create beautiful visible layers.
Cut the Cake Evenly
Uniform angel food cake cubes make the dessert easier to layer and ensure a balanced amount of cake in every serving.
Presentation Ideas
For an elegant finish, garnish the top with:
- Extra whipped topping
- Fresh cherries
- Maraschino cherries
- White chocolate shavings
- Angel food cake crumbs
- A light dusting of powdered sugar
You can also reserve a few whole cherries to arrange around the top of the dessert before serving.
Variations
Chocolate Cherries in the Snow
Add a layer of chocolate pudding or chocolate cake cubes for a richer chocolate-cherry version.
Strawberry Version
Replace the cherry pie filling with strawberry pie filling or fresh strawberries.
Blueberry Version
Use blueberry pie filling for a beautiful blue-and-white variation.
Individual Dessert Cups
Layer the cake, cream filling, and cherries into individual clear glasses for an elegant party presentation.
Make-Ahead Instructions
This dessert is excellent for making ahead.
Assemble the entire dessert up to 1 day before serving, cover tightly, and refrigerate.
Add any decorative toppings immediately before serving for the freshest appearance.
Storage
Keep the dessert covered and refrigerated.
Best enjoyed: Within 2–3 days.
Because it contains dairy and whipped topping, keep it chilled until ready to serve.
Serving Suggestions
Serve Cherries in the Snow cold as a dessert after:
- Family dinners
- Holiday meals
- Barbecues
- Potlucks
- Brunches
- Birthday celebrations
It pairs especially well with coffee, tea, or a glass of cold milk.
Recipe Summary
Cherries in the Snow is an easy, creamy, no-bake dessert made with tender angel food cake, sweetened cream cheese filling, fluffy whipped topping, and luscious cherry pie filling.
The beautiful red-and-white layers make it perfect for holidays and special occasions, while the simple preparation makes it an effortless dessert for everyday gatherings.
Light, creamy, fruity, and wonderfully nostalgic.