🍫🥜 Buckeye Brownies
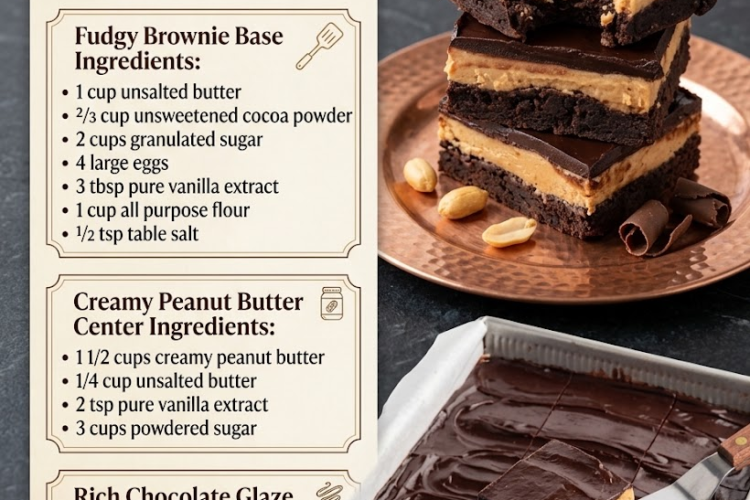
These decadent Buckeye Brownies combine everything you love about the classic Buckeye candy with a rich, fudgy homemade brownie. A deep chocolate brownie base is layered with creamy peanut butter and finished with a sweet, silky peanut butter frosting.
They’re intensely chocolatey, wonderfully peanut-buttery, and perfect for holidays, bake sales, potlucks, or whenever a serious chocolate craving strikes.
Recipe Details
- Prep Time: 20 minutes
- Bake Time: 25–30 minutes
- Chill Time: 1 hour
- Total Time: About 1 hour 50 minutes
- Yield: 16 brownies
- Difficulty: Easy
- Pan: 9×13-inch baking pan
Ingredients
For the Brownies
- 1 cup unsalted butter, melted
- ⅔ cup unsweetened cocoa powder
- 1 cup all-purpose flour
- 2 cups granulated sugar
- ½ teaspoon table salt
- 4 large eggs
- 3 tablespoons pure vanilla extract
For the Peanut Butter Layer
- 1½ cups creamy peanut butter
- ¾ cup unsalted butter, softened
- 2 teaspoons pure vanilla extract
- 3 cups powdered sugar
Optional Chocolate Topping
For an especially classic Buckeye finish:
- 1½ cups semi-sweet chocolate chips
- ⅓ cup creamy peanut butter
Instructions
1. Prepare the Pan
Preheat the oven to 350°F (175°C).
Line a 9×13-inch baking pan with parchment paper, leaving some overhang on the sides to make the brownies easy to remove.
Lightly grease the parchment.
2. Make the Brownie Batter
Melt the butter in a saucepan or microwave-safe bowl.
Transfer the melted butter to a large mixing bowl.
Whisk in the cocoa powder until completely smooth.
Add the granulated sugar and salt and whisk until combined.
Add the eggs one at a time, whisking well after each addition.
Stir in the vanilla extract.
Finally, add the flour and gently fold until just combined.
Do not overmix once the flour is added.
3. Bake the Brownies
Pour the batter into the prepared pan and spread it evenly.
Bake for 25–30 minutes, or until the edges are set and a toothpick inserted into the center comes out with a few moist crumbs.
Do not wait for the toothpick to come out completely clean—the brownies should remain fudgy.
Place the pan on a wire rack and allow the brownies to cool completely.
4. Make the Peanut Butter Layer
In a large bowl, beat the softened butter and creamy peanut butter together for 2–3 minutes, until smooth and fluffy.
Add the vanilla extract.
Gradually beat in the powdered sugar, about ½ cup at a time.
Continue mixing until the mixture is thick, creamy, and spreadable.
If it seems too thick, add 1 tablespoon of milk or heavy cream at a time until you reach the desired consistency.
5. Add the Peanut Butter Layer
Once the brownies are completely cool, spread the peanut butter mixture evenly over the brownie surface.
Use an offset spatula to create a smooth, even layer.
Refrigerate for 30–45 minutes to firm up the peanut butter layer.
6. Add the Chocolate Topping
If using the optional chocolate topping, place the chocolate chips and peanut butter in a microwave-safe bowl.
Microwave in 15–20 second intervals, stirring thoroughly between each interval, until completely melted and smooth.
Pour the chocolate mixture over the chilled peanut butter layer.
Spread gently into an even layer.
7. Chill
Return the brownies to the refrigerator for at least 30 minutes, or until the chocolate topping is set.
For the cleanest slices, chill for about 1 hour.
8. Slice and Serve
Use the parchment paper to lift the brownies from the pan.
For neat squares, use a sharp knife warmed under hot water and wiped dry between cuts.
Cut into 16 large squares or 24 smaller pieces.
Let the brownies sit at room temperature for about 10 minutes before serving.
Chef’s Tips
- Use room-temperature eggs for a smoother brownie batter.
- Don’t overbake. Slightly underdone brownies will firm as they cool while retaining that fudgy texture.
- Make sure the brownie layer is completely cool before spreading the peanut butter layer.
- If the peanut butter mixture is difficult to spread, warm your spatula slightly or add a tablespoon of milk.
- Chill between layers to keep the peanut butter and chocolate layers beautifully defined.
- For exceptionally clean cuts, refrigerate the finished brownies overnight and slice them cold.
Optional Buckeye Candy Finish
For a beautiful presentation, top the chocolate layer with:
- Mini peanut butter cups
- Chopped roasted peanuts
- Chocolate curls
- A light drizzle of melted peanut butter
- Flaky sea salt
You can also press a whole mini Buckeye candy into the top of each brownie before the chocolate sets.
Variations
🥜 Extra Peanut Butter
Swirl ¼ cup melted peanut butter over the chocolate topping before it sets.
🍫 Dark Chocolate Buckeyes
Use dark chocolate chips instead of semi-sweet chocolate for a richer, less-sweet finish.
🧂 Salted Buckeye Brownies
Sprinkle a small amount of flaky sea salt over the chocolate topping.
🍪 Cookie Crunch
Add 1 cup crushed chocolate sandwich cookies to the brownie batter or sprinkle them between the peanut butter and chocolate layers.
☕ Mocha Buckeye Brownies
Add 1 teaspoon instant espresso powder to the cocoa powder for a deeper chocolate flavor.
Storage
Store the brownies in an airtight container in the refrigerator for up to 5 days.
Allow them to sit at room temperature for 10–15 minutes before serving for the softest texture.
Freezing
Freeze the brownies in a single layer until firm, then wrap individual pieces tightly in plastic wrap and place them in a freezer-safe container.
They can be frozen for up to 2 months.
Thaw overnight in the refrigerator or for about 30–60 minutes at room temperature.
Serving Suggestions
Serve these brownies with:
- Vanilla ice cream
- Cold milk
- Whipped cream
- Hot coffee
- Chocolate sauce
- Extra peanut butter drizzle
For an indulgent dessert, warm a brownie for a few seconds and serve it with a scoop of vanilla ice cream.
The Result
Fudgy chocolate brownies + creamy peanut butter + silky chocolate topping = the ultimate Buckeye dessert. Every bite delivers the irresistible chocolate-and-peanut-butter combination that makes Buckeye candy so addictive. 🍫🥜