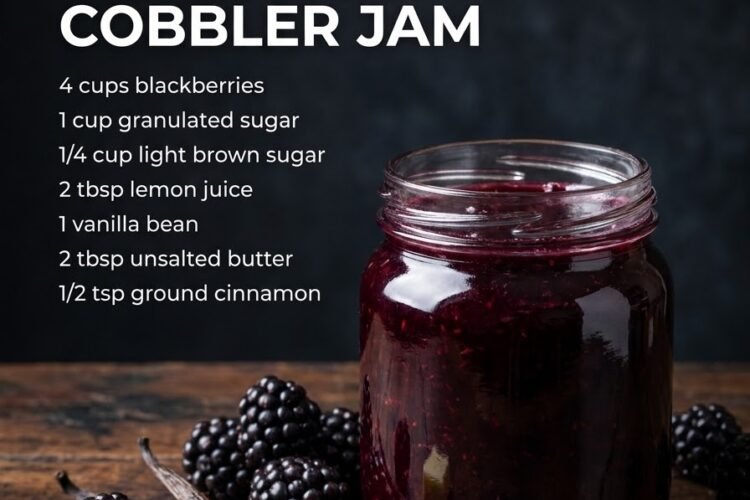
🫐 Blackberry Vanilla Bean Cobbler Jam — Rich, Fruity & Buttery
Imagine the cozy flavor of homemade blackberry cobbler captured in a jar! This Blackberry Vanilla Bean Cobbler Jam combines juicy blackberries, warm brown sugar, real vanilla bean, fresh lemon juice, and a little butter to create a glossy, deeply flavored fruit spread.
As the berries simmer, they break down into a luscious purple jam, while the brown sugar adds a gentle caramel-like sweetness. Tiny flecks of real vanilla bean bring warmth and fragrance, and the butter rounds out the flavor with a subtle, buttery finish reminiscent of a freshly baked blackberry cobbler.
Spread it over warm biscuits, buttered toast, pancakes, waffles, or freshly baked scones. You can even swirl it into yogurt, spoon it over cheesecake, or warm it slightly to make a delicious dessert topping.
Best of all, this homemade jam requires no complicated equipment and makes a wonderful small-batch treat for your refrigerator or freezer!
Recipe Information
- Prep Time: 15 minutes
- Cook Time: 25–35 minutes
- Cooling Time: 1–2 hours
- Total Time: Approximately 1 hour
- Yield: About 2–3 cups
- Course: Breakfast, Condiment, Dessert
- Difficulty: Easy
- Method: Stovetop
- Storage: Refrigerator or freezer
Ingredients
For the Blackberry Vanilla Bean Jam
- 4 cups (approximately 575–600 g) fresh blackberries, rinsed and drained
- 1½ cups (300 g) granulated sugar
- ½ cup (100 g) packed light brown sugar
- 1 vanilla bean, split lengthwise
- 2 tablespoons (30 ml) freshly squeezed lemon juice
- 1 tablespoon (14 g) unsalted butter
- Pinch of salt, optional
Ingredient note: Granulated sugar helps create a traditional jam-like consistency, while brown sugar provides the warm, caramel-like flavor associated with cobbler. The exact yield and thickness will depend on the juiciness of your berries and how much the mixture reduces.
Instructions
Step 1: Prepare the Blackberries
Rinse the blackberries gently under cool running water and drain them well.
Pick out any leaves, stems, or damaged berries. Place the blackberries in a large, heavy-bottomed saucepan.
Use a potato masher or the back of a sturdy spoon to crush some of the berries, releasing their juices while leaving a few whole pieces for a rustic texture.
If you prefer a smoother jam, mash the berries more thoroughly.
Step 2: Add the Sugars and Lemon Juice
Add the granulated sugar, brown sugar, and freshly squeezed lemon juice to the saucepan.
Stir well to coat the berries and begin dissolving the sugar.
Let the mixture stand for about 5–10 minutes if the berries are particularly firm. This allows some juice to release before cooking.
The lemon juice brightens the blackberry flavor and balances the sweetness of the brown sugar.
Step 3: Prepare the Vanilla Bean
Place the vanilla bean on a cutting board and carefully split it lengthwise with a small sharp knife.
Use the back of the knife to scrape out the tiny seeds from inside the pod.
Add the vanilla seeds and the scraped pod to the blackberry mixture. The seeds will distribute throughout the jam, creating beautiful dark flecks and a fragrant vanilla aroma.
Tip: If you don’t have a whole vanilla bean, substitute 1–2 teaspoons pure vanilla extract. Add the extract near the end of cooking to preserve its aroma.
Step 4: Bring the Fruit Mixture to a Simmer
Place the saucepan over medium heat and stir frequently as the sugars dissolve.
Once the berries release more juice and the mixture begins bubbling, reduce the heat to medium-low.
Simmer gently for approximately 15–20 minutes, stirring regularly and lightly mashing the berries as they soften.
The mixture will become darker, glossier, and thicker as moisture evaporates. Use a long-handled spoon and take care, as bubbling jam can splatter and cause burns.
Step 5: Cook Until Thick and Glossy
Continue simmering until the jam reaches your preferred consistency, usually another 5–15 minutes depending on the fruit’s moisture content.
Stir frequently, especially as the mixture thickens, to prevent scorching on the bottom of the saucepan.
For a more reliable setting point, use a candy or jam thermometer. Traditional jam often sets near 220°F (104°C) at sea level, although the precise setting point can vary with altitude, sugar concentration, and fruit composition.
For this small-batch refrigerator jam, use the temperature as a guide rather than the only test. The mixture should be visibly reduced and should coat the back of a spoon.
Cold-plate test: Place a small plate in the freezer before you begin cooking. Spoon a little jam onto the chilled plate and wait 30 seconds. Push it gently with your finger. If it wrinkles slightly and does not immediately run back together, it may be ready. If it remains very runny, continue cooking and test again.
Step 6: Add the Butter
Reduce the heat to low and stir in the tablespoon of unsalted butter.
Let it melt completely into the jam, stirring gently until the mixture looks glossy and smooth.
The butter adds a subtle richness that evokes the flavor of blackberry cobbler. It also helps reduce surface foam.
Avoid adding too much butter, which can leave the jam greasy or interfere with its texture.
Step 7: Finish the Vanilla Flavor
Remove the saucepan from the heat.
Carefully lift out the vanilla bean pod and discard it, or rinse and dry it for another culinary use.
Taste the jam carefully once a small sample has cooled. If you want a stronger vanilla aroma and are using vanilla extract rather than a bean, stir it in at this stage.
Add the optional pinch of salt if desired. It helps round out the sweetness without making the jam taste salty.
Step 8: Cool the Jam
Allow the jam to stand in the saucepan for approximately 10 minutes, stirring occasionally.
It will continue to thicken as it cools.
Spoon the warm jam into clean, heat-safe jars or containers, leaving a little space at the top for expansion if you intend to freeze it.
Let the containers cool briefly, then refrigerate promptly. Do not leave the jam sitting at room temperature for an extended period.
Step 9: Chill Until Ready to Use
Refrigerate the jam until completely cool and thickened, preferably for several hours.
Once chilled, the jam should have a glossy, spreadable texture with soft blackberry pieces and flecks of fragrant vanilla.
Spread it on toast, spoon it onto pancakes, or warm a little gently to drizzle over your favorite desserts.
Tips for the Best Blackberry Cobbler Jam
- Choose ripe, flavorful berries. Deeply colored, sweet-tart blackberries provide the strongest flavor.
- Use both granulated and brown sugar. Granulated sugar supports the jam-like texture, while brown sugar contributes a warm, caramel-like note.
- Don’t skip the lemon juice. It balances the sweetness and brightens the fruit flavor.
- Scrape the real vanilla bean. The seeds provide concentrated vanilla flavor and beautiful flecks throughout the jam.
- Simmer gently. A controlled simmer allows the berries to soften and reduces the risk of scorching.
- Stir frequently near the end. Jam becomes more likely to stick as it thickens.
- Don’t judge the consistency while hot. The jam will thicken further as it cools.
- Use a wide saucepan if possible. A wider surface helps water evaporate more efficiently.
- Avoid overcooking. Excessive reduction can make the jam overly thick or sticky once refrigerated.
Delicious Variations
Cinnamon Blackberry Cobbler Jam
Add ¼ teaspoon ground cinnamon during cooking for a warm, bakery-inspired flavor. Keep the amount small so it complements rather than masks the vanilla.
Blackberry Almond Jam
Add ¼ teaspoon almond extract after removing the jam from the heat. Almond pairs beautifully with blackberries, but use it sparingly because its flavor is concentrated.
Lemon Vanilla Blackberry Jam
Increase the lemon zest to 1 teaspoon and add it during the final minutes of cooking for a brighter citrus note.
Mixed Berry Cobbler Jam
Replace 1 cup of the blackberries with raspberries or chopped strawberries. The flavor will be fruitier and the setting behavior may vary slightly.
Chunky Blackberry Jam
Mash only half of the blackberries, leaving the rest mostly whole. This creates a rustic spread with generous pieces of fruit.
Smooth Blackberry Vanilla Spread
After cooking, carefully mash the fruit more thoroughly or pass the mixture through a fine-mesh sieve to remove the seeds. Return it to the saucepan briefly if further reduction is needed.
Maple Blackberry Cobbler Jam
Replace 2 tablespoons of the granulated sugar with maple syrup. Because maple syrup adds extra liquid, the cooking time and final consistency may change.
How to Serve Blackberry Vanilla Bean Cobbler Jam
This jam is wonderfully versatile and brings a rich fruity flavor to both simple breakfasts and special desserts.
- Warm biscuits: Spread onto freshly baked biscuits with a little butter.
- Toast and sourdough: Add a generous layer for a quick breakfast.
- Pancakes and waffles: Warm the jam slightly and drizzle over the top.
- Scones: Serve alongside clotted cream or whipped cream.
- Cheesecake: Spoon over plain or vanilla cheesecake for a fruity topping.
- Yogurt and oatmeal: Swirl into plain yogurt or warm oatmeal.
- Ice cream: Spoon over vanilla ice cream for an easy blackberry cobbler-inspired dessert.
- Thumbprint cookies: Use as a fruity filling for homemade cookies.
For an extra-special treat, warm a few spoonfuls of the jam and drizzle it over a slice of pound cake or vanilla cake.
Storage Instructions
Refrigerator: Transfer the cooled jam to clean, covered containers and refrigerate at 40°F (4°C) or below. Because this recipe contains butter and has not been formulated or processed as a shelf-stable preserve, use it within about 1 week for best quality.
Freezer: For longer storage, freeze the jam in freezer-safe containers, leaving headspace for expansion. Use within approximately 3 months for the best flavor and texture. Thaw in the refrigerator.
Do not store at room temperature: This recipe is intended as a refrigerator or freezer jam. The sugar, acidity, and cooking process have not been validated for safe room-temperature canning, and adding butter makes it especially unsuitable for treating as a shelf-stable preserve.
Serving tip: Always use a clean spoon to remove jam from the container, and return it to the refrigerator promptly.
Frequently Asked Questions
Can I use frozen blackberries?
Yes. Add the frozen berries directly to the saucepan or thaw them first and include their juices. Frozen berries may release more liquid, so the jam may require additional simmering time to thicken.
Do I have to use a vanilla bean?
No. Pure vanilla extract works as a convenient substitute. Stir in 1–2 teaspoons after removing the jam from the heat. A real vanilla bean gives the jam its characteristic dark vanilla flecks and a particularly fragrant flavor.
Why is my blackberry jam runny?
It may need more cooking time, or the berries may have contained more moisture than expected. Continue simmering gently and retest the consistency on a chilled plate. Remember that the jam will also thicken as it cools.
Why did my jam become too thick?
It may have reduced too much during cooking. For a softer spread, gently warm it with a teaspoon of water or lemon juice at a time until the desired consistency is reached. Refrigerate again after adjusting.
Can I leave the blackberry seeds in?
Absolutely. The seeds provide the traditional texture of blackberry jam. For a smoother spread, strain the cooked mixture through a fine-mesh sieve before adding the butter, pressing gently to extract the fruit pulp.
Is the butter necessary?
No. The butter adds a subtle cobbler-like richness and helps reduce foaming, but the jam can be made without it. Omitting it changes the flavor slightly but does not require any other ingredient substitution.
Can I use only brown sugar?
You can experiment with brown sugar alone, but the color will be darker and the flavor more molasses-like. The jam’s texture may also differ. The combination of granulated and brown sugar offers a more balanced result.
Can I use this jam for homemade gifts?
Yes, provided you label it clearly as a refrigerator jam, keep it chilled during storage and transport, and tell recipients to refrigerate it immediately. For gifts intended to sit unrefrigerated or ship at room temperature, use a tested shelf-stable jam recipe instead.
Final Thoughts
Blackberry Vanilla Bean Cobbler Jam is a delicious way to capture the comforting flavor of a homemade fruit cobbler in a simple, spreadable treat. Sweet-tart blackberries, caramel-like brown sugar, fragrant vanilla bean, fresh lemon juice, and a little butter combine to create a jam that’s rich, glossy, and full of homemade charm.
Make a small batch, chill it until thick and luscious, and keep it ready for biscuits, breakfast toast, or a quick dessert topping.
Juicy blackberries, real vanilla bean, and buttery cobbler-inspired flavor in every spoonful—this homemade jam is a little jar of comfort! 🫐🧈🤎