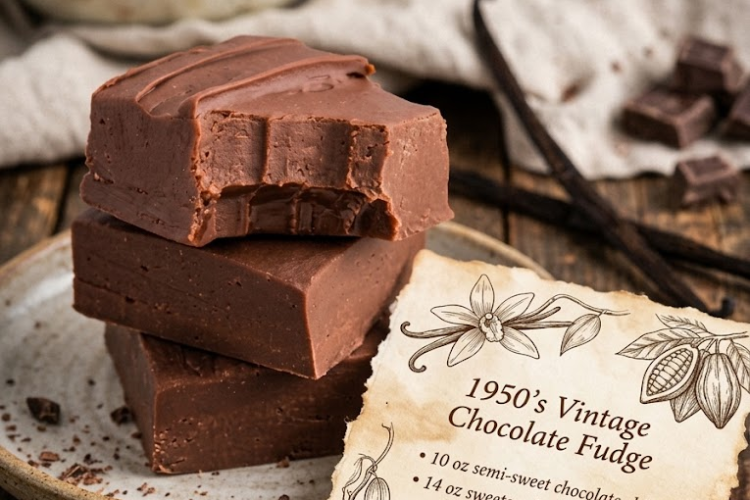
🍫 1950s Vintage Chocolate Fudge
A Sweet Trip Back in Time with Rich, Creamy, Old-Fashioned Chocolate Goodness!
Take a delicious trip down memory lane with this 1950s Vintage Chocolate Fudge! Inspired by the nostalgic homemade sweets found in classic family kitchens, this simple chocolate treat combines semi-sweet chocolate chips, sweetened condensed milk, and vanilla for a smooth, rich dessert without the fuss of traditional candy-making.
No candy thermometer, complicated techniques, or long ingredient list are needed. Just melt, mix, chill, and enjoy! Cut it into little squares for holiday dessert trays, homemade gifts, potlucks, or a cozy night in.
Recipe Information
- Prep Time: 10 minutes
- Cook Time: 5 minutes
- Chilling Time: 4–6 hours
- Total Time: About 4 hours 15 minutes to 6 hours 15 minutes
- Yield: 16–25 small pieces
- Course: Dessert, Candy
- Cuisine: American-inspired
- Difficulty: Easy
Ingredients
- 10 ounces (283 g) semi-sweet mini chocolate chips
- 1 can (14 ounces / 397 g) sweetened condensed milk
- 1 teaspoon vanilla extract
Important texture note: These quantities make a very creamy, soft fudge. For firmer, more traditional squares that hold their shape at room temperature, increase the chocolate chips to approximately 16–18 ounces (454–510 g) while keeping the same amount of condensed milk and vanilla.
Instructions
Step 1: Prepare the Pan
Line an 8-inch square baking pan with parchment paper, leaving a little overhang on two sides. This will make it easy to lift the fudge out once it has chilled.
Lightly grease the parchment with a small amount of butter or neutral oil if needed to prevent sticking.
Step 2: Melt the Chocolate and Condensed Milk
Add the chocolate chips and sweetened condensed milk to a microwave-safe bowl.
Microwave in 20–30 second intervals, stirring well after each interval. Continue until the chocolate is mostly melted and the mixture is smooth and glossy. The residual heat will melt any remaining small pieces.
Alternatively, place the chocolate chips and condensed milk in a heatproof bowl over a saucepan of gently simmering water. Stir constantly until melted and smooth, making sure the bottom of the bowl does not touch the water.
Tip: Avoid overheating the chocolate, as it can become thick, grainy, or scorched.
Step 3: Add the Vanilla
Remove the mixture from the heat and stir in the vanilla extract until evenly combined.
The fudge mixture should look rich, smooth, and glossy, with no visible unmelted chocolate pieces.
Step 4: Transfer to the Pan
Pour the chocolate mixture into the prepared pan. Use a silicone spatula to scrape the bowl clean and spread the mixture evenly into the corners.
Smooth the top with the spatula. For a decorative touch, gently swirl the surface or sprinkle a little flaky sea salt over the top before chilling.
Step 5: Chill Until Set
Cover the pan and refrigerate for at least 4–6 hours, or until the fudge is thoroughly cold and firm enough to cut.
Because the specified recipe uses less chocolate than many traditional condensed-milk fudge recipes, it may remain softer than classic fudge, particularly at room temperature. For the cleanest slices, keep it well chilled.
Step 6: Slice and Serve
Once set, lift the fudge out of the pan using the parchment-paper overhang. Place it on a cutting board and cut into small squares with a sharp knife.
For neat edges, warm the knife under hot water, wipe it dry, and make each cut with a clean blade.
Serve chilled or slightly softened, depending on your preferred texture.
Tips for Perfect Vintage Chocolate Fudge
- Use good-quality chocolate: Semi-sweet chocolate chips provide a balanced chocolate flavor that isn’t overly sweet.
- Melt gently: Short microwave intervals or a double boiler help prevent scorching.
- Stir thoroughly: Mixing the chocolate and condensed milk until smooth creates a more even texture.
- Line the pan: Parchment paper makes removing and cutting the fudge much easier.
- Chill completely: Cutting too early can make the fudge sticky or cause it to lose its shape.
- Keep it cool: The original quantities produce a softer fudge, so refrigeration is especially helpful.
Delicious Variations
Walnut Chocolate Fudge: Fold in ½ cup of finely chopped walnuts or pecans after adding the vanilla.
Chocolate Peanut Butter Fudge: Swirl 2–3 tablespoons of smooth peanut butter through the mixture before chilling.
Sea Salt Chocolate Fudge: Sprinkle flaky sea salt over the top for a sweet-and-salty finish.
Marshmallow Chocolate Fudge: Fold in ½ cup of mini marshmallows once the chocolate mixture has cooled slightly.
Festive Vintage Fudge: Add colorful sprinkles, chopped candied cherries, or finely chopped toasted nuts for a cheerful holiday version.
Storage Instructions
- Refrigerator: Store the fudge in an airtight container for up to 1 week. Keep it chilled, especially when using the original softer ratio.
- Freezer: Freeze in a sealed, freezer-safe container with parchment between layers for up to 2 months. Thaw in the refrigerator before serving.
- Serving: Avoid leaving the fudge out for extended periods if it becomes too soft. Return it to the refrigerator to firm up.
Frequently Asked Questions
Do I need a candy thermometer?
No. This simplified recipe uses sweetened condensed milk and melted chocolate, so there is no need to cook sugar to a specific temperature.
Why is my fudge too soft?
The ratio of chocolate to condensed milk strongly affects firmness. With 10 ounces of chocolate and a full 14-ounce can of condensed milk, the result will be creamier and softer than traditional firm fudge. Using approximately 16–18 ounces of chocolate will create a sturdier texture.
Can I melt the ingredients on the stovetop?
Yes. Use a double boiler over gently simmering water and stir continuously until smooth. Avoid direct high heat, which can scorch the chocolate or make the mixture seize.
Can I make this fudge ahead of time?
Absolutely. Prepare it a day ahead, keep it covered in the refrigerator, and slice it shortly before serving.
Can I add toppings?
Yes! Chopped nuts, flaky salt, crushed cookies, or festive sprinkles are all delicious options.
A Little Bite of Chocolate Nostalgia
This 1950s Vintage Chocolate Fudge is a simple way to bring old-fashioned sweetness into your kitchen. With just three ingredients and a few easy steps, you can make a rich, chocolatey treat that is perfect for sharing with family and friends.
Keep it classic, chill it well, slice it into little squares, and enjoy a sweet taste of nostalgia! 🍫