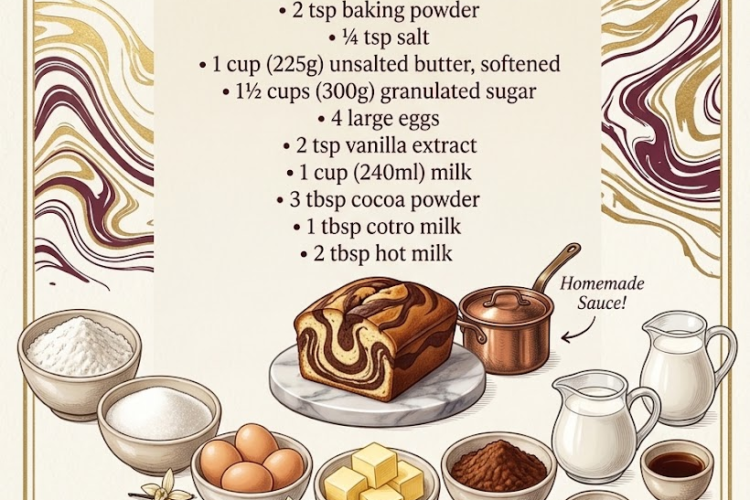
🍰 Classic Marble Cake
Soft, buttery vanilla cake swirled with rich chocolate cake for a beautiful marbled effect in every slice. This homemade Marble Cake is tender, moist, and simple enough for everyday baking while still looking special enough for celebrations.
⏱ Recipe Information
Prep Time: 20 minutes
Bake Time: 45–55 minutes
Total Time: About 1 hour 15 minutes
Yield: 10–12 servings
Difficulty: Easy
Ingredients
Vanilla Cake
- 2½ cups (315 g) all-purpose flour
- 2 teaspoons baking powder
- ¼ teaspoon salt
- 1 cup (225 g) unsalted butter, softened
- 1½ cups (300 g) granulated sugar
- 4 large eggs, room temperature
- 2 teaspoons vanilla extract
- 1 cup (240 ml) milk, room temperature
Chocolate Swirl
- 3 tablespoons unsweetened cocoa powder
- 2 tablespoons hot milk
Instructions
1. Prepare the Pan
Preheat your oven to 350°F (175°C).
Grease and lightly flour a 9-inch round cake pan, 9-inch square pan, or a 9 × 5-inch loaf pan.
For especially easy removal, line the bottom with parchment paper.
Prepare the Batter
2. Combine the Dry Ingredients
In a medium bowl, whisk together:
- Flour
- Baking powder
- Salt
Set aside.
3. Cream the Butter and Sugar
Place the softened butter and granulated sugar in a large mixing bowl.
Beat for approximately 3–4 minutes, until the mixture is noticeably lighter, fluffy, and creamy.
This step helps create a lighter cake.
4. Add the Eggs
Add the eggs one at a time, beating well after each addition.
Scrape down the sides of the bowl as needed.
Add the vanilla extract and mix until combined.
Combine the Batter
5. Add Flour and Milk
Add the flour mixture in three additions, alternating with the milk in two additions.
Start and finish with the dry ingredients:
- ⅓ flour mixture
- ½ milk
- ⅓ flour mixture
- Remaining milk
- Remaining flour mixture
Mix on low speed just until combined.
Do not overmix.
Create the Chocolate Batter
6. Divide the Batter
Transfer approximately ⅓ of the vanilla batter to a separate bowl.
Set aside the remaining ⅔.
7. Add Cocoa
Whisk the cocoa powder with the 2 tablespoons hot milk until smooth and lump-free.
Add this cocoa mixture to the smaller portion of cake batter.
Gently fold until evenly combined.
You now have:
- A vanilla batter
- A chocolate batter
Create the Marble Effect
8. Layer the Batter
Spoon alternating dollops of vanilla and chocolate batter into the prepared pan.
For example:
- Spoon some vanilla batter into the pan.
- Add a spoonful of chocolate batter.
- Add another spoonful of vanilla.
- Continue alternating until all the batter is used.
You don’t need to make the layers perfectly even.
9. Swirl
Insert a butter knife or wooden skewer into the batter.
Make gentle figure-eight motions through the batter several times.
Don’t over-swirl.
The goal:
You want distinct ribbons of vanilla and chocolate rather than turning the entire batter into one color.
Bake
10. Bake the Cake
Place the pan in the preheated oven.
Bake for approximately 45–55 minutes, depending on the pan you’re using.
The cake is ready when:
- The top is golden.
- It springs back lightly when touched.
- A toothpick inserted into the center comes out clean or with a few moist crumbs.
If using a loaf pan, it may need a little longer.
Cool
11. Cool in the Pan
Remove the cake from the oven.
Let it cool in the pan for 10–15 minutes.
Run a knife around the edges if necessary.
Turn the cake onto a wire rack and allow it to cool completely.
🍫 Optional Finishes
This cake is delicious as-is, but you can dress it up with:
Chocolate Glaze
Melt together:
- ½ cup chocolate chips
- 2 tablespoons heavy cream
Stir until smooth and drizzle over the cooled cake.
Powdered Sugar
Dust the top lightly with powdered sugar just before serving.
Chocolate Buttercream
Cover the cooled cake with chocolate buttercream for a richer dessert.
Simple Vanilla Glaze
Mix 1 cup powdered sugar with 1–2 tablespoons milk and a splash of vanilla.
Drizzle over the cake.
⭐ Chef’s Tips
Use Room-Temperature Ingredients
Room-temperature butter, eggs, and milk blend more evenly and help produce a smoother batter.
Cream the Butter Properly
Don’t rush the butter-and-sugar step. This incorporates air and contributes to the cake’s tender texture.
Don’t Overmix
Once the flour is added, mix only until the batter comes together.
Don’t Over-Swirl
A few figure-eight motions are enough. Too much swirling will eliminate the beautiful marble pattern.
Don’t Open the Oven Early
Try not to open the oven during the first 30 minutes, as a sudden temperature drop can cause the cake to sink.
🍰 How to Get Beautiful Marble Slices
For the most dramatic marble effect, use alternating spoonfuls rather than pouring the batter in two large layers.
Then make only 4–6 gentle swirls with a skewer.
When sliced, you’ll get beautiful ribbons of chocolate running through the vanilla cake.
Storage
Store the cooled cake in an airtight container at room temperature for 3–4 days.
If topped with cream cheese frosting or another perishable frosting, refrigerate instead.
Freezing
Wrap individual slices or the entire unfrosted cake tightly in plastic wrap, followed by aluminum foil.
Freeze for up to 3 months.
Thaw at room temperature before serving.
🍰 Recipe Summary
This Classic Marble Cake combines a tender vanilla butter cake with a rich cocoa swirl for the perfect balance of flavors.
The secret to that beautiful marbled appearance is simple: alternate the two batters, then gently swirl—don’t overdo it.
Every slice is a little different, beautifully marbled, buttery, soft, and chocolatey.