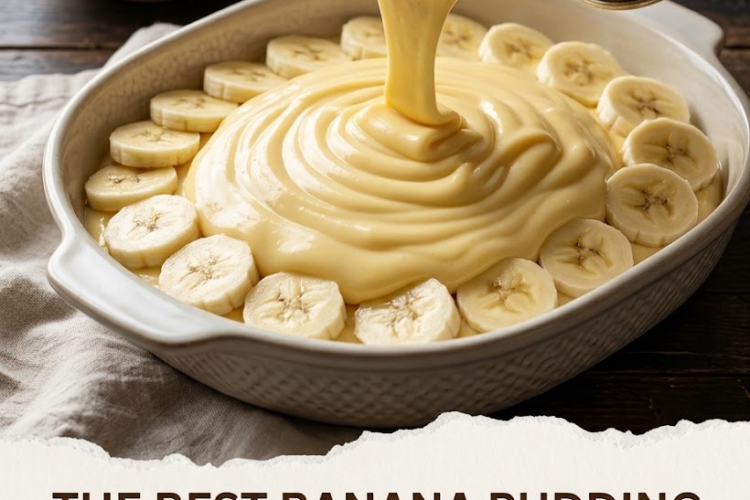
🍌 Best Banana Pudding Ever
Creamy, silky, and loaded with classic banana flavor, this quick and easy banana pudding is the kind of dessert that disappears from the table fast. A rich vanilla pudding base is made extra creamy with sweetened condensed milk, then layered with bananas, vanilla wafers, and fluffy whipped cream.
No complicated baking required—just mix, layer, chill, and enjoy!
⏱ Recipe Information
Prep Time: 20 minutes
Chill Time: 4 hours
Total Time: 4 hours 20 minutes
Servings: 8–10
Difficulty: Easy
Method: No-Bake
Ingredients
Banana Pudding
- 2 cups cold whole milk
- 1 package (3.4 oz) instant vanilla pudding mix
- 1 can (14 oz) sweetened condensed milk
- 1 teaspoon vanilla extract
For the Layers
- 4–5 ripe but firm bananas, sliced
- 1 box (11 oz) vanilla wafers
Whipped Cream Layer
- 1½ cups cold heavy whipping cream
- ¼ cup powdered sugar
- 1 teaspoon vanilla extract
Optional Garnish
- Extra vanilla wafers
- Banana slices
- Crushed vanilla wafer crumbs
Instructions
1. Make the Vanilla Pudding
Pour the cold milk into a large mixing bowl.
Add the instant vanilla pudding mix.
Whisk vigorously for approximately 2 minutes, until the pudding begins to thicken.
2. Add the Sweetened Condensed Milk
Pour the sweetened condensed milk into the pudding mixture.
Add the vanilla extract.
Whisk until completely smooth and well combined.
The mixture should be thick, creamy, and glossy.
3. Chill the Pudding
Place the pudding mixture in the refrigerator for approximately 10–15 minutes while you prepare the whipped cream.
This gives it additional time to thicken.
Make the Whipped Cream
4. Whip the Cream
Pour the cold heavy whipping cream into a chilled mixing bowl.
Add the powdered sugar and vanilla extract.
Beat with an electric mixer on medium-high speed until medium-stiff peaks form.
The cream should be fluffy and hold its shape.
Don’t overbeat.
5. Fold in Some Whipped Cream
For an especially light and creamy banana pudding, gently fold about ½ cup of the whipped cream into the chilled pudding mixture.
This makes the pudding filling lighter and more mousse-like.
Reserve the remaining whipped cream for the top.
Assemble the Banana Pudding
6. Prepare the Bananas
Peel the bananas and slice them into approximately ¼-inch rounds.
Choose bananas that are ripe and sweet but still firm enough to hold their shape.
7. Start With Vanilla Wafers
Arrange a layer of vanilla wafers across the bottom of a large 9 × 13-inch baking dish or trifle bowl.
Break a few wafers into smaller pieces to fill any gaps.
8. Add the Bananas
Arrange a layer of sliced bananas over the vanilla wafers.
Try to distribute them evenly so every serving gets plenty of banana.
9. Add the Pudding
Spoon approximately half of the pudding mixture over the bananas.
Spread gently into an even layer.
10. Repeat the Layers
Repeat with:
Vanilla wafers → bananas → pudding
Continue until all of the pudding has been used.
11. Add the Whipped Cream
Spread the remaining whipped cream over the top.
Alternatively, pipe decorative swirls across the surface for a more elegant presentation.
12. Garnish
Top with:
- Vanilla wafers
- Banana slices
- Crushed wafer crumbs
For the best appearance, add fresh banana slices shortly before serving.
Chill
13. Refrigerate
Cover the banana pudding tightly and refrigerate for at least 4 hours.
For the classic soft, cake-like texture, overnight chilling is even better.
The vanilla wafers absorb some of the creamy pudding and become wonderfully tender while still retaining a little texture.
Serve
Scoop the chilled banana pudding into bowls or dessert glasses.
Serve cold and enjoy!
⭐ Chef’s Tips
Use Cold Milk
Cold milk helps the instant pudding thicken properly.
Don’t Use Overripe Bananas
Very soft bananas can become mushy in the pudding. Choose bananas that are yellow with only a few small brown spots.
Layer Everything Evenly
Even layers ensure every serving has the perfect combination of wafers, bananas, and creamy pudding.
Chill Overnight
If you love that classic old-fashioned banana pudding texture where the wafers become soft and cake-like, let the pudding rest overnight.
Add Fresh Bananas Later
If preparing the pudding a day ahead, reserve a few banana slices for the final garnish so they look fresh when served.
Make-Ahead Instructions
Banana pudding is perfect for making ahead.
Assemble the pudding up to 24 hours before serving.
Cover tightly and refrigerate.
For the freshest presentation, add the final banana slices and wafer garnish just before serving.
Storage
Keep the banana pudding refrigerated.
Best enjoyed within 2–3 days.
The bananas will gradually soften and darken, and the wafers will become increasingly tender.
Easy Individual Banana Pudding Cups
For parties, divide the ingredients among 8–10 small dessert cups.
Layer each cup with:
- Vanilla wafers
- Banana slices
- Vanilla pudding
- More wafers
- More banana
- More pudding
- Whipped cream
Finish with a single vanilla wafer on top.
These are especially convenient for parties because everyone gets their own individual serving.
Delicious Variations
Strawberry Banana Pudding
Add thinly sliced fresh strawberries between the layers.
Chocolate Banana Pudding
Use chocolate pudding instead of vanilla and add chocolate wafer cookies.
Peanut Butter Banana Pudding
Drizzle creamy peanut butter between the layers.
Caramel Banana Pudding
Add thin ribbons of caramel sauce throughout the layers.
Banana Cream Pie Pudding
Add a graham cracker crumb layer and finish with extra whipped cream.
🍌 Recipe Summary
This Best Banana Pudding Ever is wonderfully simple but tastes like a homemade classic.
Sweetened condensed milk makes the vanilla pudding incredibly rich and creamy, while fresh bananas and vanilla wafers provide the perfect combination of soft, fruity, and crunchy textures.
Creamy pudding + sweet bananas + vanilla wafers + fluffy whipped cream = a dessert that’s impossible to resist.
❤️ Love this recipe?
Say YES to keep getting more delicious recipes! Thank you for being here and sharing the love for homemade food.