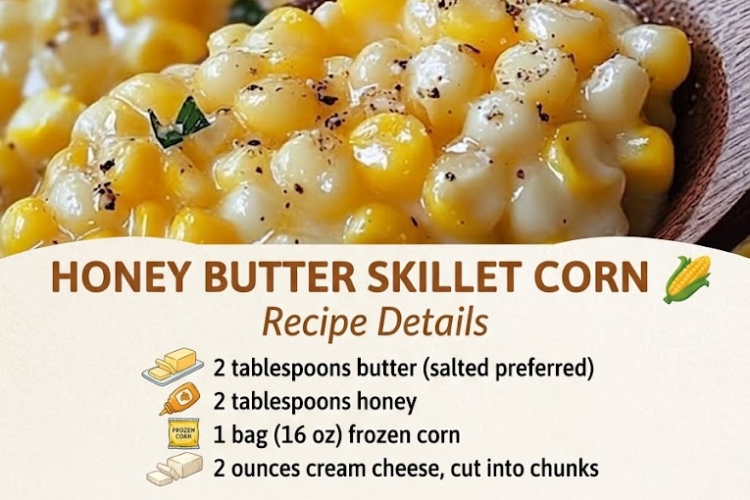
🌽 Honey Butter Skillet Corn
Sweet, buttery, creamy, and incredibly easy, this Honey Butter Skillet Corn is the perfect side dish for busy weeknights, holiday dinners, barbecues, and family gatherings. Tender corn is coated in golden honey butter and finished with cream cheese for an irresistibly silky texture.
⏱ Recipe Information
Prep Time: 5 minutes
Cook Time: 10–12 minutes
Total Time: About 15–20 minutes
Servings: 4–6
Difficulty: Easy
Method: Stovetop
Ingredients
- 2 tablespoons salted butter
- 2 tablespoons honey
- 1 bag (16 oz / 454 g) frozen corn
- 2 oz (57 g) cream cheese, cut into small chunks
- ¼ teaspoon salt
- ¼ teaspoon black pepper
Instructions
1. Melt the Honey Butter
Place a large skillet over medium heat.
Add the butter and let it melt completely.
Once melted, stir in the honey.
Cook for about 30 seconds, stirring until the butter and honey are combined.
2. Add the Corn
Add the frozen corn directly to the skillet.
Stir well so the corn becomes coated in the honey-butter mixture.
Cook for approximately 5–7 minutes, stirring occasionally.
The corn should be heated through and tender.
Tip:
There’s no need to thaw the corn first.
Make It Creamy
3. Add the Cream Cheese
Reduce the heat to medium-low.
Add the cream cheese pieces.
Stir continuously as the cream cheese melts into the corn.
Cook for another 2–4 minutes, until the cream cheese is completely melted and coats the corn in a creamy sauce.
4. Season
Add:
- ¼ teaspoon salt
- ¼ teaspoon black pepper
Stir well.
Taste and adjust the seasoning if desired.
For a sweeter corn side, add another small drizzle of honey.
Serve
5. Finish and Enjoy
Remove the skillet from the heat.
Let the corn stand for 1–2 minutes so the creamy sauce can thicken slightly.
Serve warm.
For a beautiful finish, add a tiny drizzle of honey and a little freshly cracked black pepper.
⭐ Chef’s Tips
Use Salted Butter
Salted butter gives the dish a lovely sweet-and-savory balance. If using unsalted butter, increase the salt slightly to taste.
Cut the Cream Cheese Small
Smaller pieces melt much faster and create a smoother sauce.
Don’t Boil the Cream Cheese
Keep the heat moderate to low once the cream cheese is added. Gentle heat helps keep the sauce smooth.
Adjust the Sweetness
The honey provides the signature sweetness, but you can increase or decrease it according to your preference.
Fresh Corn Works Too
If corn is in season, replace the frozen corn with approximately 4 cups fresh corn kernels.
🌶️ Delicious Variations
Spicy Honey Butter Corn
Add ¼–½ teaspoon red pepper flakes or a pinch of cayenne.
Garlic Butter Corn
Add 1 minced garlic clove to the melted butter before adding the honey.
Cheesy Corn
Stir in ¼ cup shredded cheddar cheese at the end.
Bacon Honey Butter Corn
Add ½ cup cooked, crumbled bacon just before serving.
Herb Butter Corn
Finish with chopped parsley, chives, or green onions.
Smoky Corn
Add ½ teaspoon smoked paprika for a subtle smoky flavor.
🍽️ What to Serve With It
Honey Butter Skillet Corn pairs beautifully with:
- Roast chicken
- Grilled steak
- Pork chops
- BBQ ribs
- Fried chicken
- Burgers
- Meatloaf
- Mashed potatoes
- Holiday turkey
It’s especially good alongside dishes with spicy, smoky, or savory flavors because the sweet corn provides a delicious contrast.
Storage
Transfer leftovers to an airtight container and refrigerate.
Refrigerator: Up to 3–4 days.
Reheat gently in a skillet over low-medium heat or in the microwave.
If the sauce becomes too thick after refrigeration, stir in 1–2 teaspoons of milk while reheating.
🌽 Recipe Summary
This Honey Butter Skillet Corn takes just a handful of ingredients and turns ordinary frozen corn into something seriously special.
The honey adds sweetness, butter brings richness, and cream cheese creates a luscious coating, while salt and pepper keep everything balanced.
It’s quick enough for a weeknight but delicious enough to earn a permanent spot on your holiday table.